Route Planning for TOPODRONE DJI Air 2S PPK
Initially, the DJI Air 2S PPK drone does not have the function of flying along the route in automatic mode. However, with the help of third-party software, flight along the route for the AFS is possible using the technology of "virtual sticks". With this technology, during the flight in automatic mode, it is necessary to constantly maintain radio communication between the control panel and the drone. However, with the help of third-party software, flight along the route for aerial photography is possible using the technology of "virtual sticks". With this technology, during the flight in automatic mode, it is necessary to constantly maintain radio communication between the control panel and the drone.
For planning and executing routes for aerial photography, including terrain bending, the most convenient solution is to use UgCS Pro software for route planning and Litchi for DJI software for their direct execution.
After passing all the above stages, it is possible to fly along routes for aerial photography, including with terrain circumference in the absence of an Internet connection at the facility. However, an internet connection is required to make changes to the route.
| 1. DJI FLY software* | 2. UgCS Pro software | 3. flylitchi.com/hub | 4. Litchi for DJI** software |
|
|
|
|
Route Planning for TOPODRONE DJI Air 2S PPK in UgCS Pro Software
- Run UgCS Pro software. To plan routes for aerial photography with terrain circumference, connect an Internet connection.
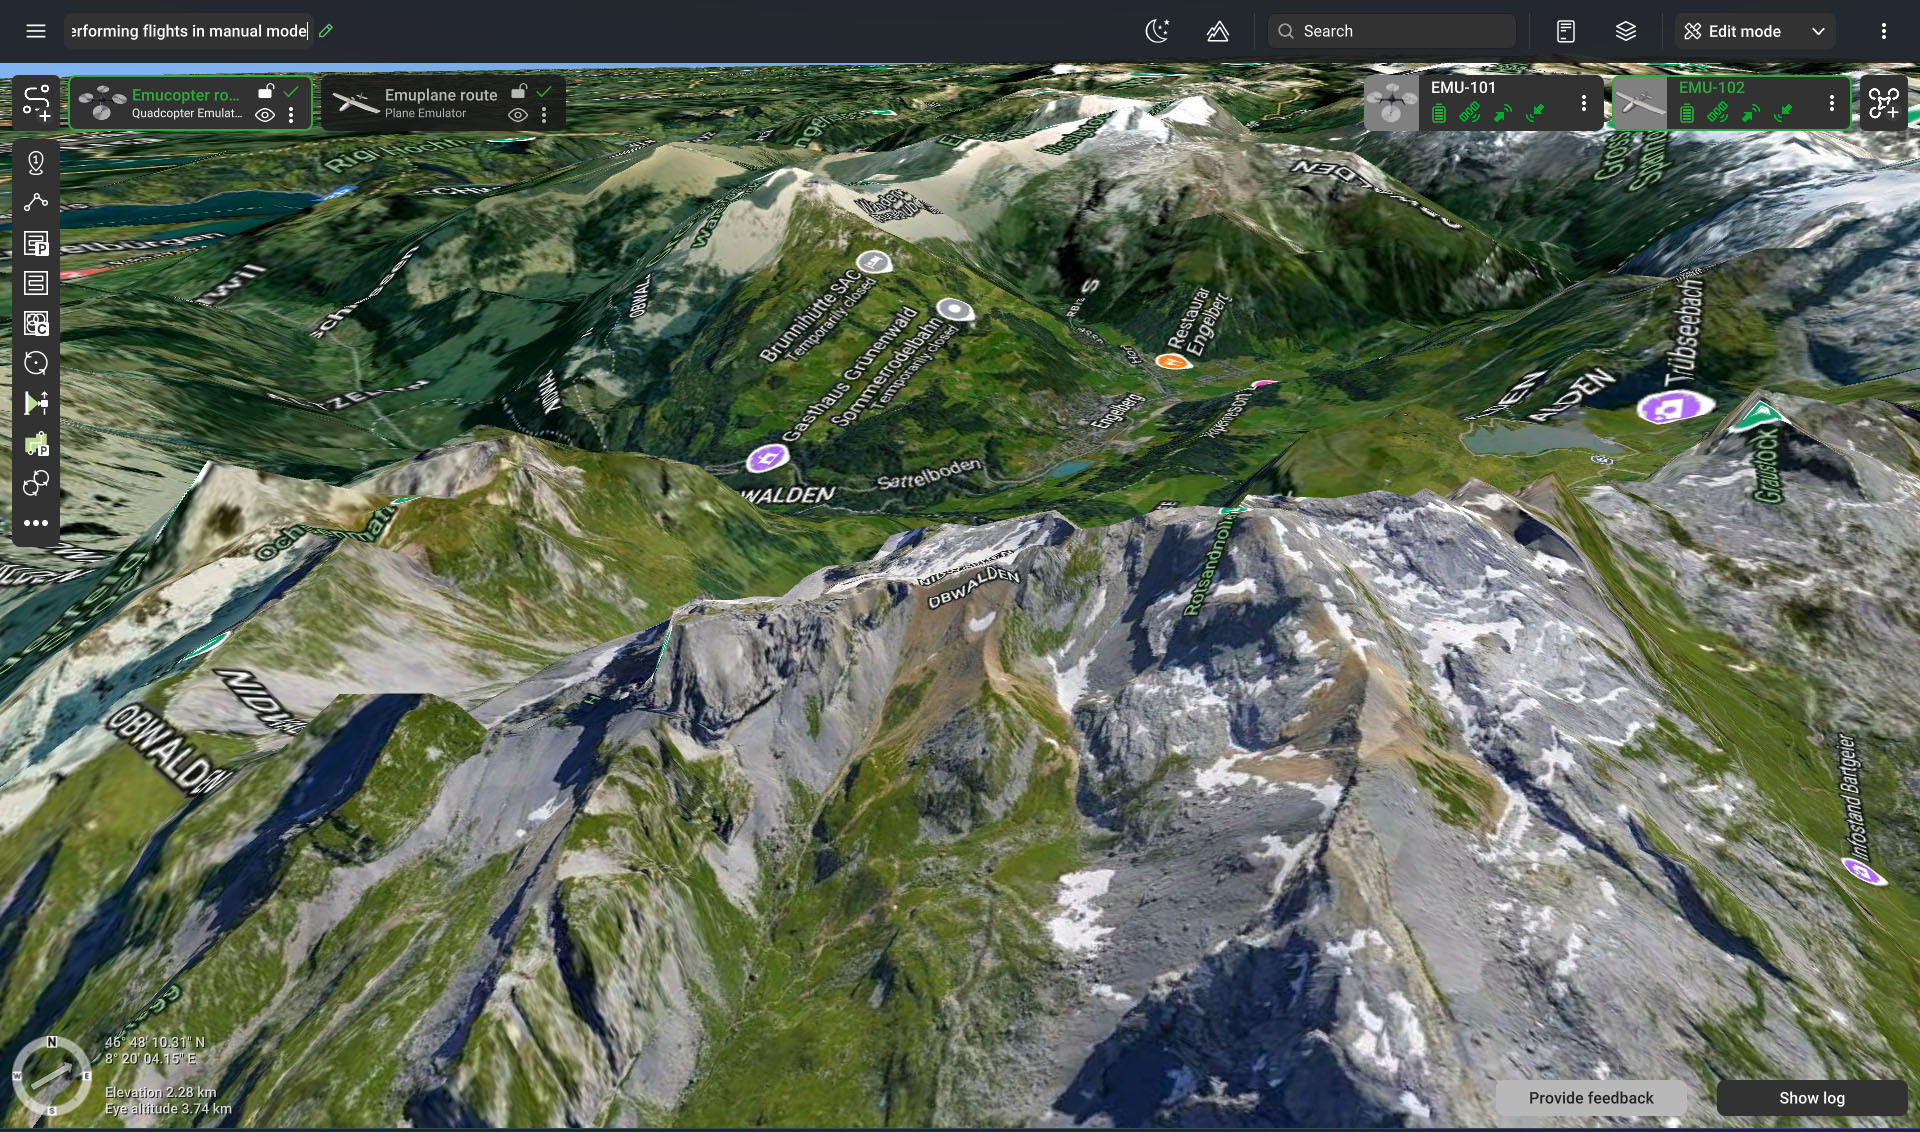
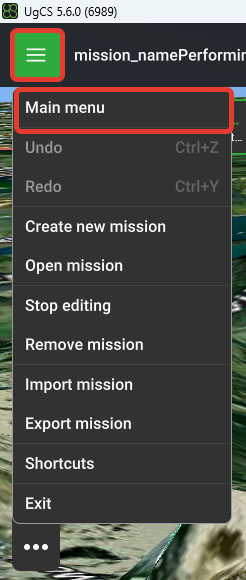
- Click on the icon with three horizontal stripes at the top left. Select the "Main Menu".
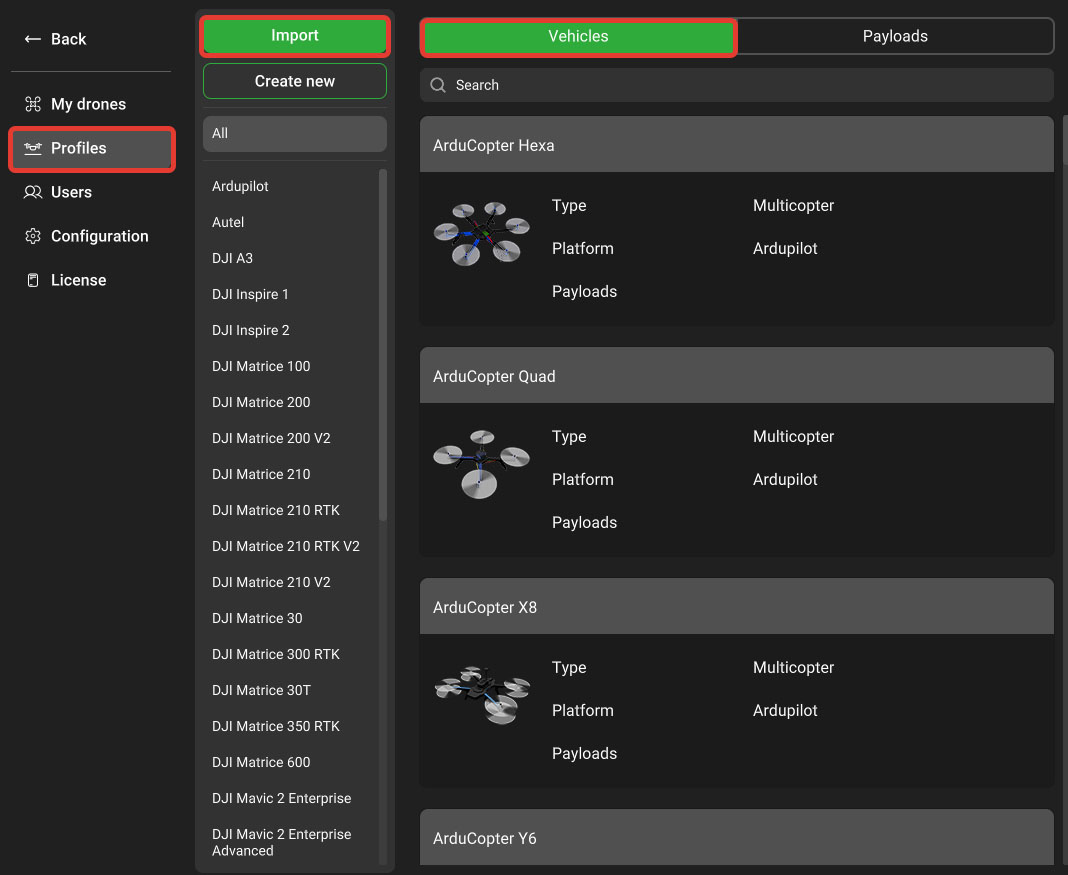
- Go to "Profiles/Vehicles / Import and choose a.profile DJI Air 2S
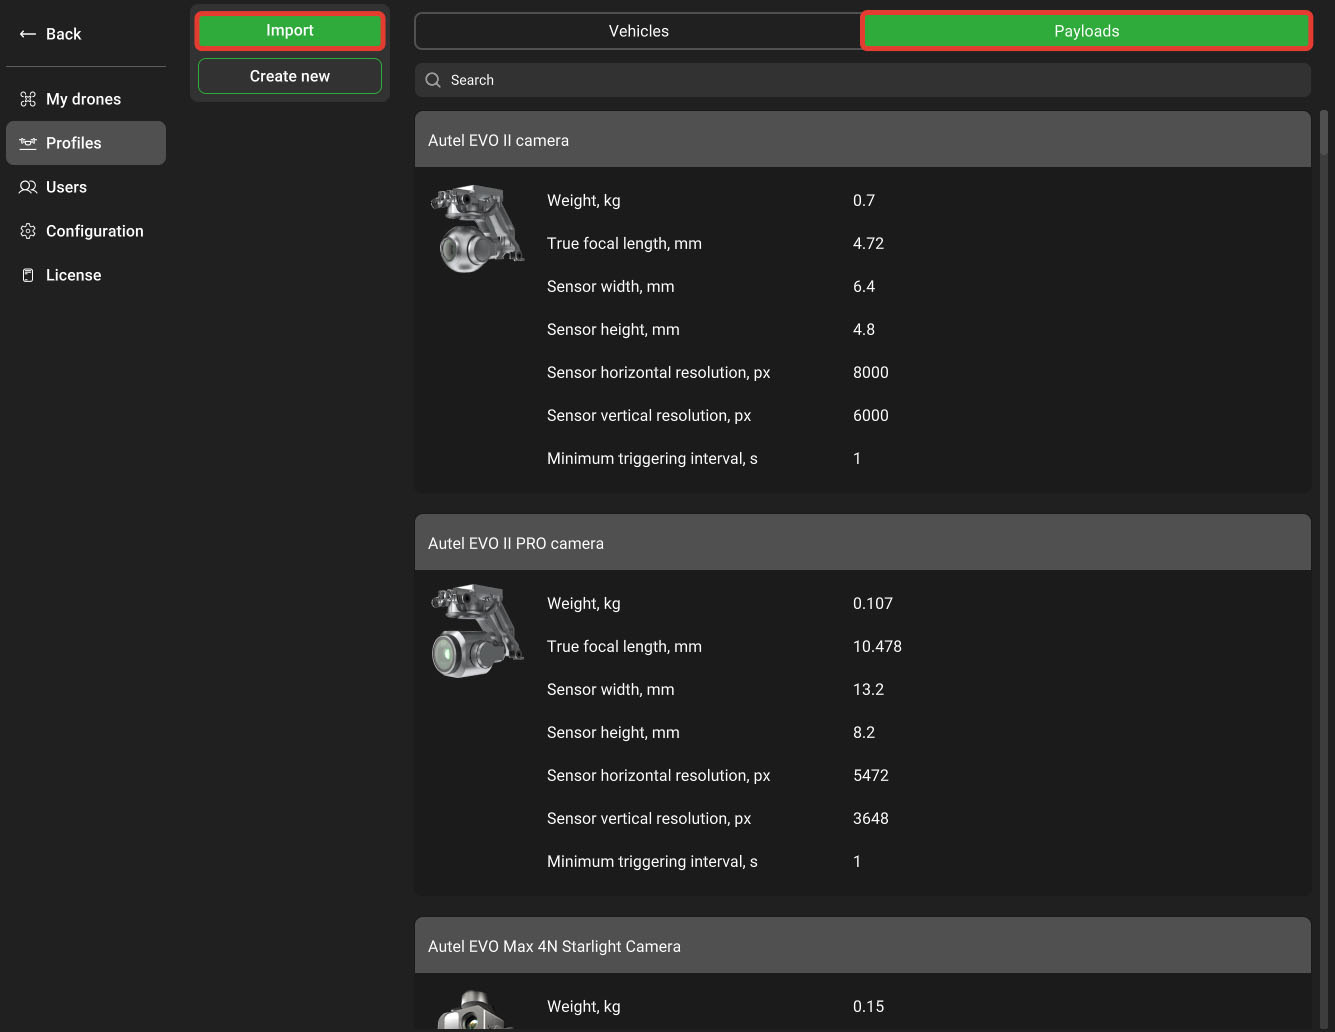
- Go to Payloads/Import and select the camera profile DJI Air 2S camera
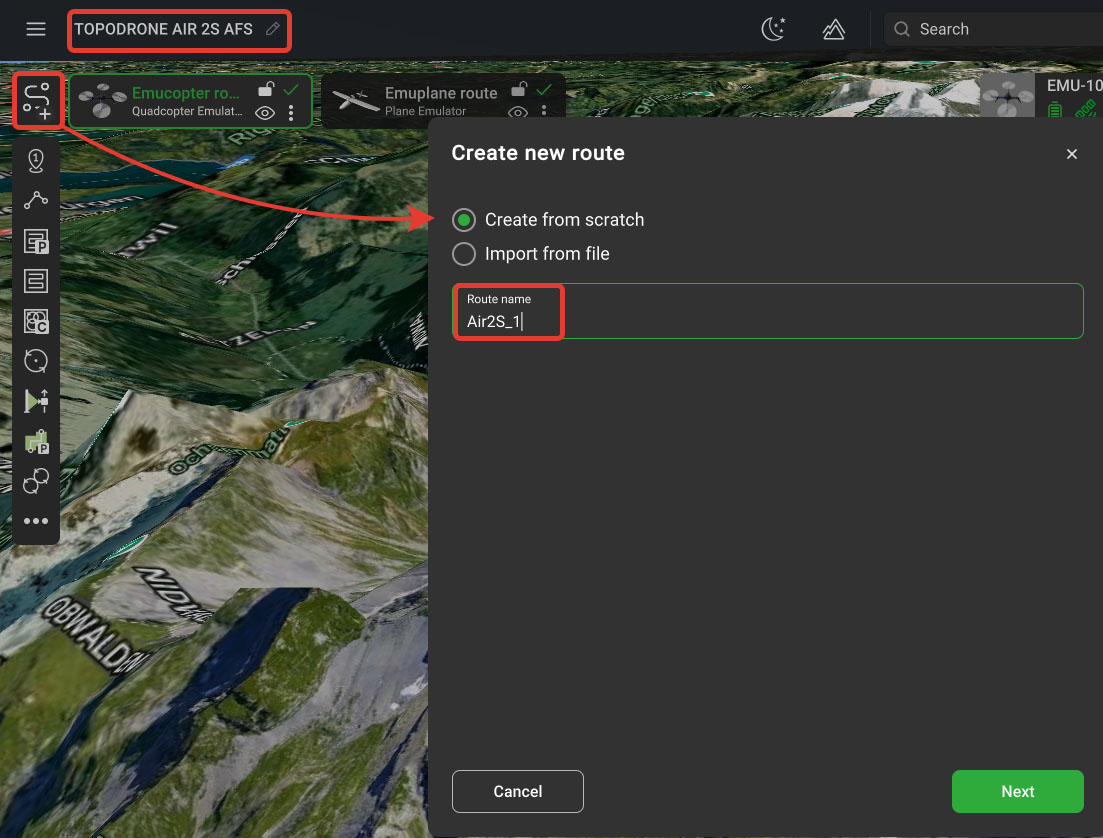
- In the upper-left corner, click on the name of the Mission and enter a name. After that click Create new route and set the route name and press the key Next.
- Select the profile "DJI Air 2S". After that, click "Next".
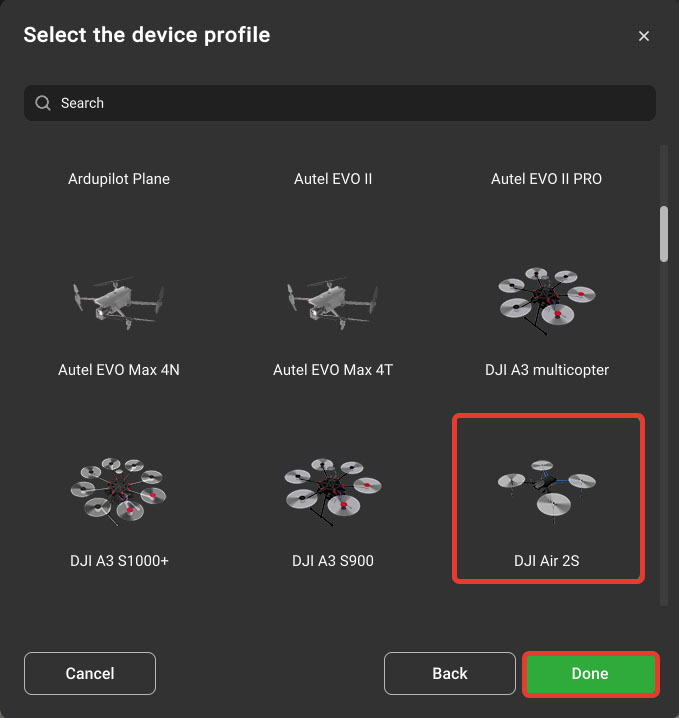
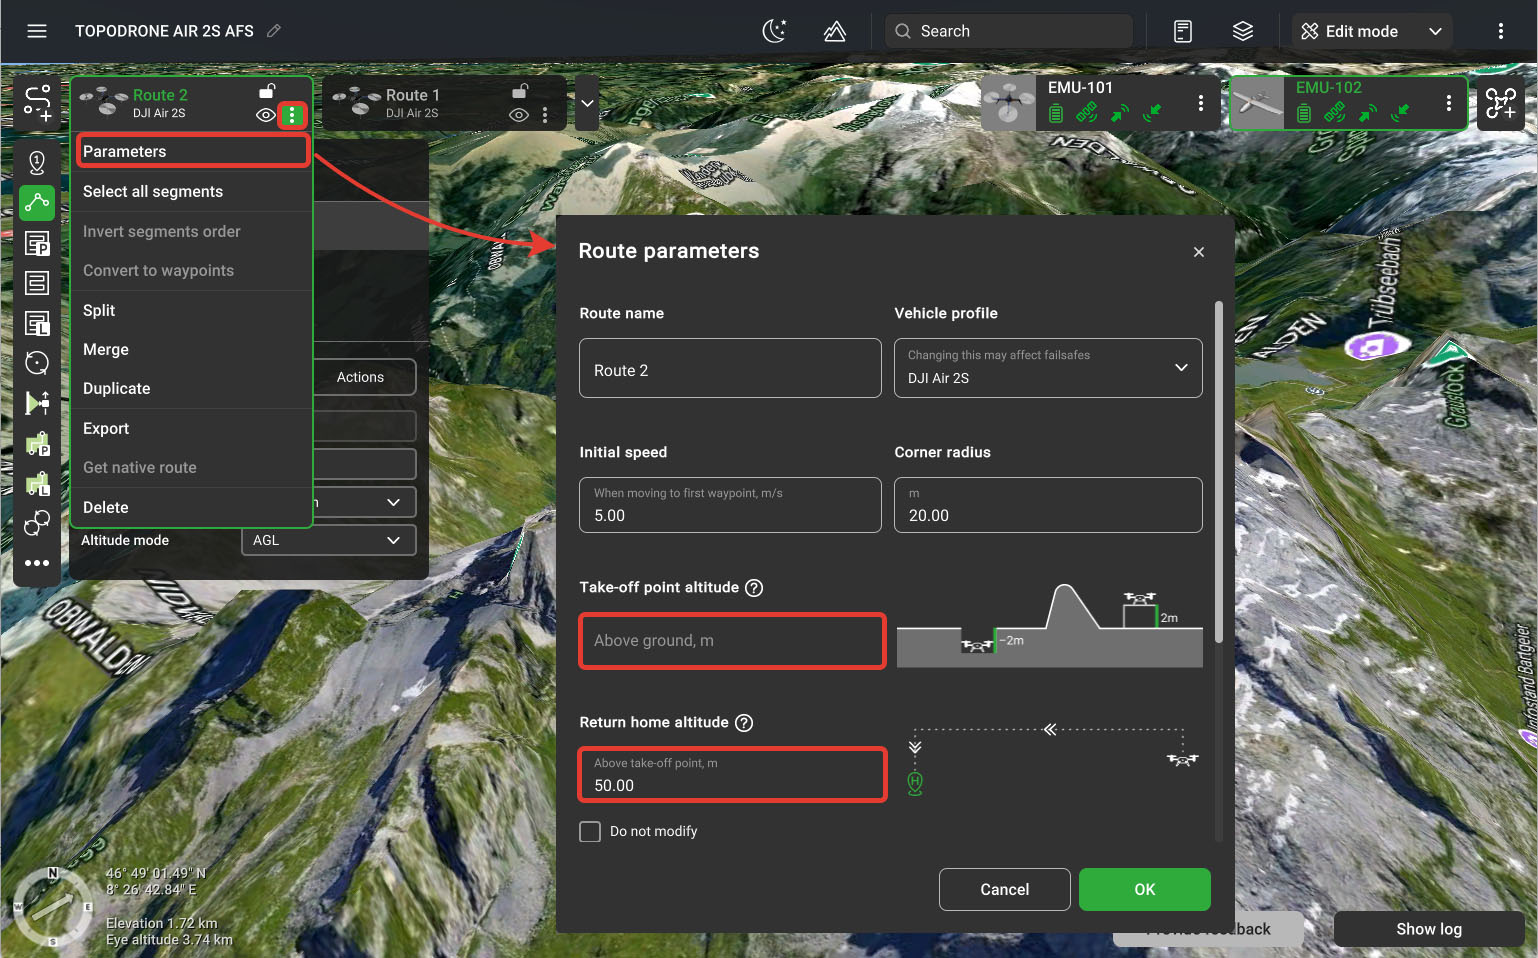
- Leave the "Take-off altitude" field empty! Set the height of the return home. It must be above any obstacles and terrain in the place of flight. Click OK.
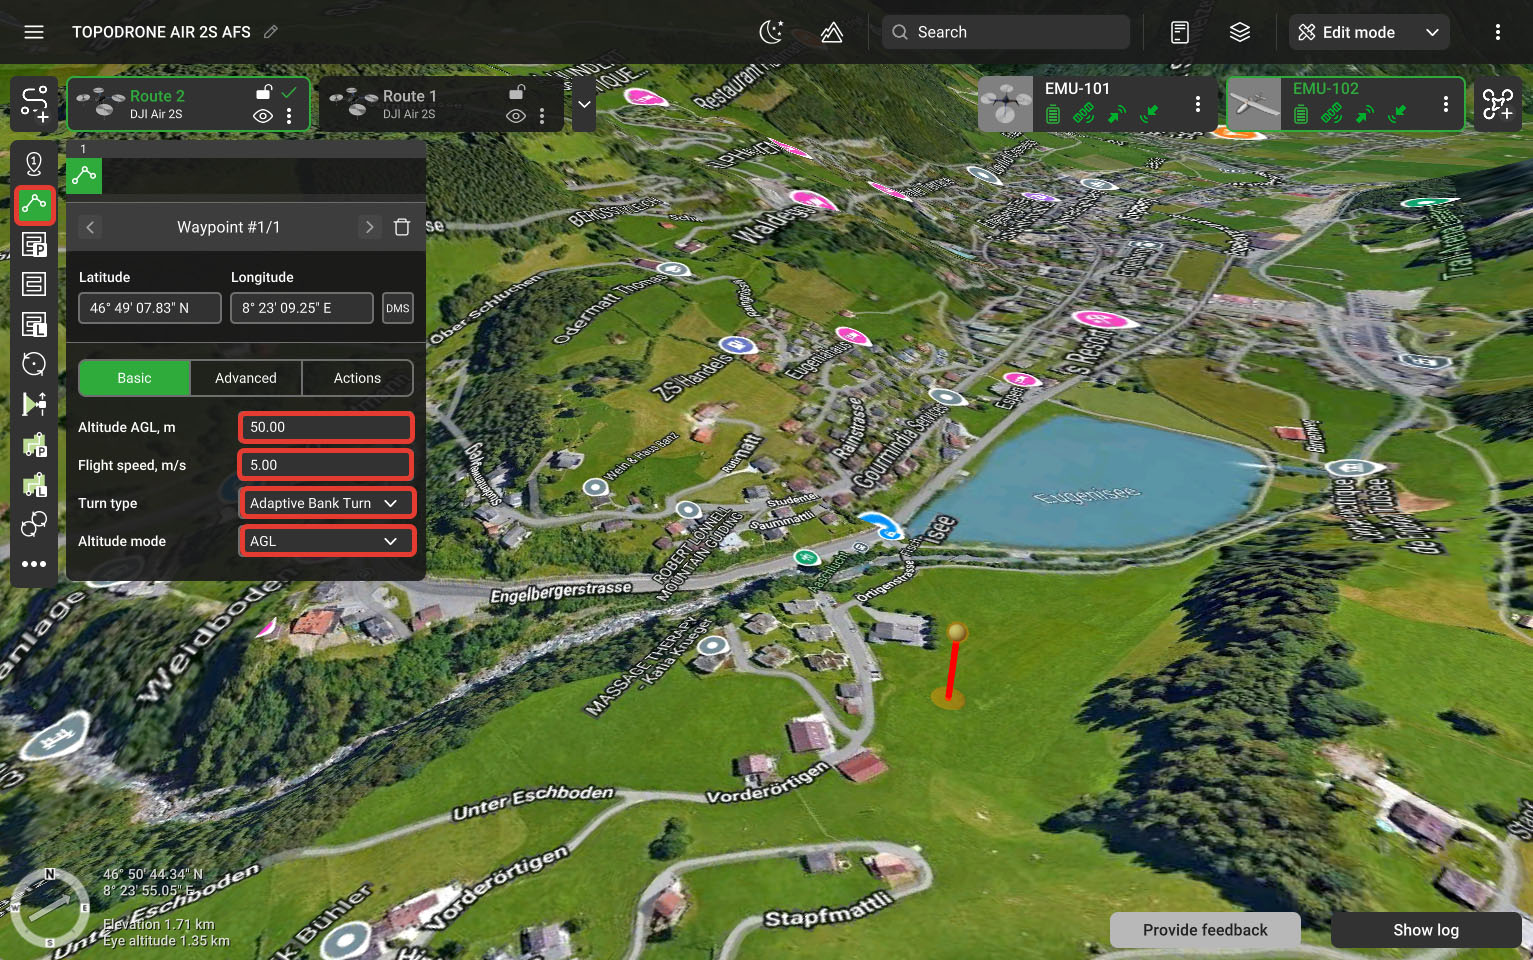
- Use the map to determine the approximate take-off location. Select the Point tool and double-click on the map to set the planned takeoff location. This point will be the starting point of the route. After launching from the any other location, drone will rise to the height of this point and fly to it in a straight trajectory. If necessary, change the altitude and speed. If the take-off location is unknown, skip this step.
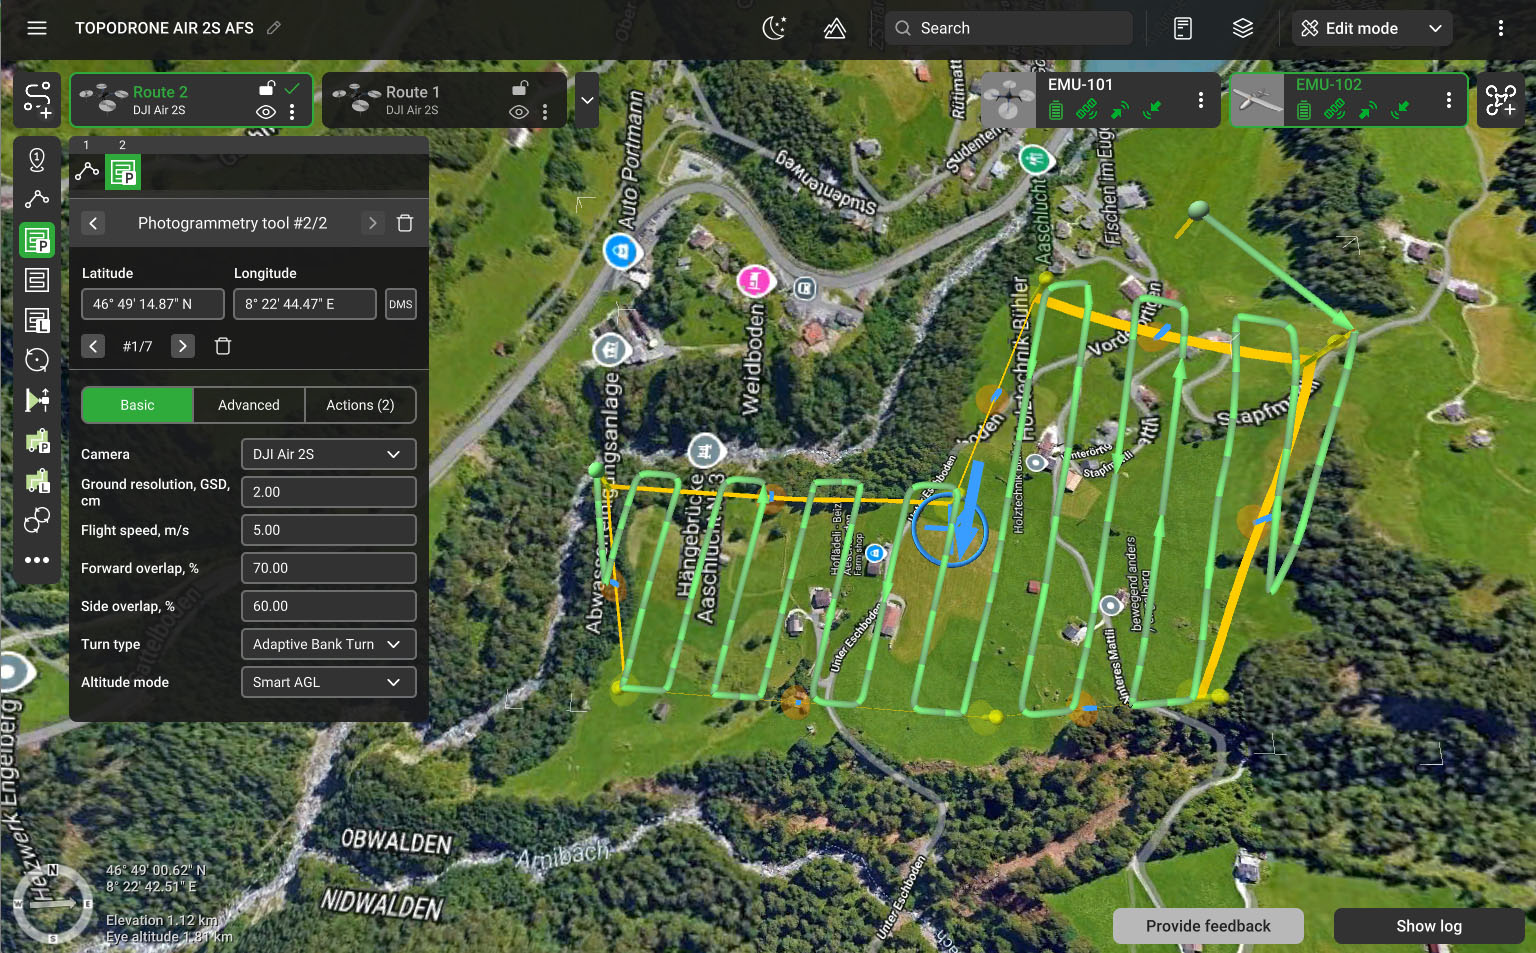
- Select the "Photogrammetry Tool" and double-click the left mouse button on the map to set the boundaries of the route territory. It is recommended to form rectangular routes. However, routes can be a closed polyline of any shape if needed. To close the boundary of the area, hover over the first point and right-click. After that, the boundary of the route area closes. When building a route for the first time, select "Camera" - DJI Air2S. Make sure that the rotation type for the photogrammetry tool is also set to "AGL" or "Advanced AGL". It is possible to set the flight speed in the UgCS software, but the flight speed parameter along the route will need to be reinstalled in the Litchi software later. Therefore, you can set the speed only to estimate the duration of the flight mission.
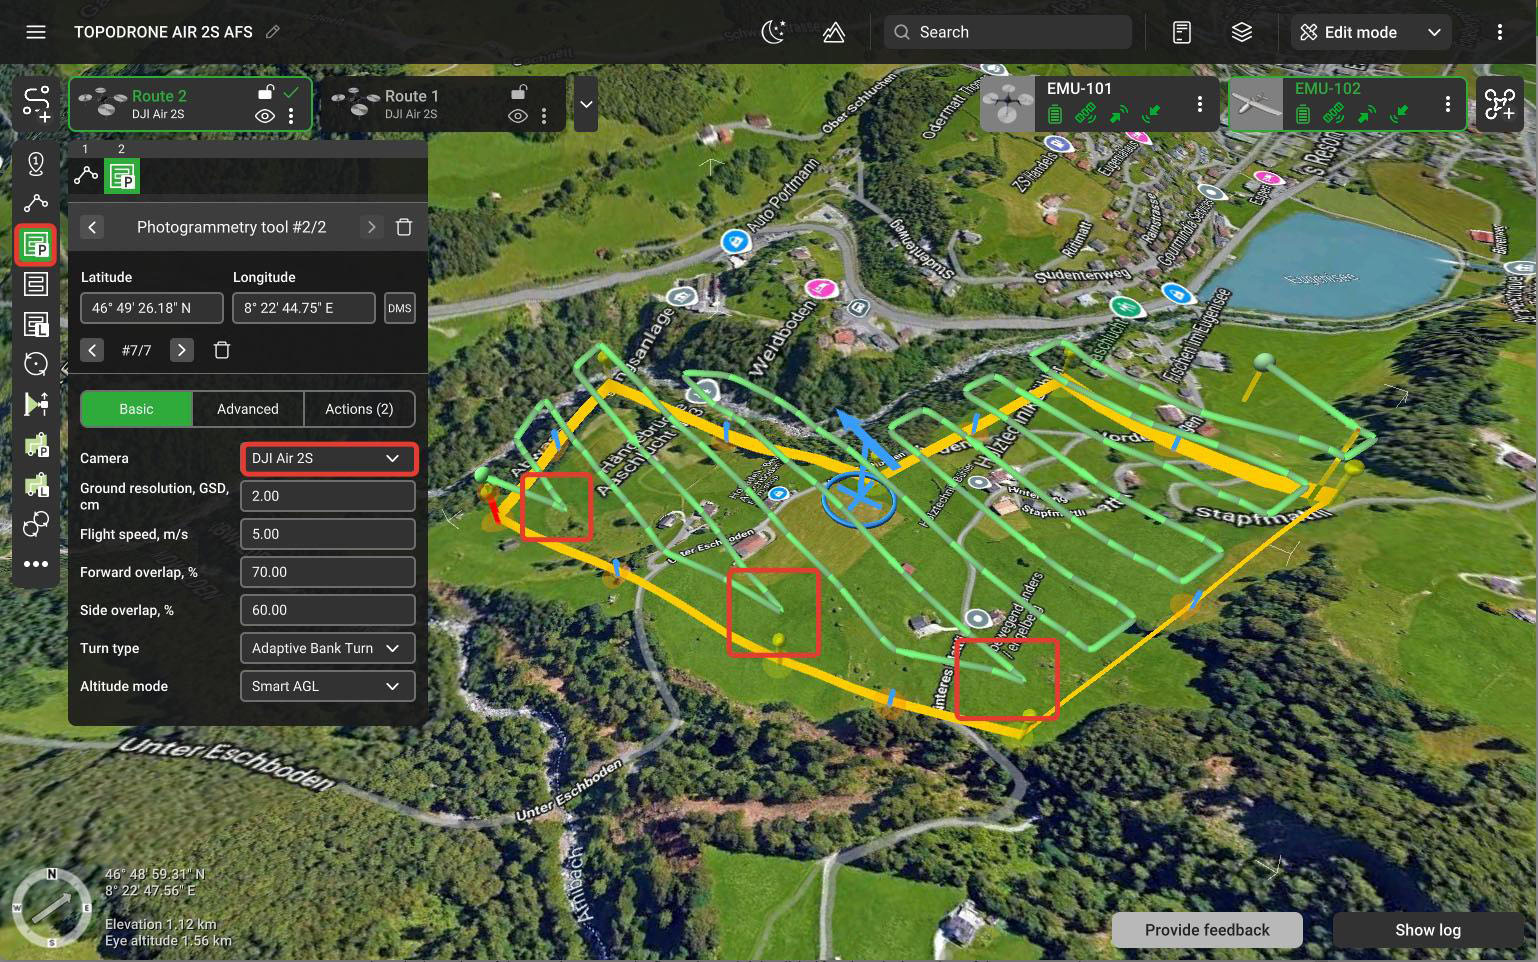
- Change the trajectories direction using the arrow in the middle. In large square routes number missions use the constant direction angle value. Round up to the nearest whole and set it manually in Photogrammetry Tool settings.

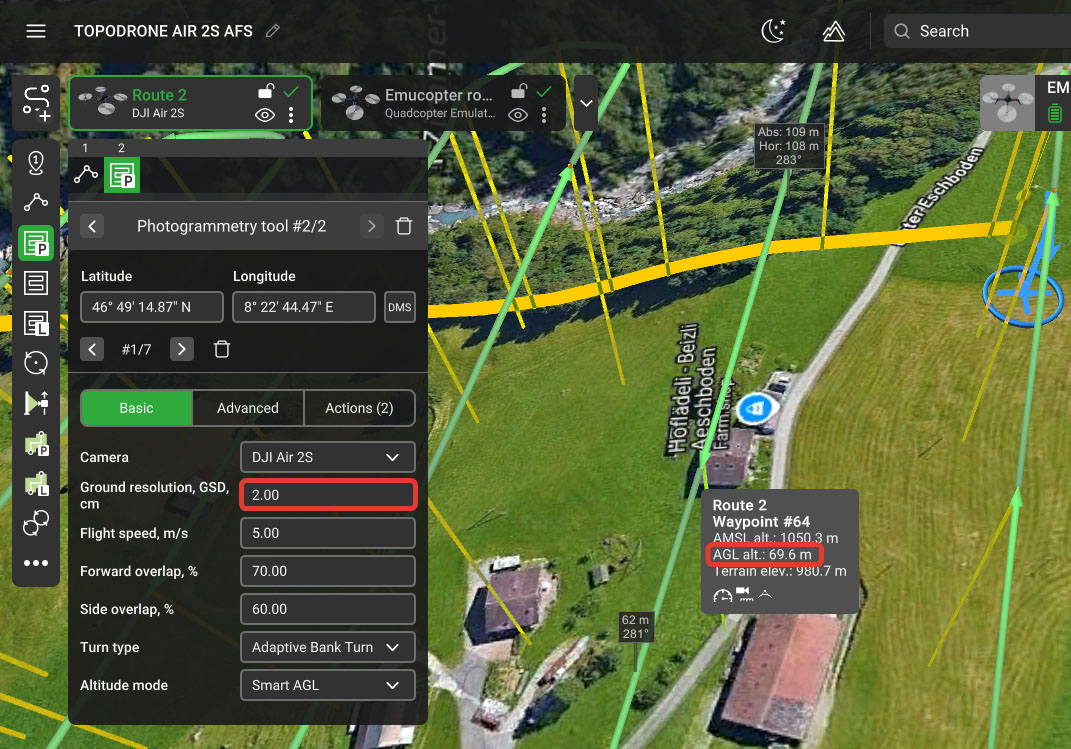
- Set GSD value, according to the required spatial resolution of images and flight altitude. In UgCS software, the flight altitude is defined by the GSD parameter. For DJI Air 2S drone, the flight height is calculated by the formula H = GSD * 34.75. For example, with GSD = 2 cm/pix, the drone's flight height will be approximately 69.5 meters from the ground. To refine the flight height, hover the cursor over any waypoint. The height from the ground is circled in the screenshot above.

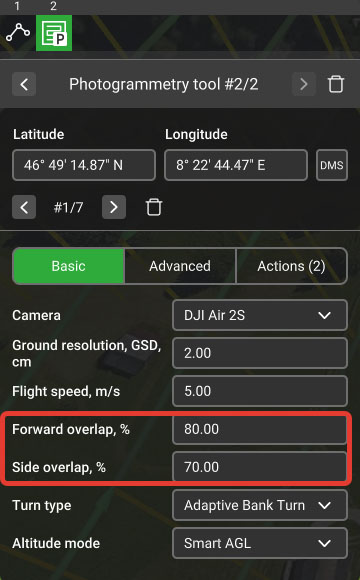
- Set the value of the side and front overlaps for adjacent photos. It is recommended to use an overlap value of at least 65%. Side overlap directly affects the number of tracks and, consequently, the estimated time of route execution. The frontal overlap is determined by the drone's flight speed and the frequency of photography. As a rule, to fly the drone in a single grid it is enough to set the value of 70% for the side overlap and 80% for the heading overlap.
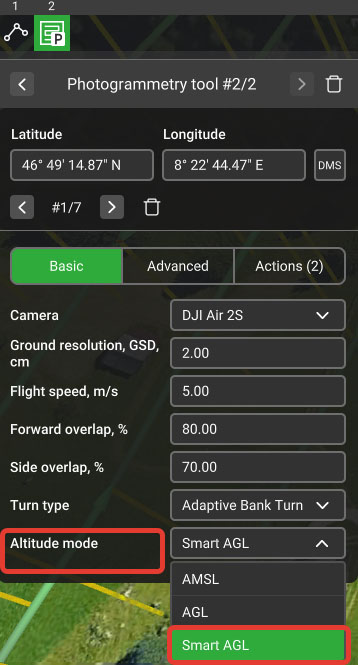
- Set the "Altitude Mode" parameter to AGL or "Advanced AGL" for terrain follow flight.

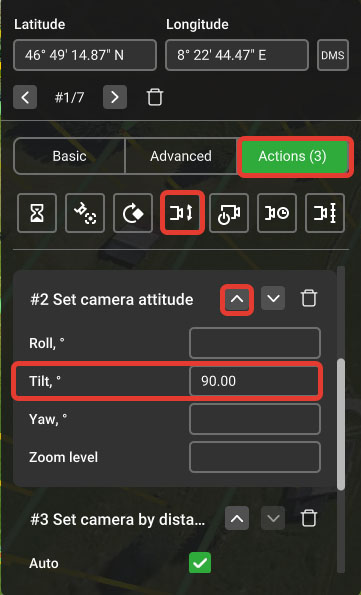
- Add the "Camera Position" action and set the Tilt value to 90 degrees to tilt the camera to the nadir. Then click the up arrow to move this action above the default “Distance Shooting” action.

-
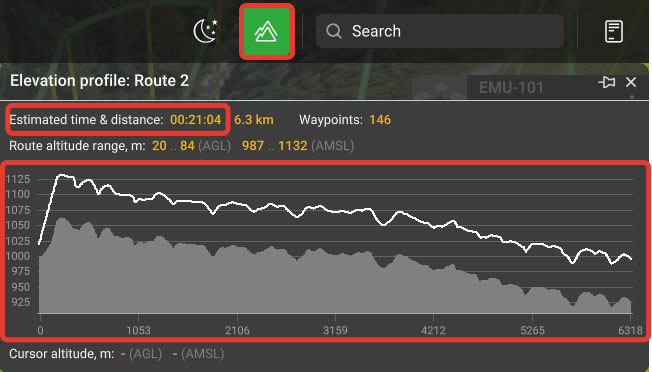
Click on the gear icon and select “Show Terrain”. Estimate flight duration and safety of the trajectory over the terrain. Close the terrain window.
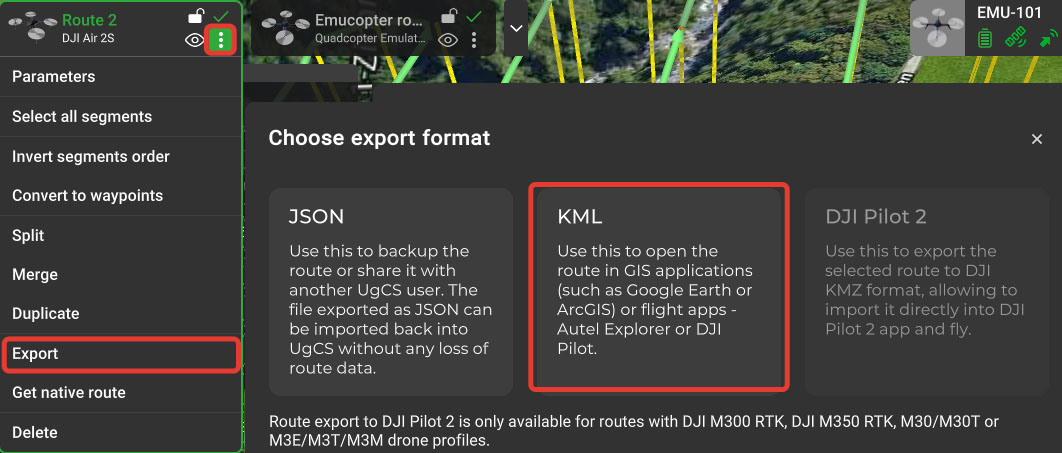
- Click on the gear icon next to the route, select "Export" and then "KML".
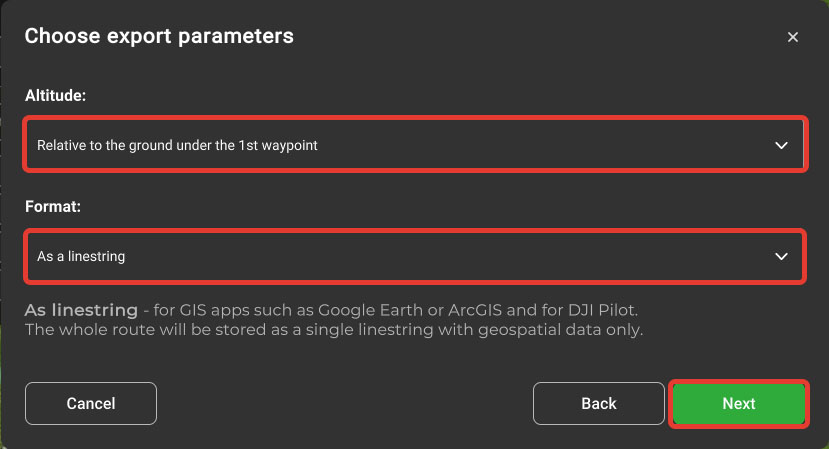
- For the "Height" field, select "Relative to the ground at the 1st point". For the "Format" field, select "As linestring". Click "Continue".
- Select a location to save the route file and a name. At this step, the planning of the base route in UgCS software is completed.
General recommendations on route planning for aerial survey in UgCS software.
- If the terrain difference in the flight area is more than 20 meters it is strongly recommended to use the Terrain Follow mode (for UgCS software - AGL or Advanced AGL mode.). Advanced AGL takes into account not only the height to the terrain, but also the distance to vertical objects with large height difference, such as rocks.
- If there is a forest area on the route, the flight altitude should be higher than 120 meters (GSD not less than 3.5 for TOPODRONE DJI Air 2S PPK), with side and frontal overlaps not less than 70%, because they are set relative to the ground, and the forest has a height of 20-40 meters higher, and the tops of trees are located closer to the camera, reducing the real % of overlap to 60% or less.
- It is recommended to use the “Double pass” option of the “Photogrammetry Tool” for aerial survey of the built-up area. This will increase the number of images and post-processing time by 2 times and will allow to perform more detailed photogrammetric post-processing.
- For correct photogrammetric postprocessing it is recommended to perform surveying at least in 3 passes. Performing aerial photography in 1 and 2 passes will lead to large errors in aerial triangulation.
- The calculated route time in UgCS software is always 10% less than the real time. Also the time calculation does not take into account wind speed and time of approach to the first waypoint from the start point. It is recommended to always form the flight time with battery charge reserve.
- Strong winds, large terrain differences, high drone speed, cold weather and old batteries reduce the flight time on a single battery of the drone.
- It is recommended to plan routes with the calculation of 1 route = 1 battery.
Importing routes into Litchi software.
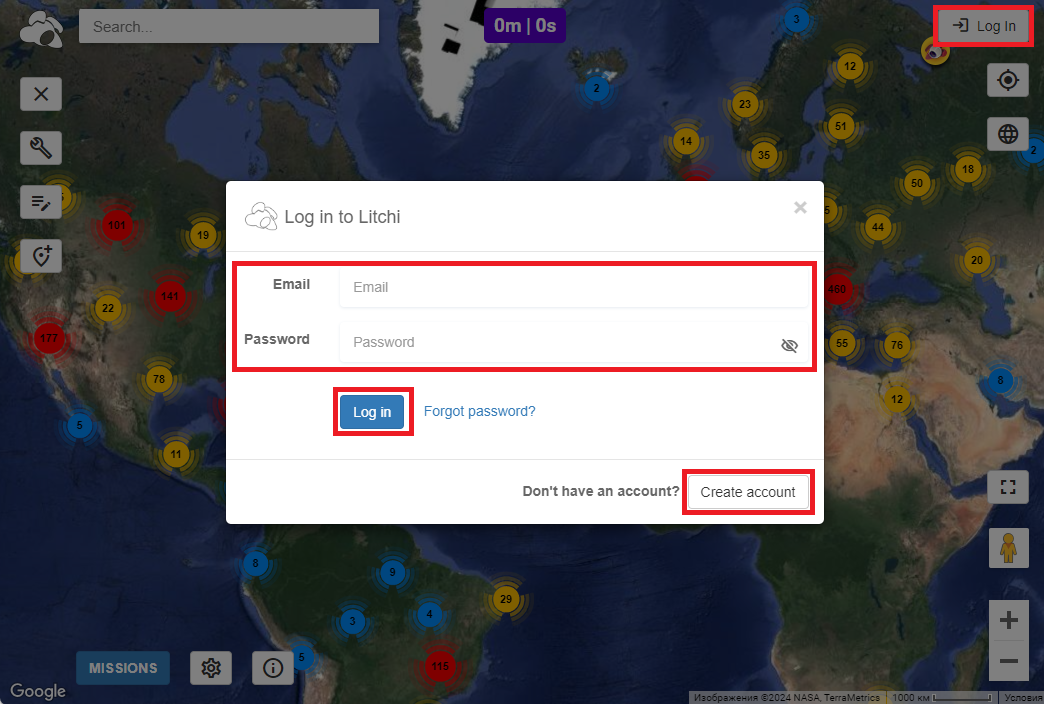
- Go to https://flylitchi.com/hub and log in to your account. If your Litchi account has not been created before - register by clicking on “Log In” and then “Create Account”.

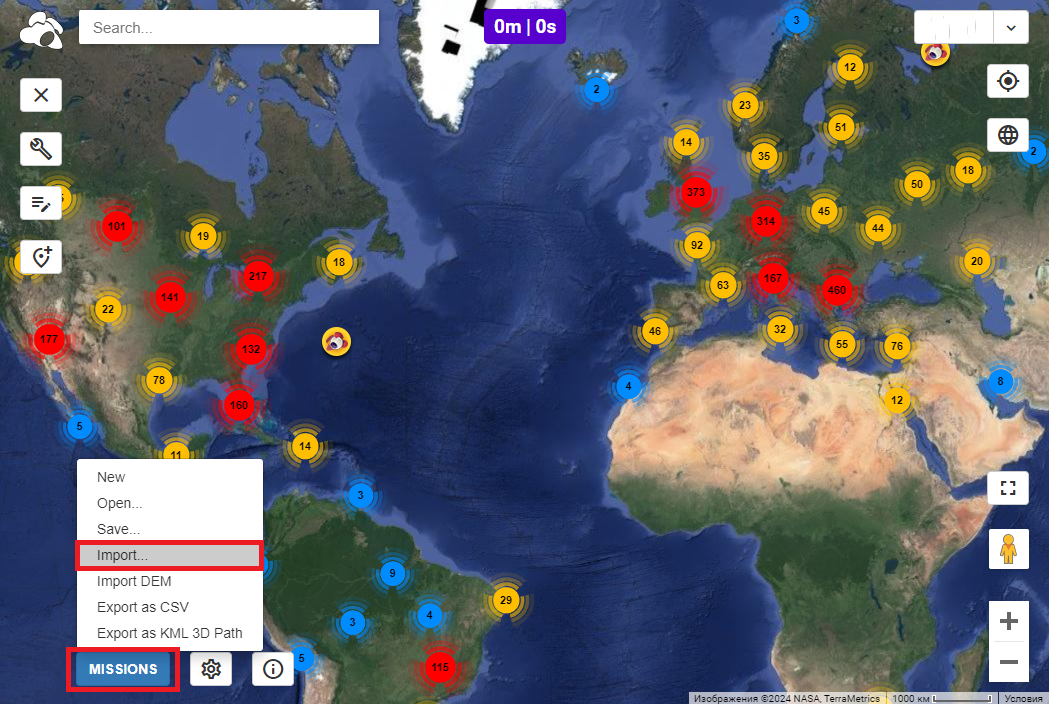
- Go to “Missions” and select “Import...”

- Click “Add Take Photo Action” and select the route file in *.kml format obtained in the previous step, then click “Import to new mission”

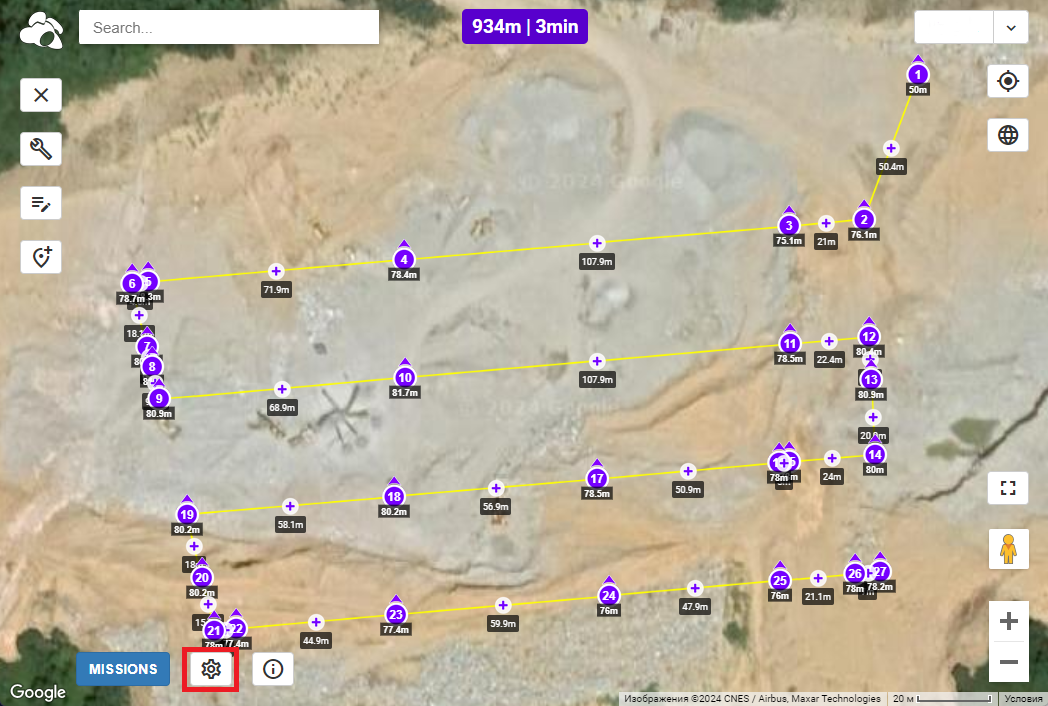
- The route obtained in UgCS software in the previous step is imported into Litchi software and displayed on the map. To change the route parameters, click on the “Gear” icon.

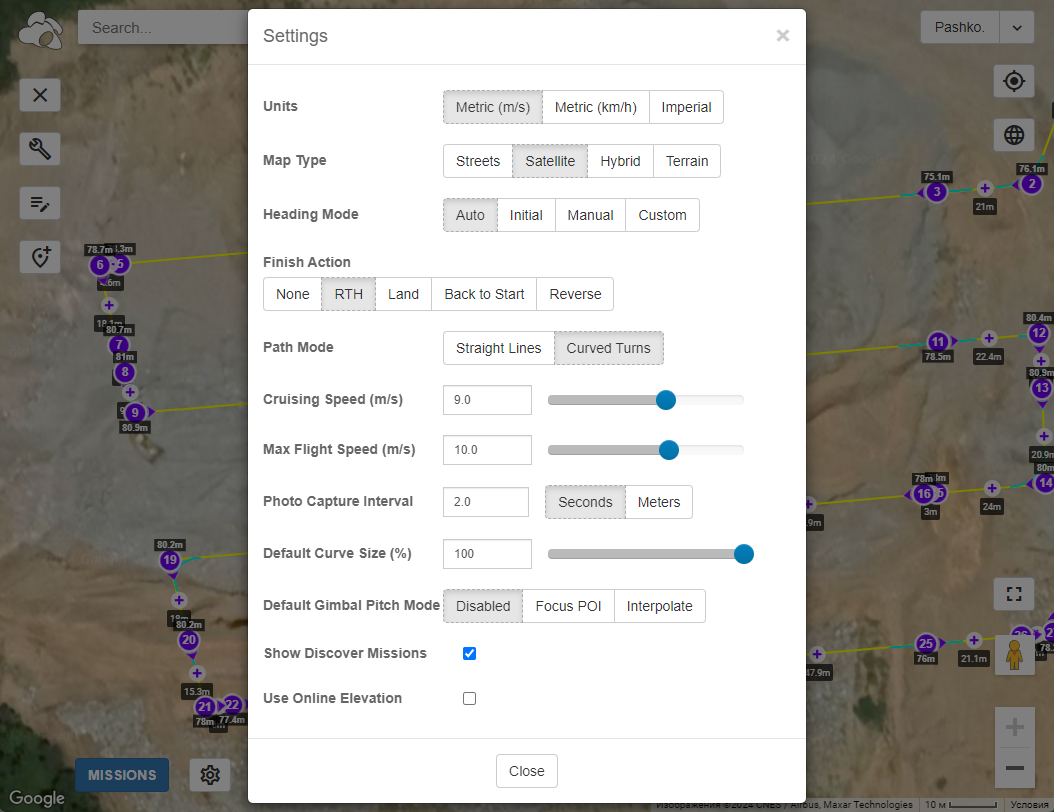
- Set all the settings as shown in the screenshot below and click “Close”. The “Photo Capture Interval” parameter is set automatically based on the route design parameters. Set the “Cruising Speed” parameter, which is responsible for the drone's flight speed along the main aerial photography route, to the required value.

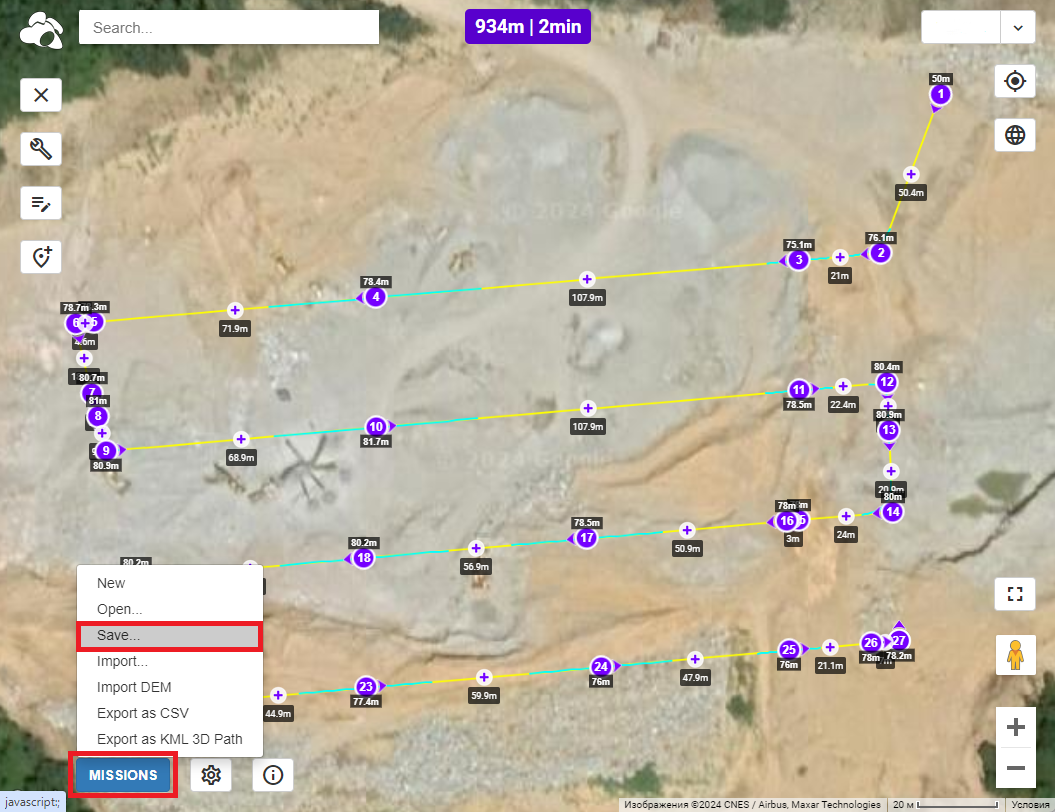
- The appearance of the route will change according to the applied parameters. Select "Missions" and then "Save" to save the route.

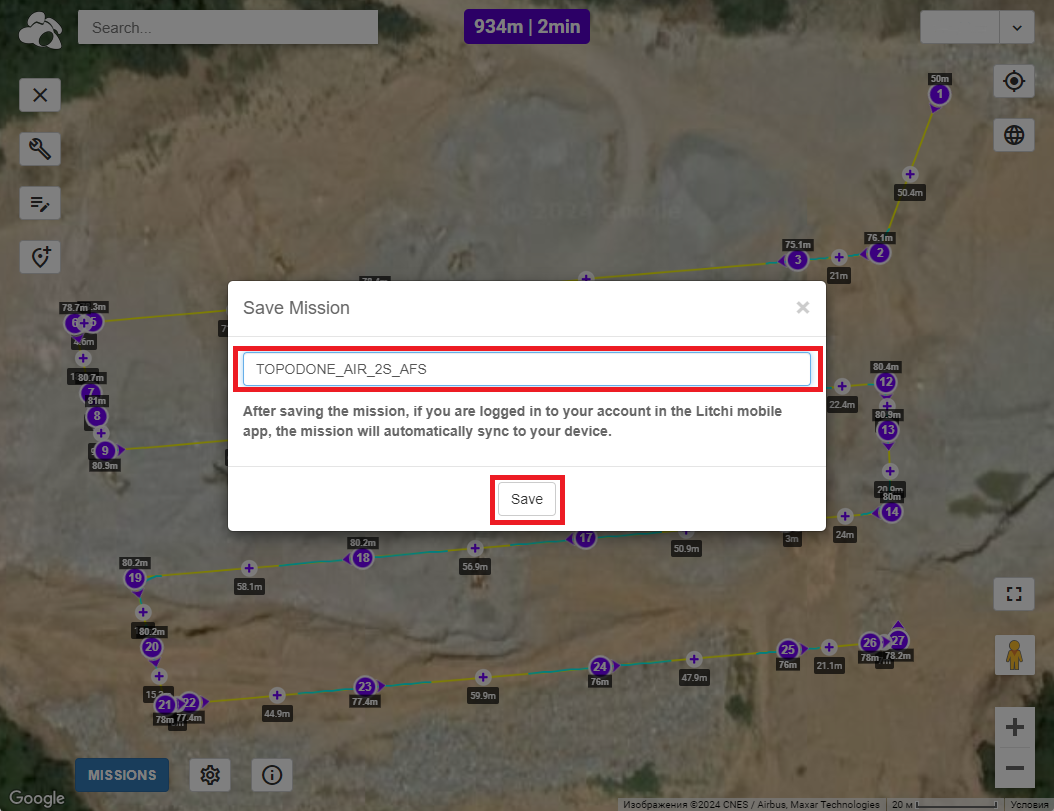
- Enter a name for the route and press “Save”. This completes the work in the browser.

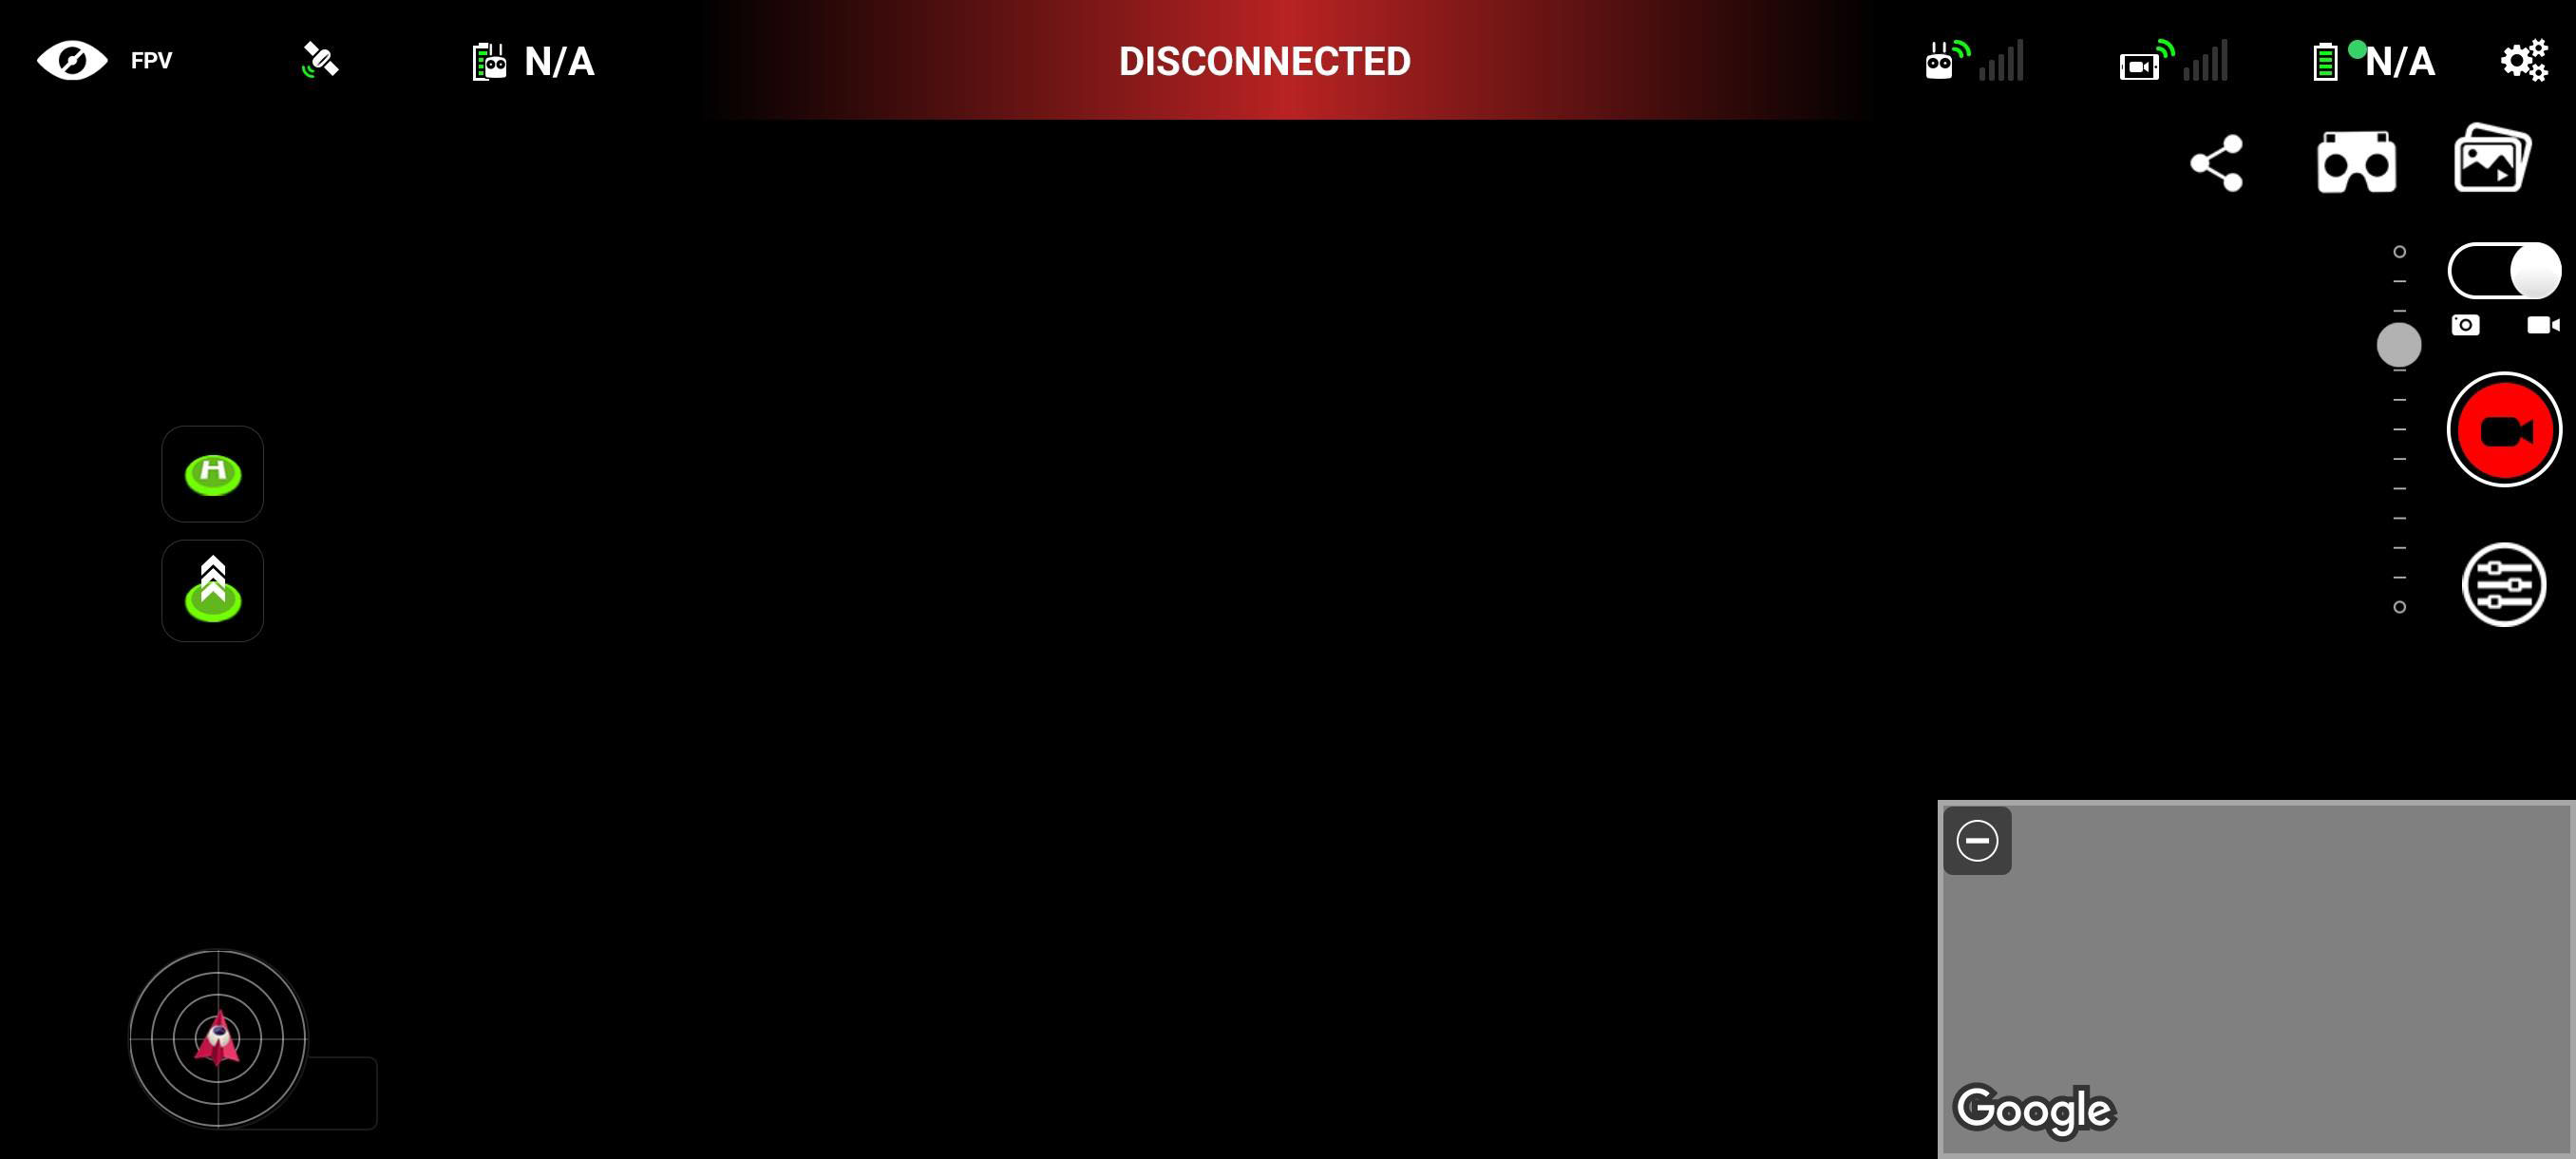
- Open the Litchi for DJI* software on your mobile device. *Sold separately.

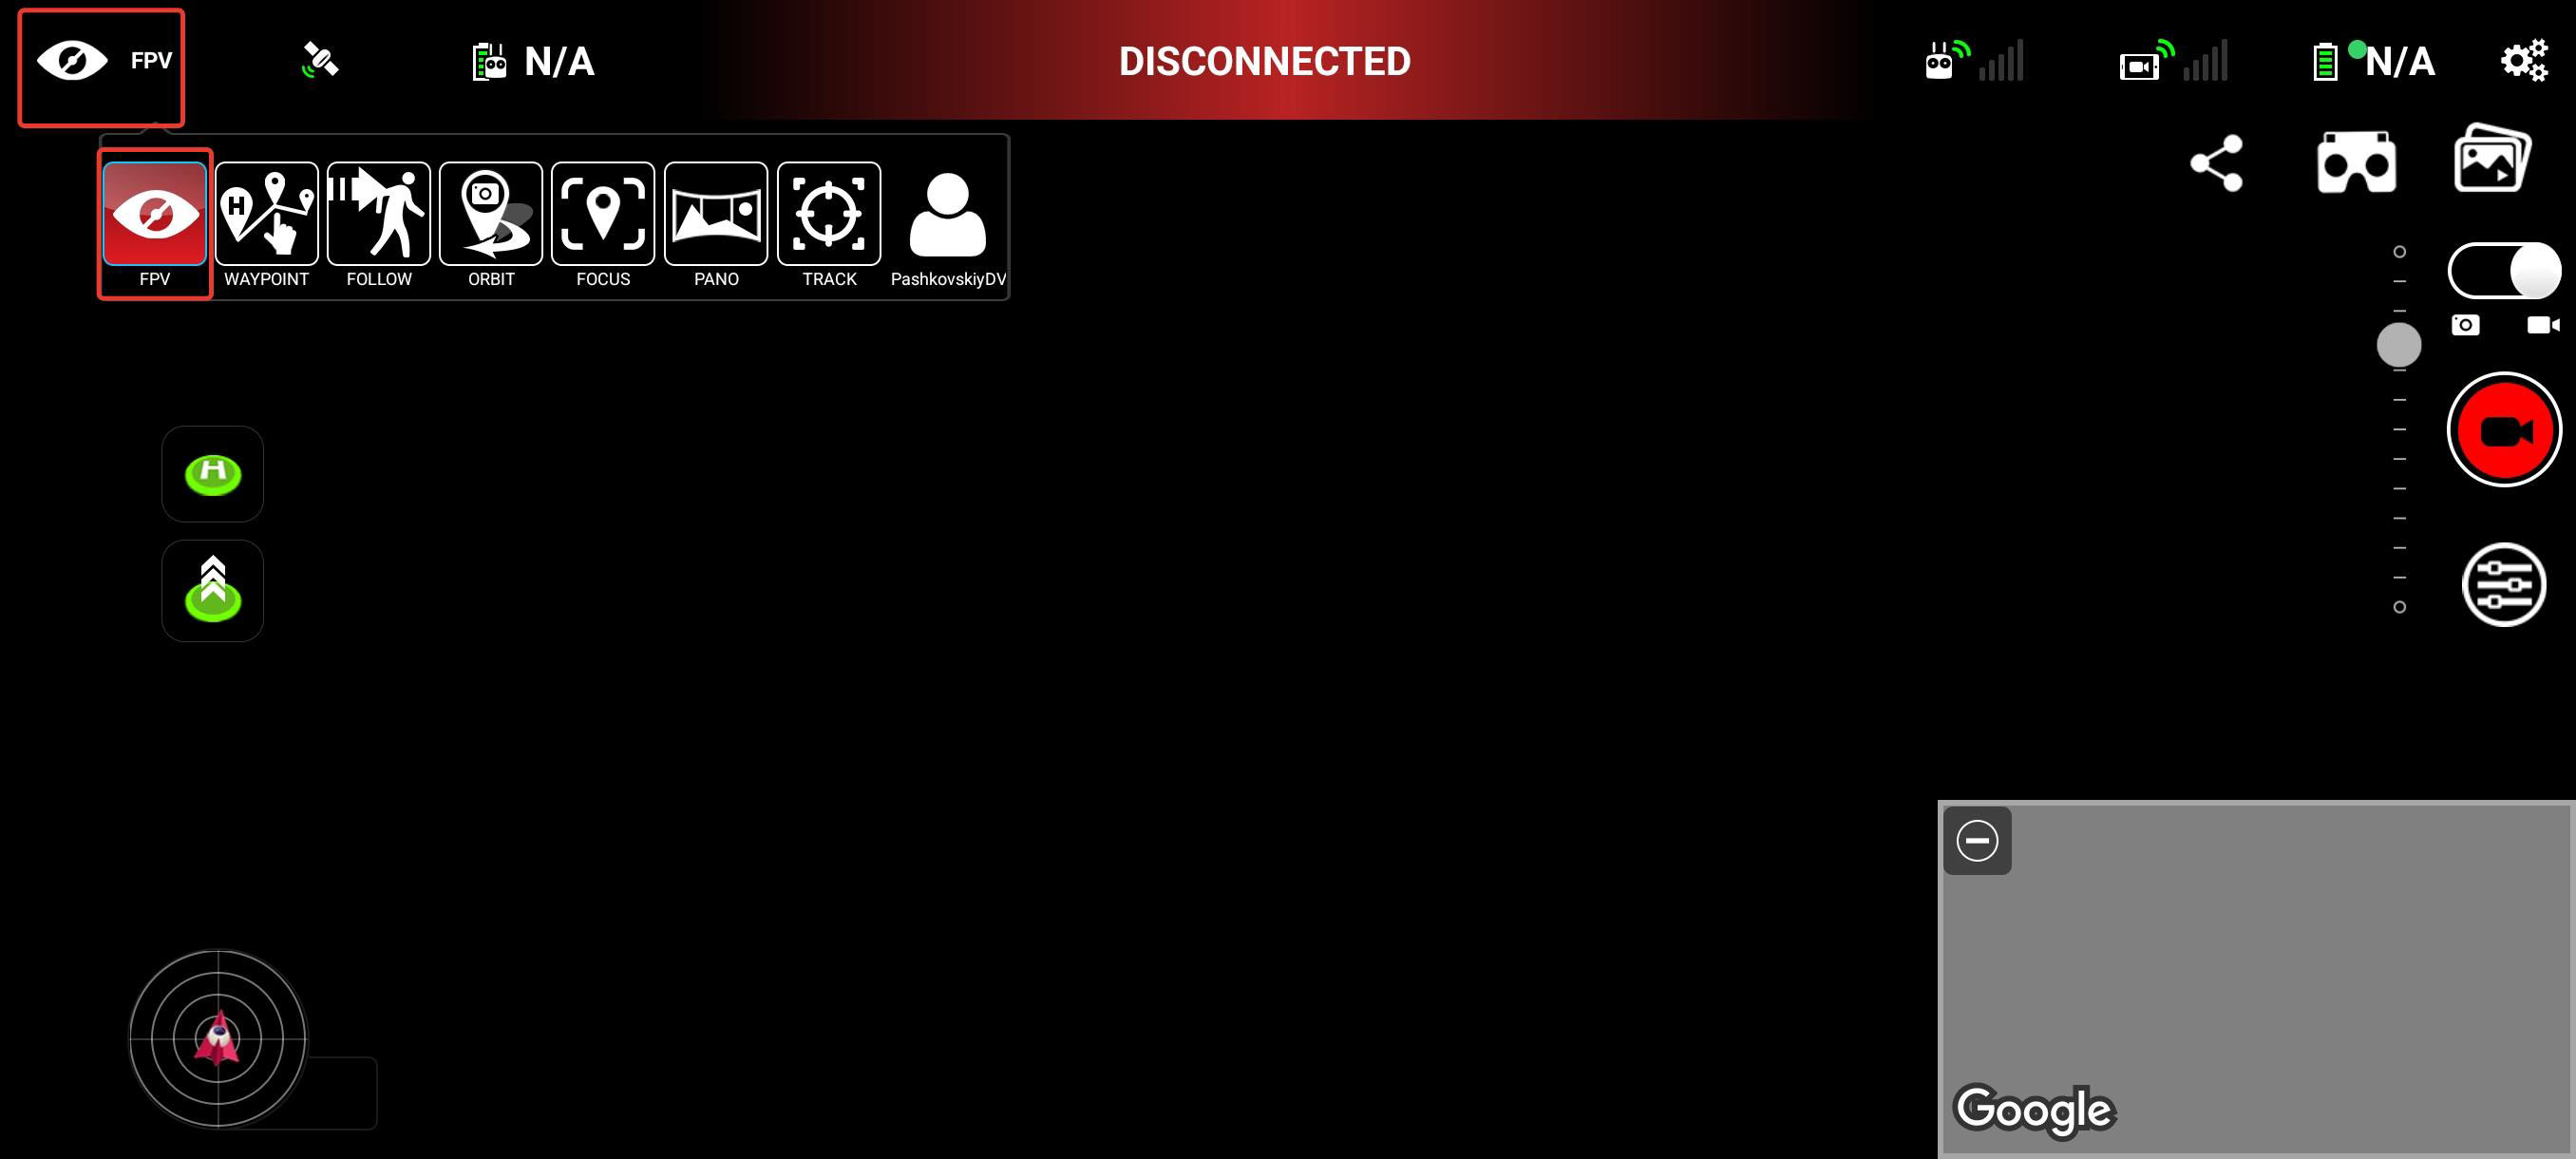
- Select "FPV" and then "WayPoint".

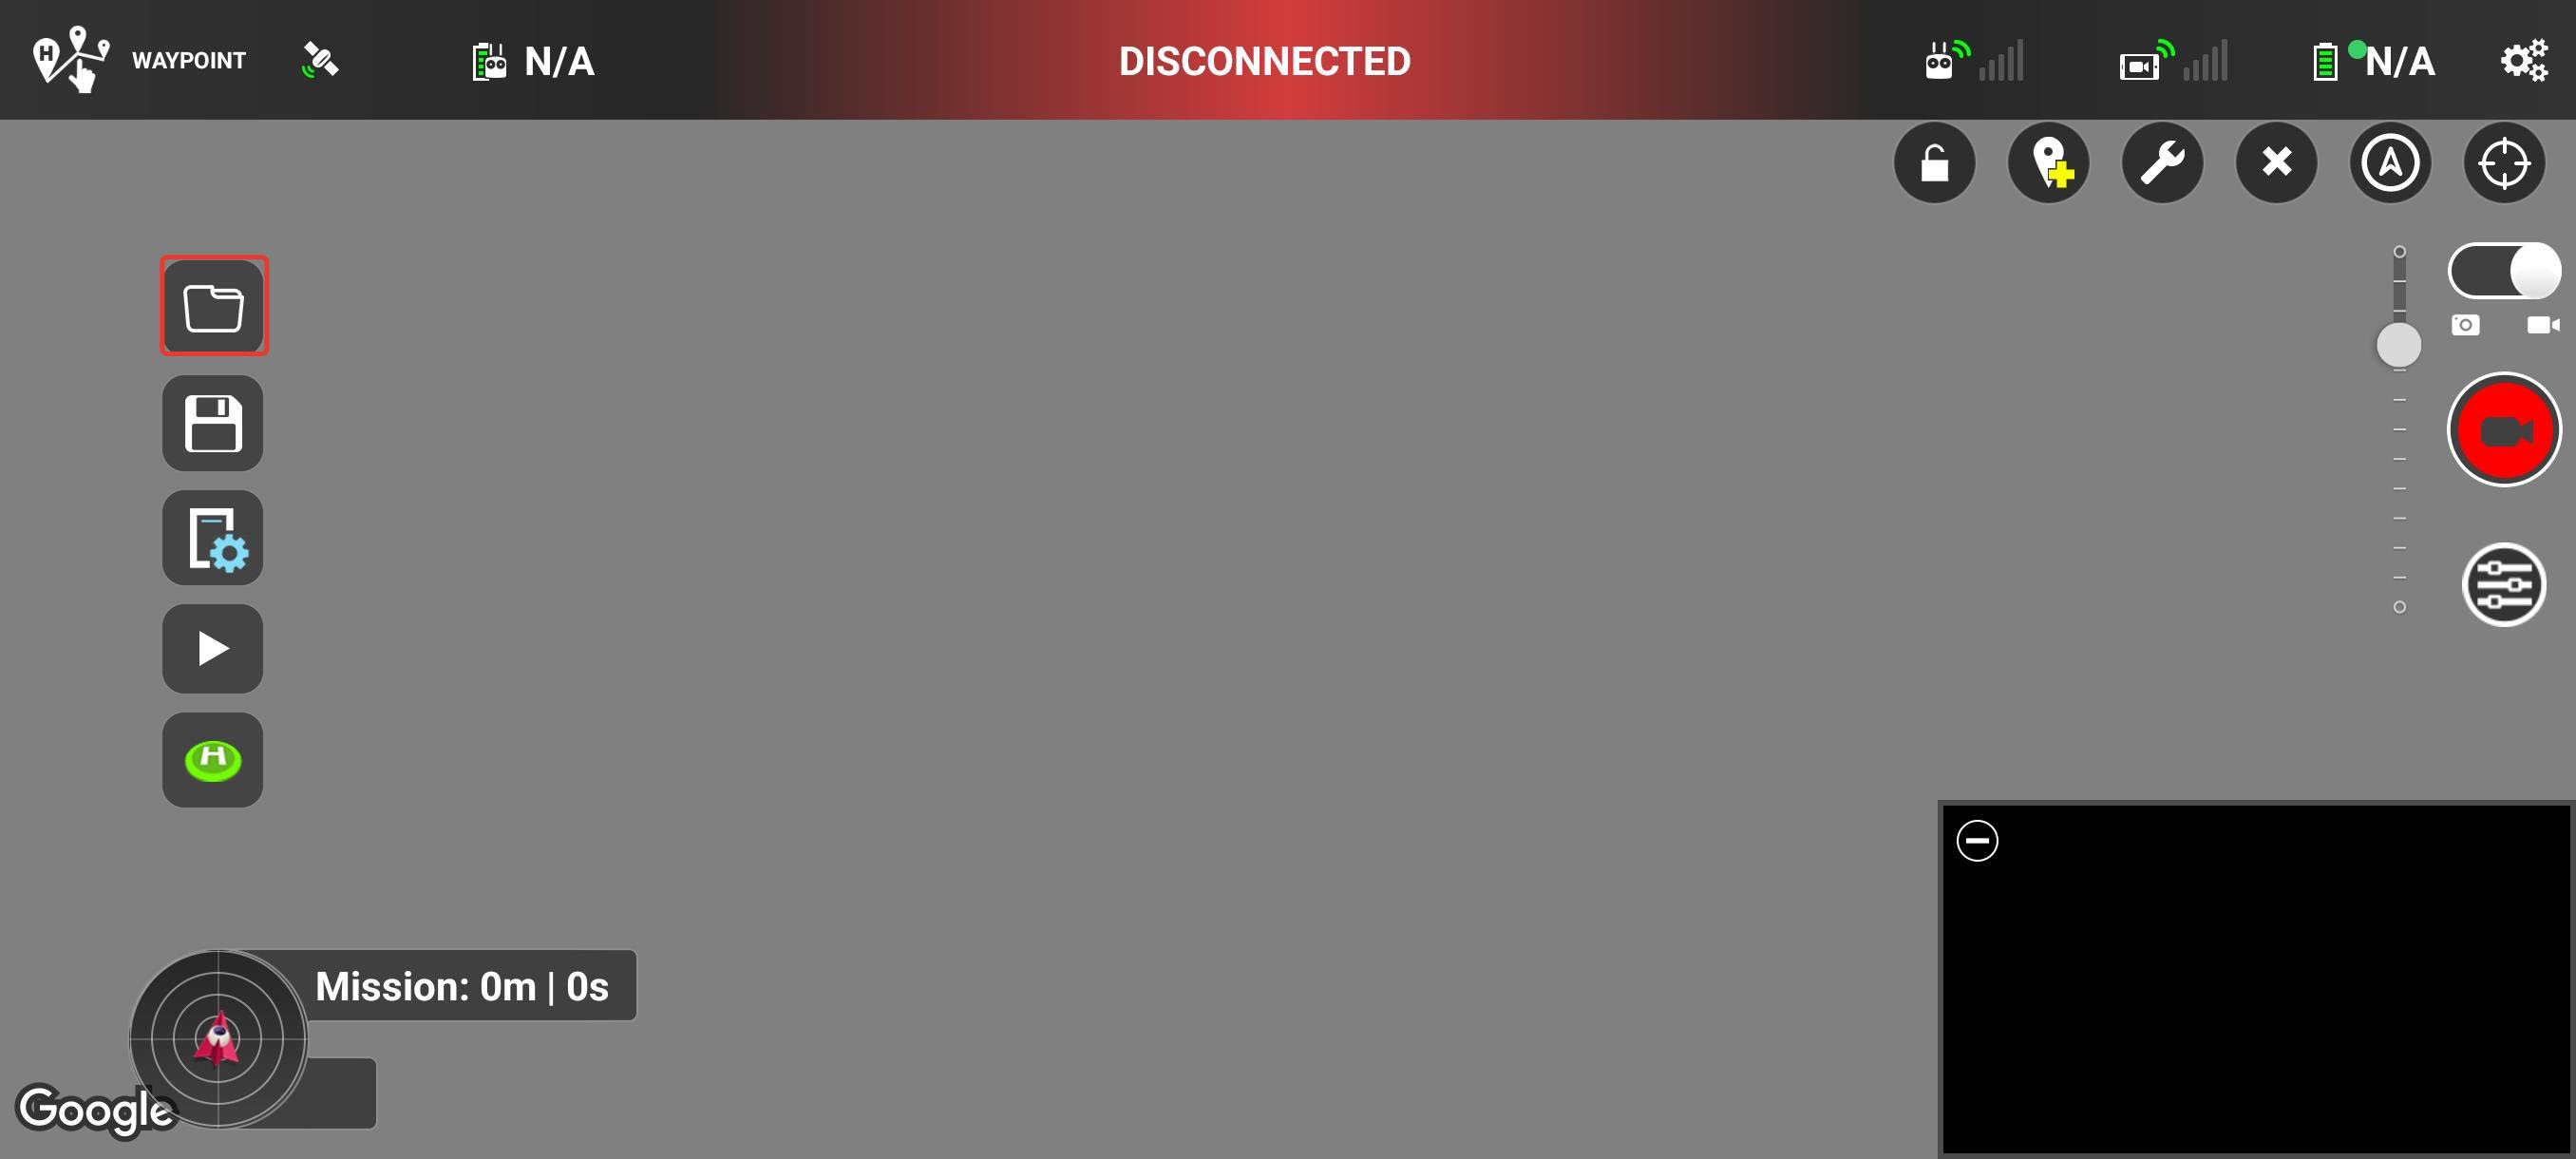
- Select "Upload Route"

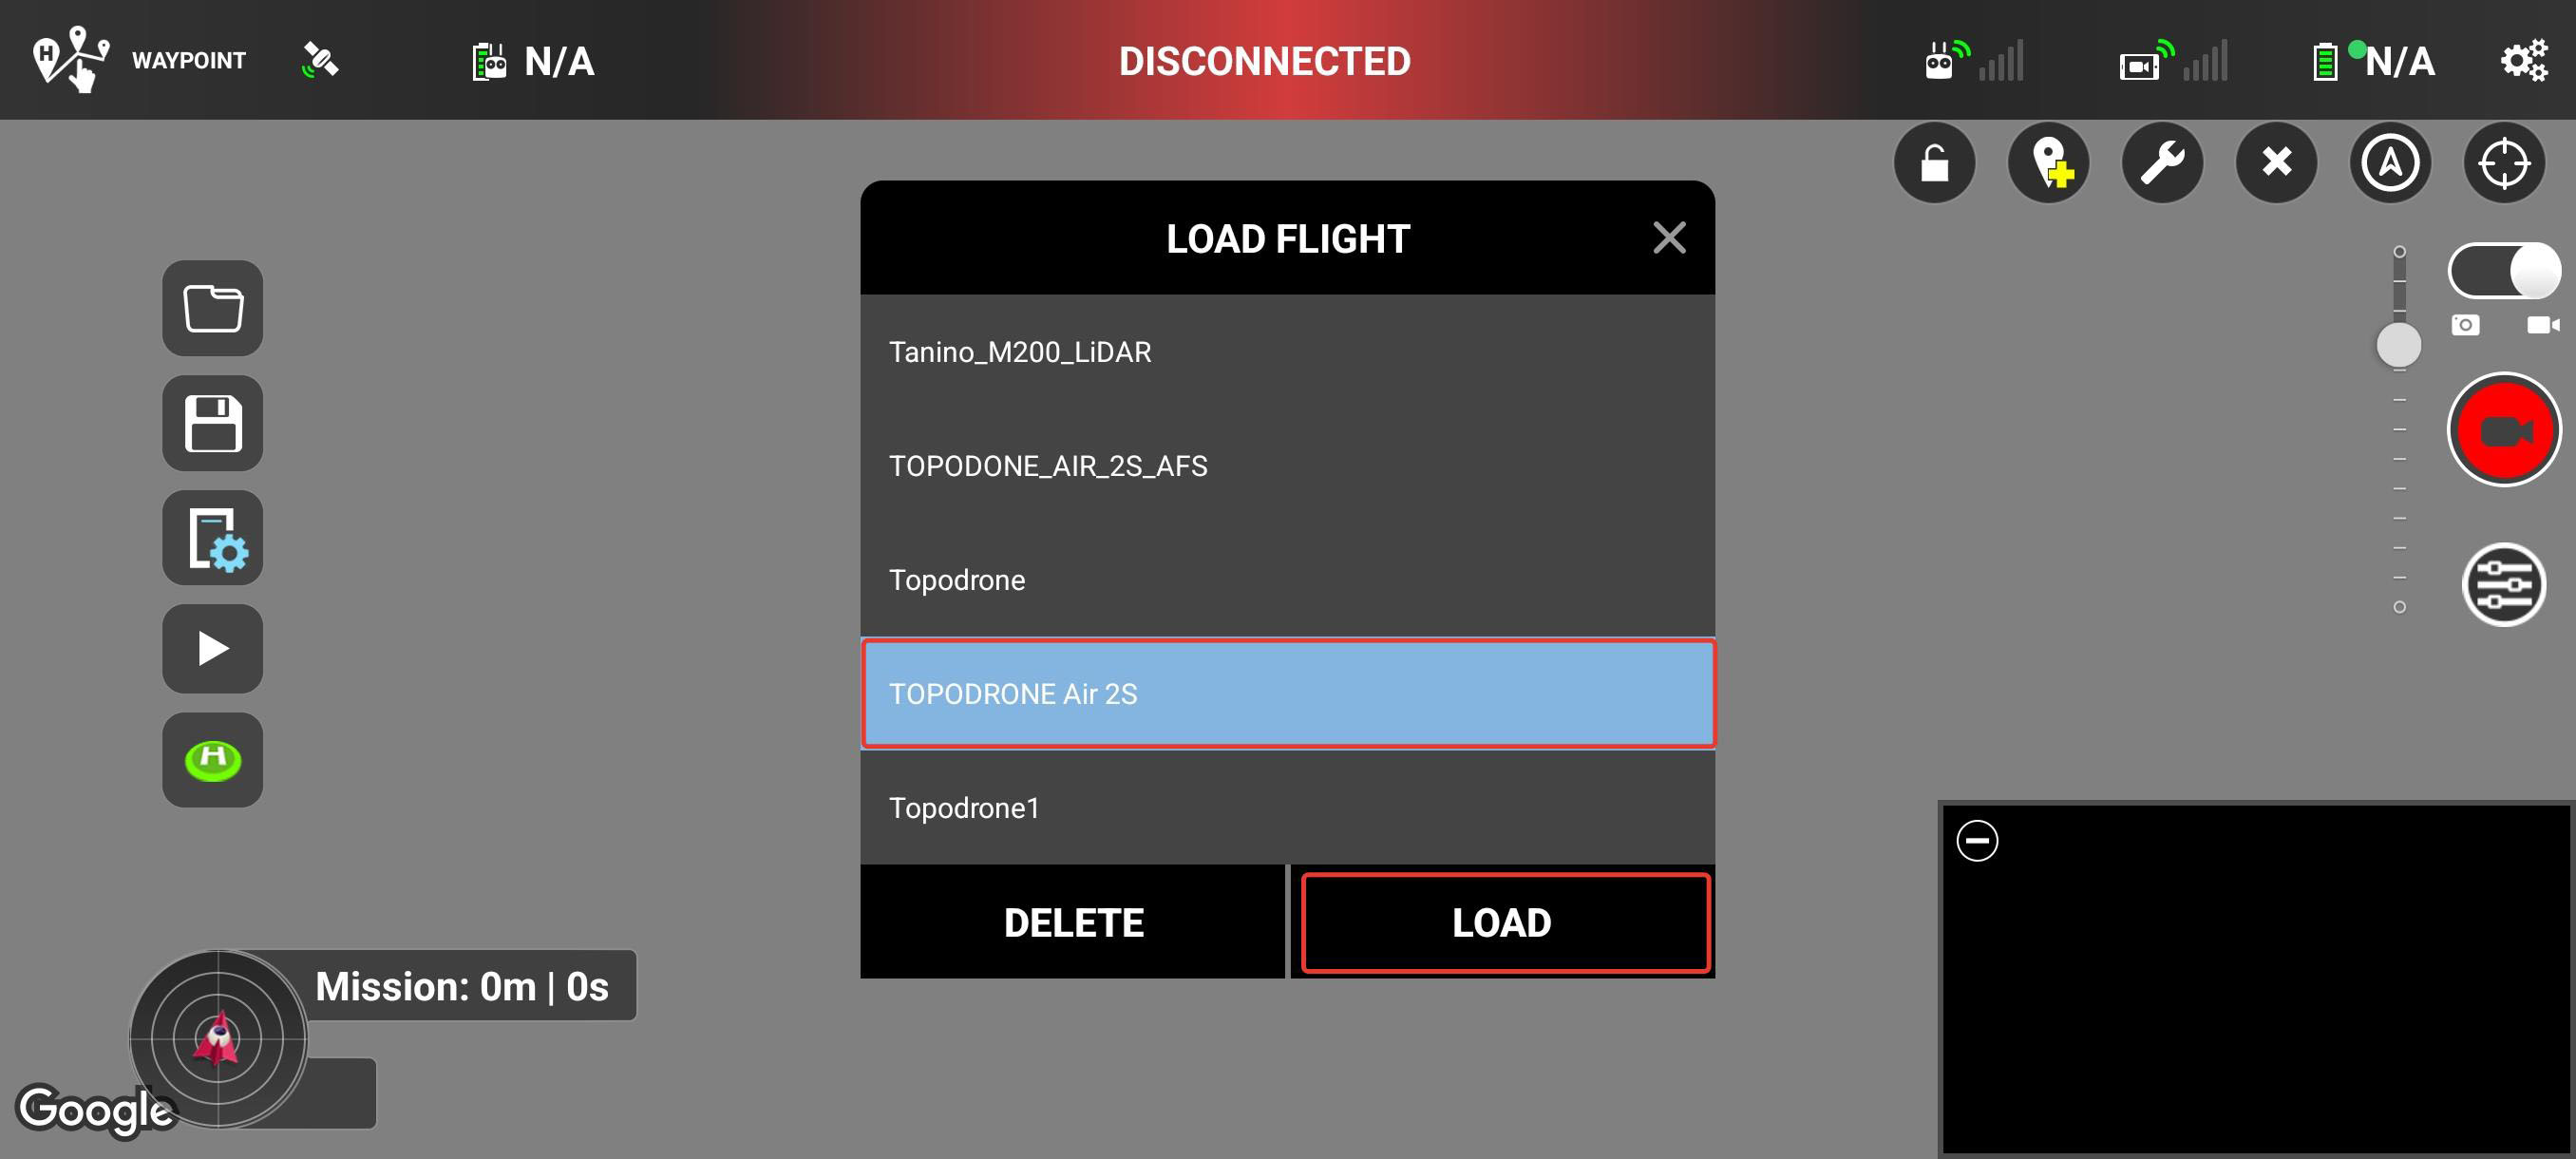
- Select the name of the route you imported earlier and click Upload.

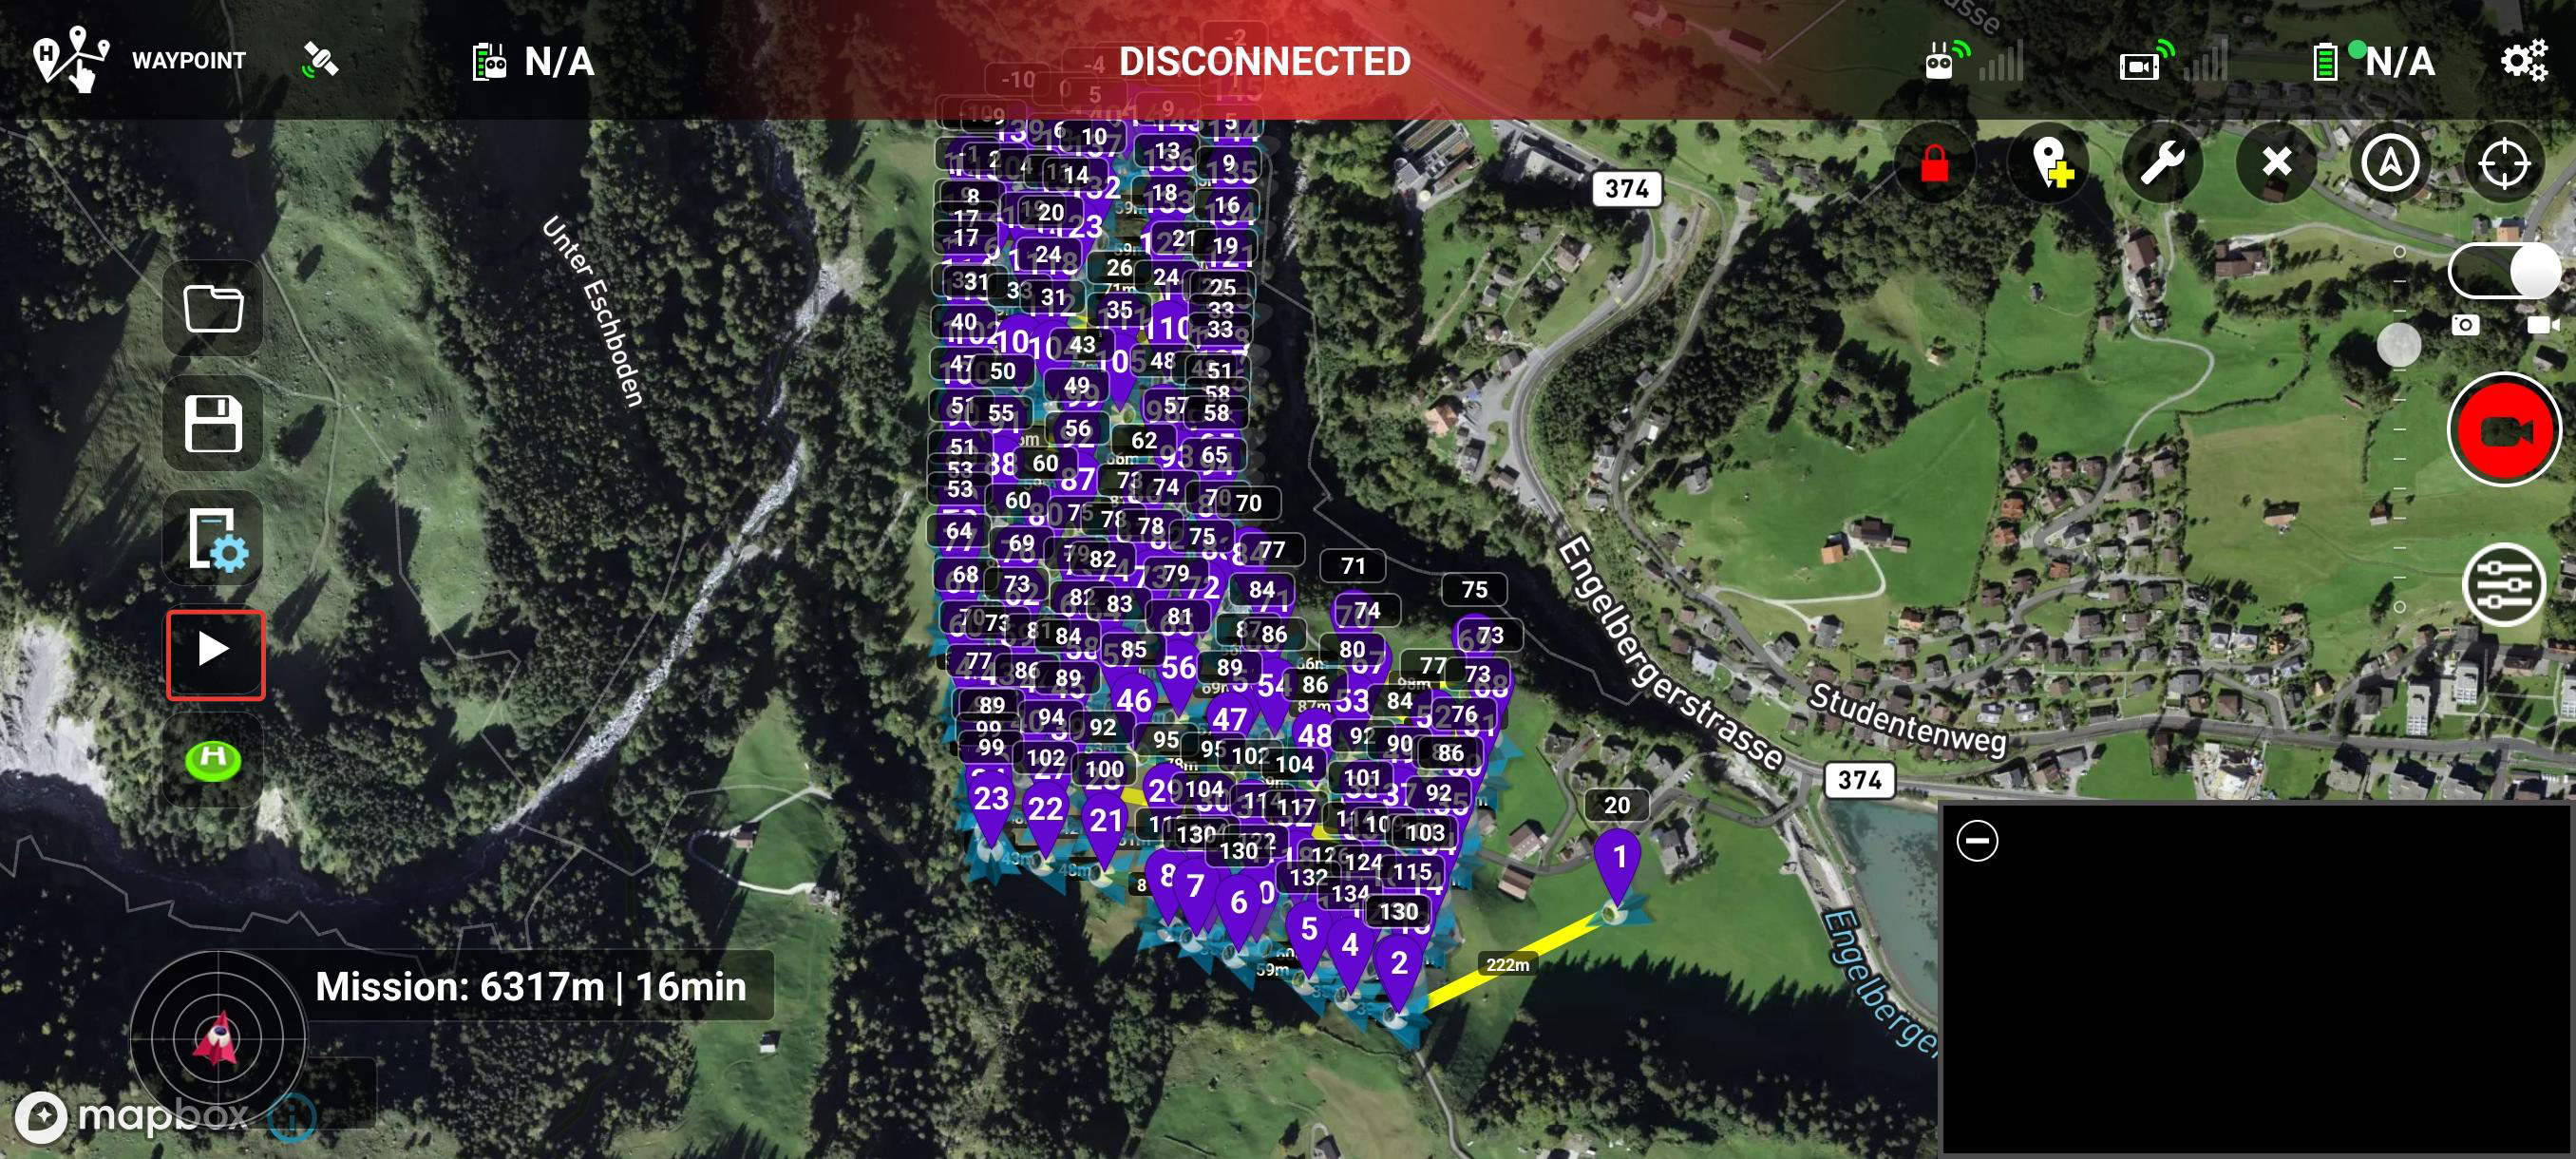
- The route is imported into the Litchi for DJI software. To start the flight, you need to connect the remote control and the drone, initialize and configure the camera, and then press the "Start" button.