Multispectral data processing TOPODRONE P61
Obtaining orthophoto using data collected from the photogrammetric camera TOPODRONE P61 with AGROWING lens is performed in several stages:
1. Obtaining high-precision photo centers in TOPODRONE Post Processing program;
2. Separation, alignment and export of multispectral images by necessary channels in AGROWING Basic program;
3. Photogrammetric processing in Agisoft Metashape program.
TOPODRONE Post Processing
Open TOPODRONE Post Processing program on the PPK Post Processing tab, select the necessary files from your flight, GNSS antenna offsets, base station file, coordinate system and specify the exact coordinates of the base station taking into account the antenna phase center.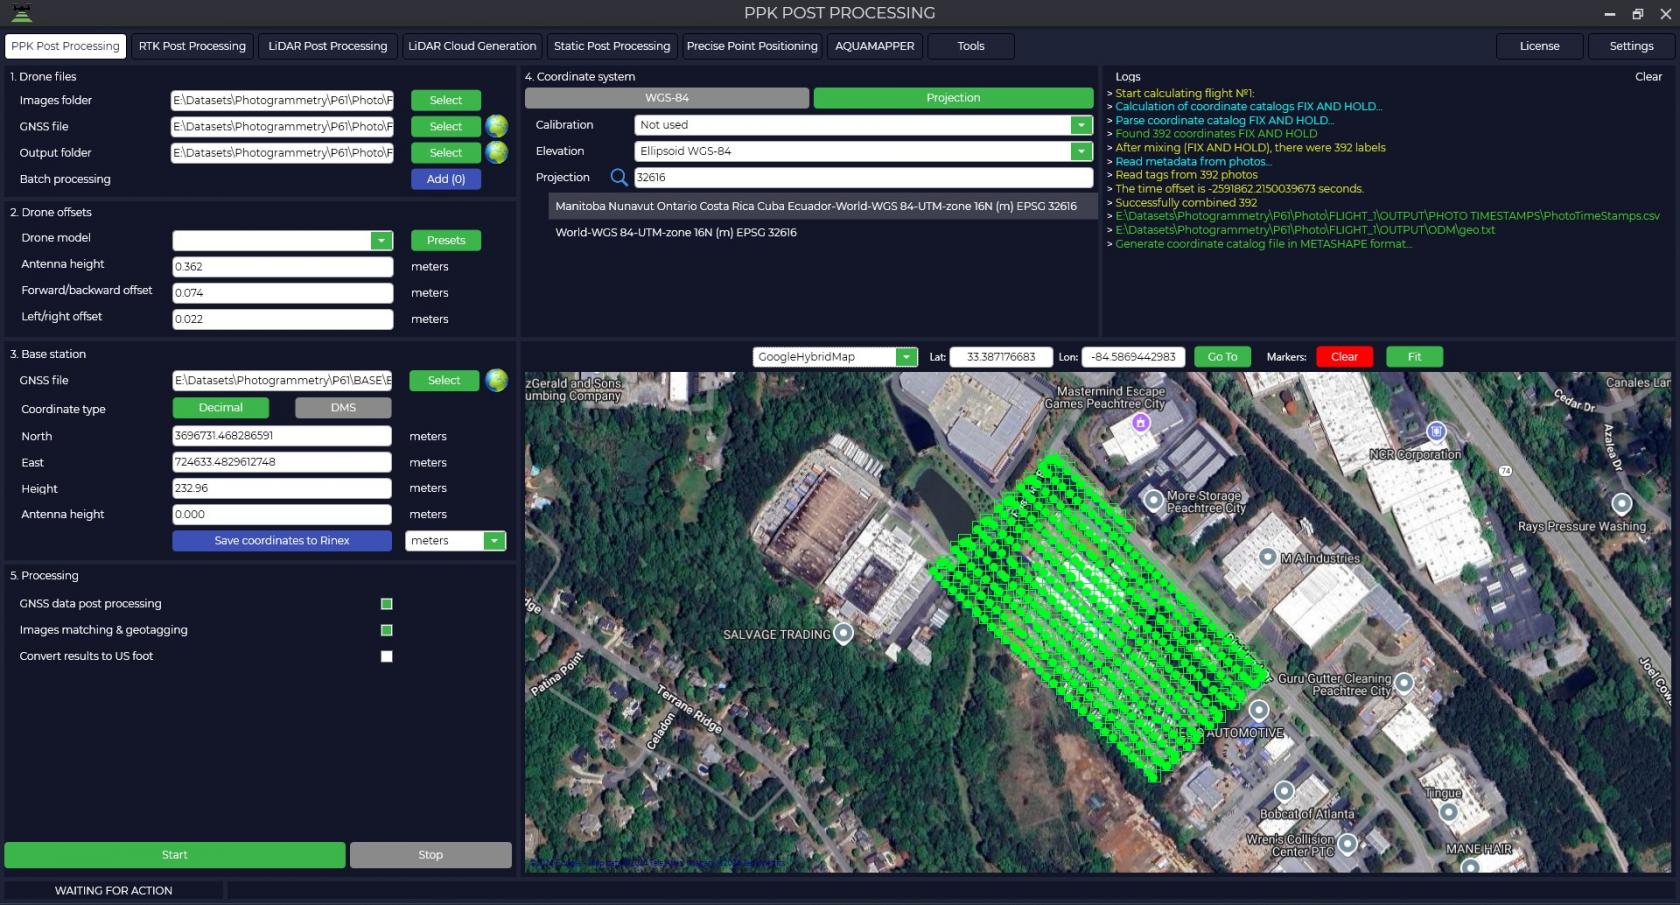
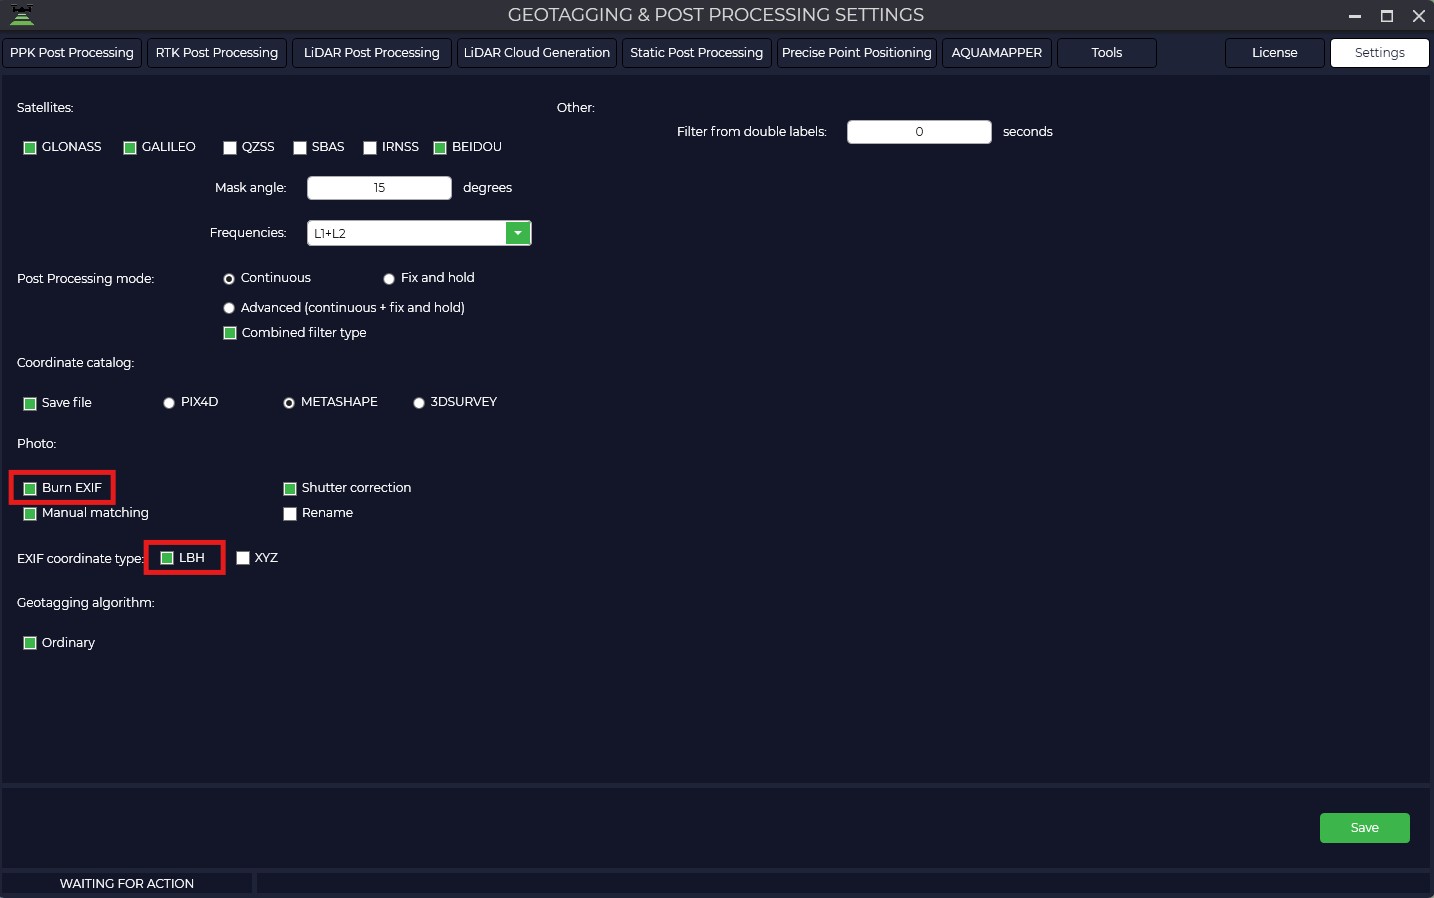
Go to the “Settings” tab and select the “Aerial Photography” section. Configure the necessary settings, making sure to check the “Tagging” and “LBH” items.
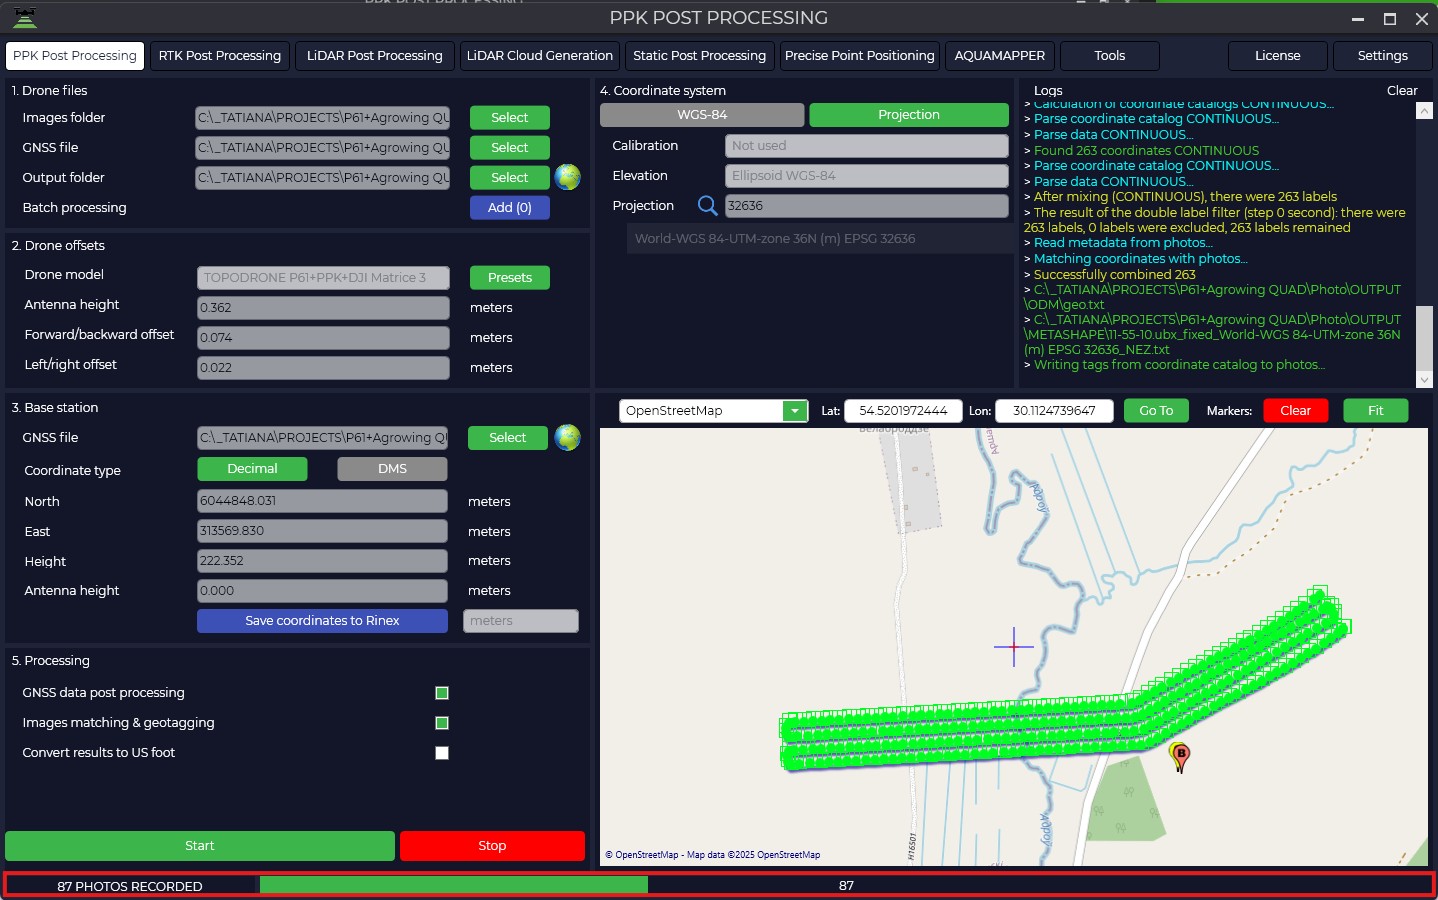
Start the processing. The result of processing will be a trajectory, a directory of exact photo centers and the photos themselves with changed tags, located in the “OUTPUT” folder called “UpdateTags”.
More details about the module itself can be found in the instructions for the TOPODRONE Post Processing.
Agrowing Basic
Agrowing Basic is available for users with any level of training. The program interface is intuitive, and support and tutorials will help you quickly learn all the functions. The Agrowing Basic software is free of charge and available for download at the following link: Agrowing Basic.
This section describes the processing in AGROWING Basic. For more detailed information on the program itself, please see the user manual for the program itself.
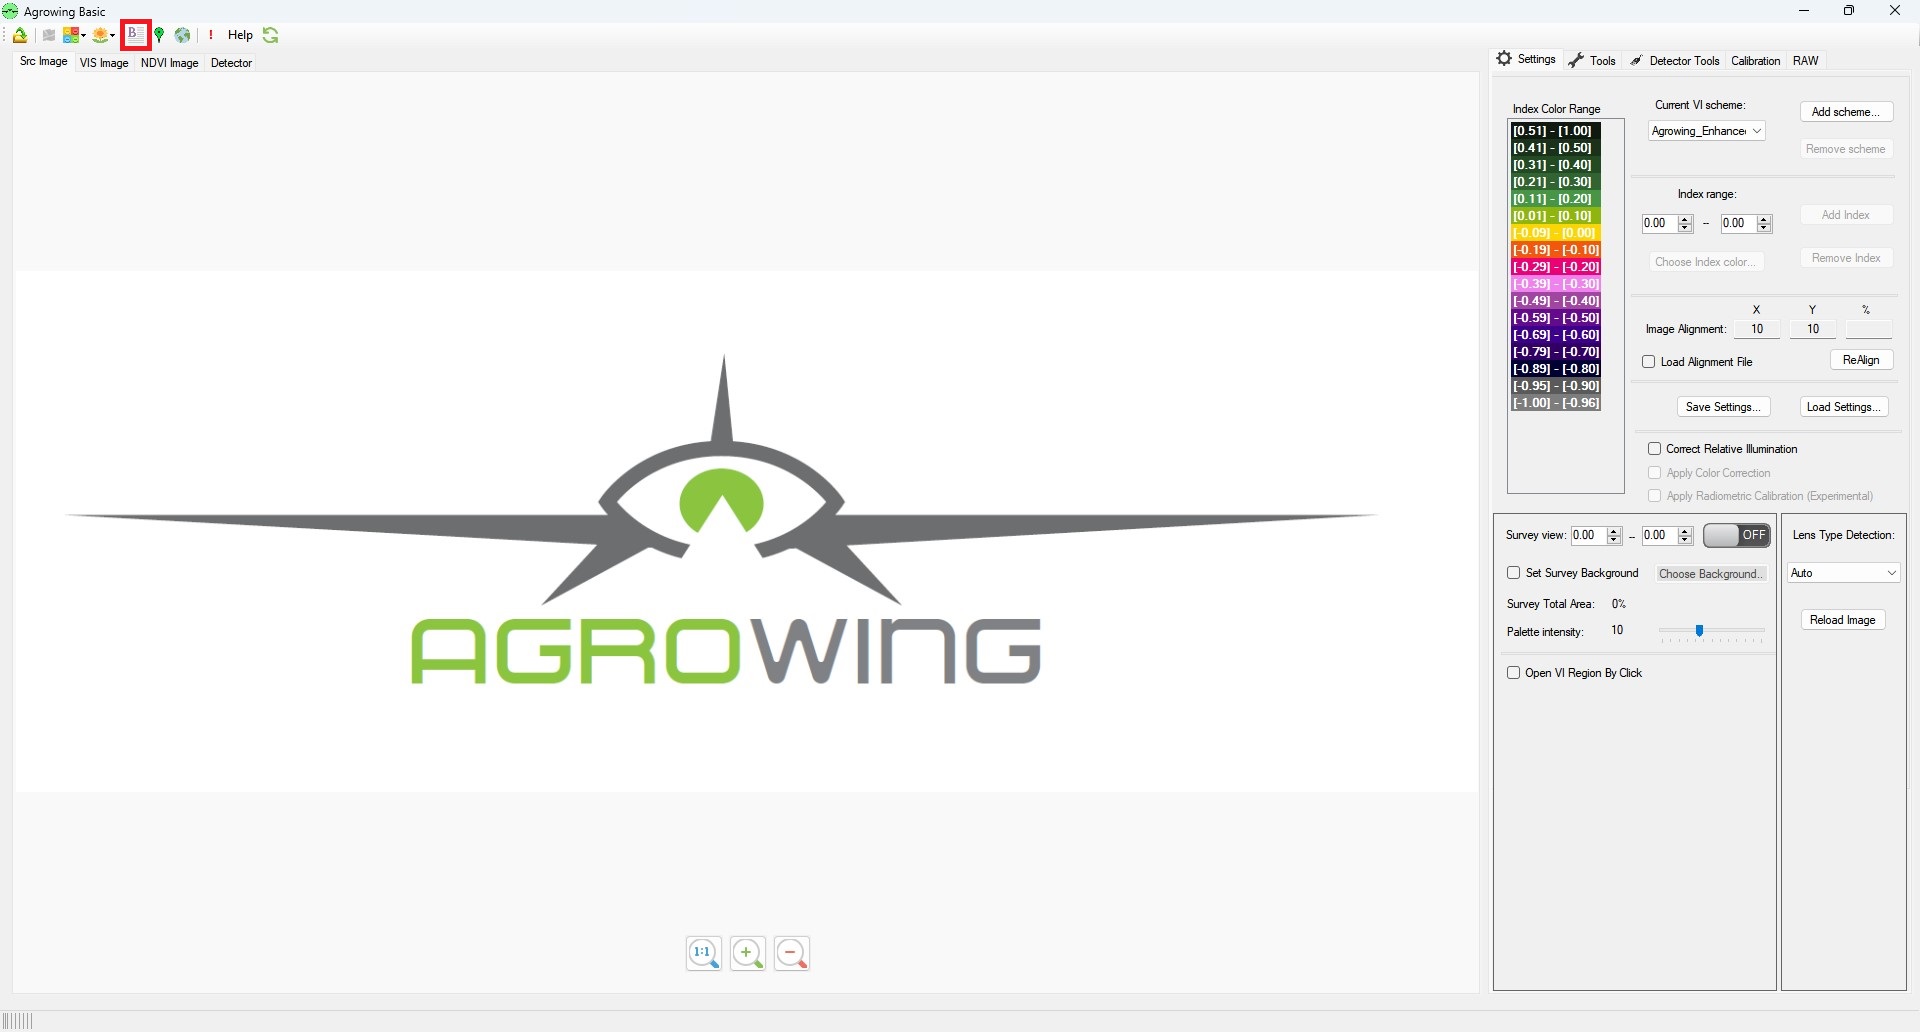
1. Start the AGROWING Basic program. Select “Image Batch Runner” item on the toolbar.
2. Select the path to the directory containing your photos and modified geotags.
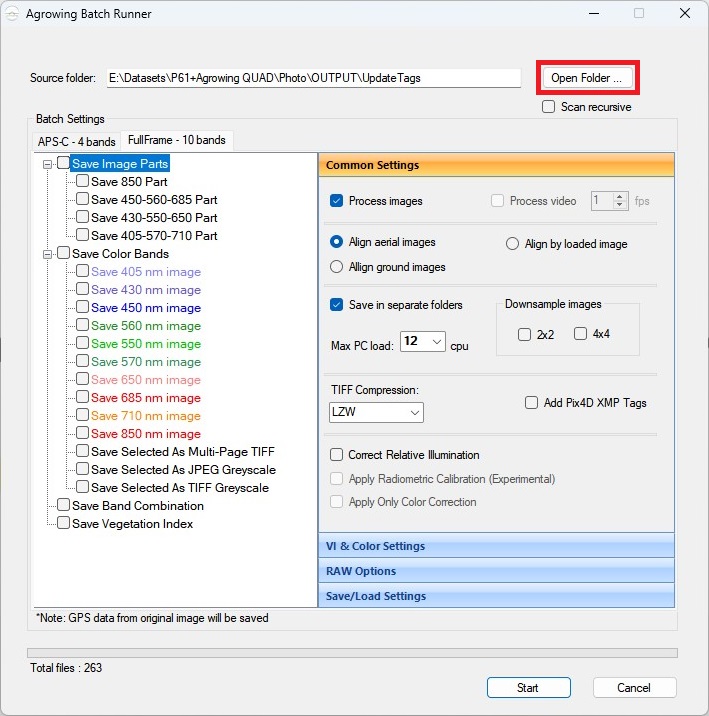
3. Select required spectral channels and type of saving the result. Save Selected As Multi-Page TIFFF allows you to export a multi-layer image containing 4 channels for each image.
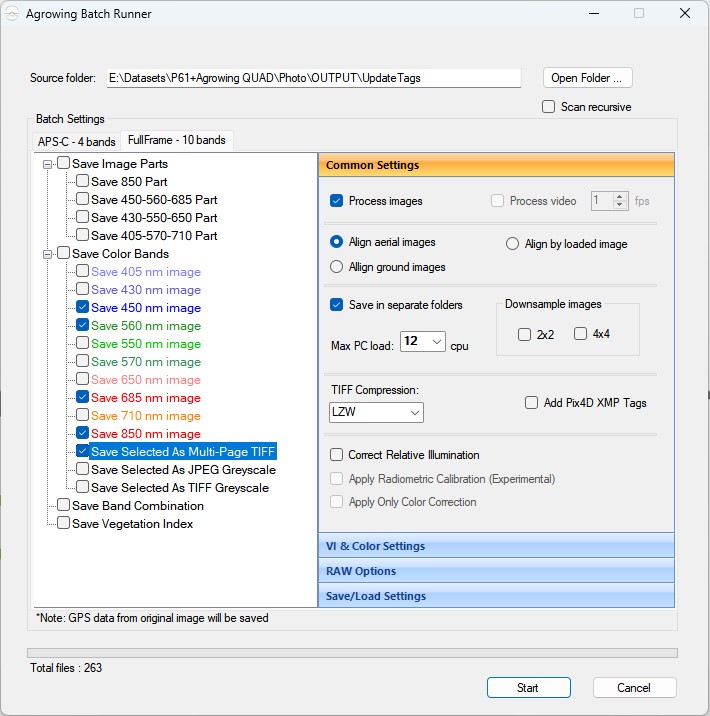
General Settings:
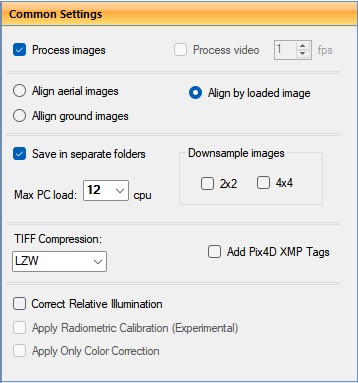
Align aerial image - quite a long process, images are aligned independently.
Align by loaded image - the application selects an random image and applies the result of aligning this image to all other images. The process is fast, but may be less accurate on some images from the same set due to small differences in heights and angles.
Align ground images - aligns images taken from the ground at a close distance of 1-1.5 meters from the object.
Save in separate folders - save results in separate folders.
Max PC load - maximum number of used streams.
Downsample images - reduce resolution of images.
TIFF Compression - select TIFF compression type from the drop-down list.
Add Pix4D XMP Tags - add tags for Pix4D program.
Correct Relative Illumination - correct relative illumination.
Apply Radiometric Calibration (Experementsl) - apply radiometric correction.
Apply Only Color Correction - apply color correction.
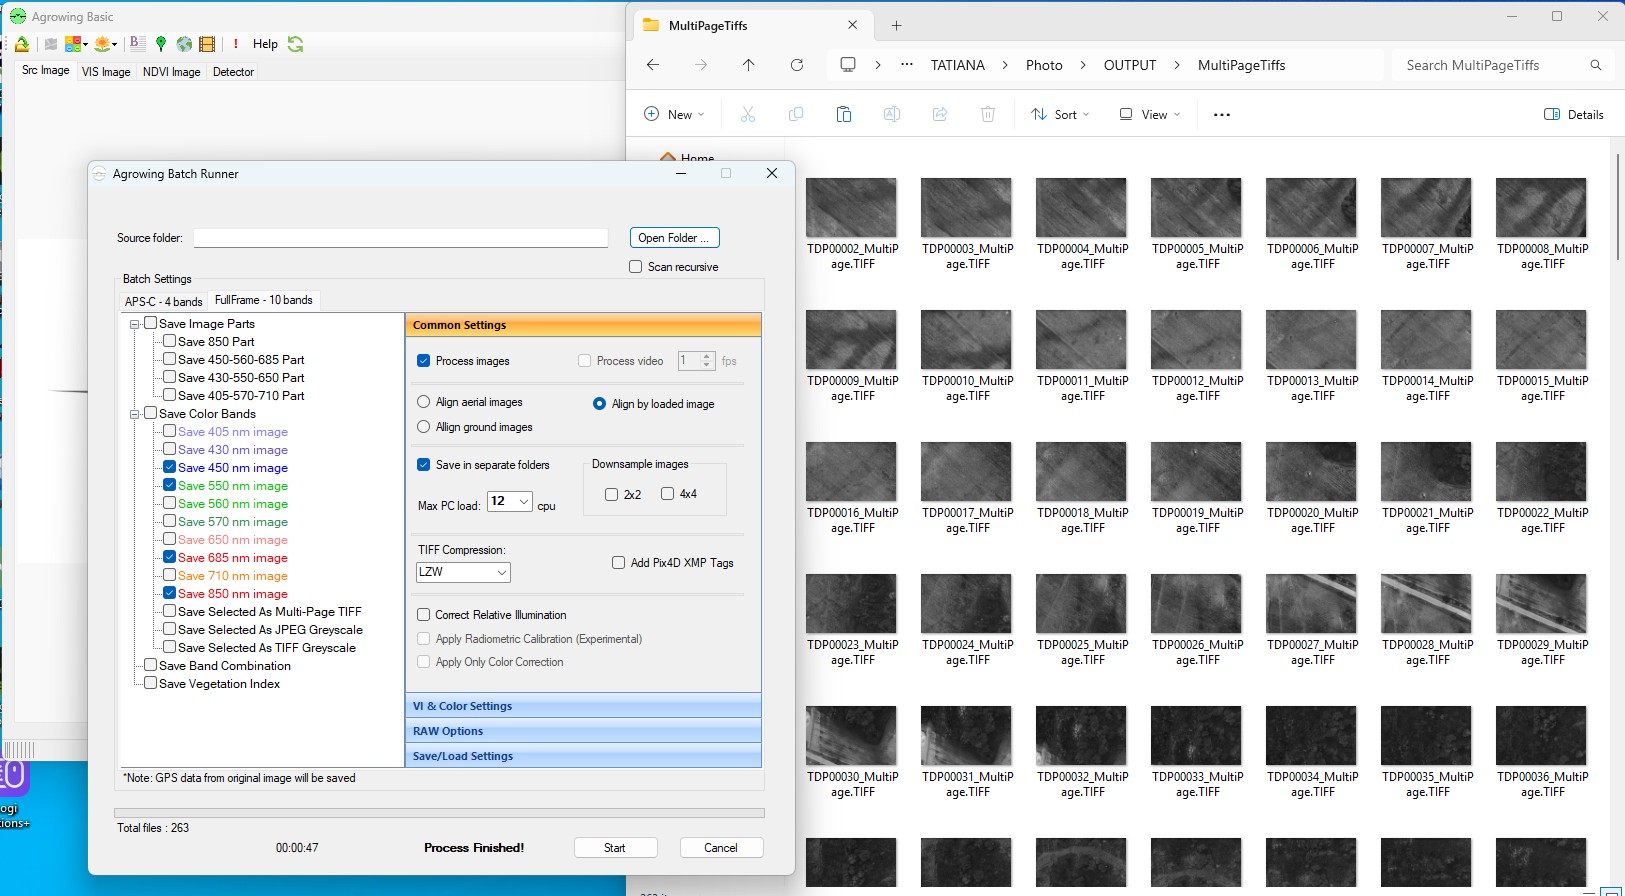
4. After making all settings, click the “Start” button. The result of processing are images in .TIFF format with exact coordinates of photo centers in xmp.
Agisoft Metashape
The process of multispectral data processing in Agisoft Metashape software has much in common with classical photogrammetric processing. Below is a detailed description of this process.
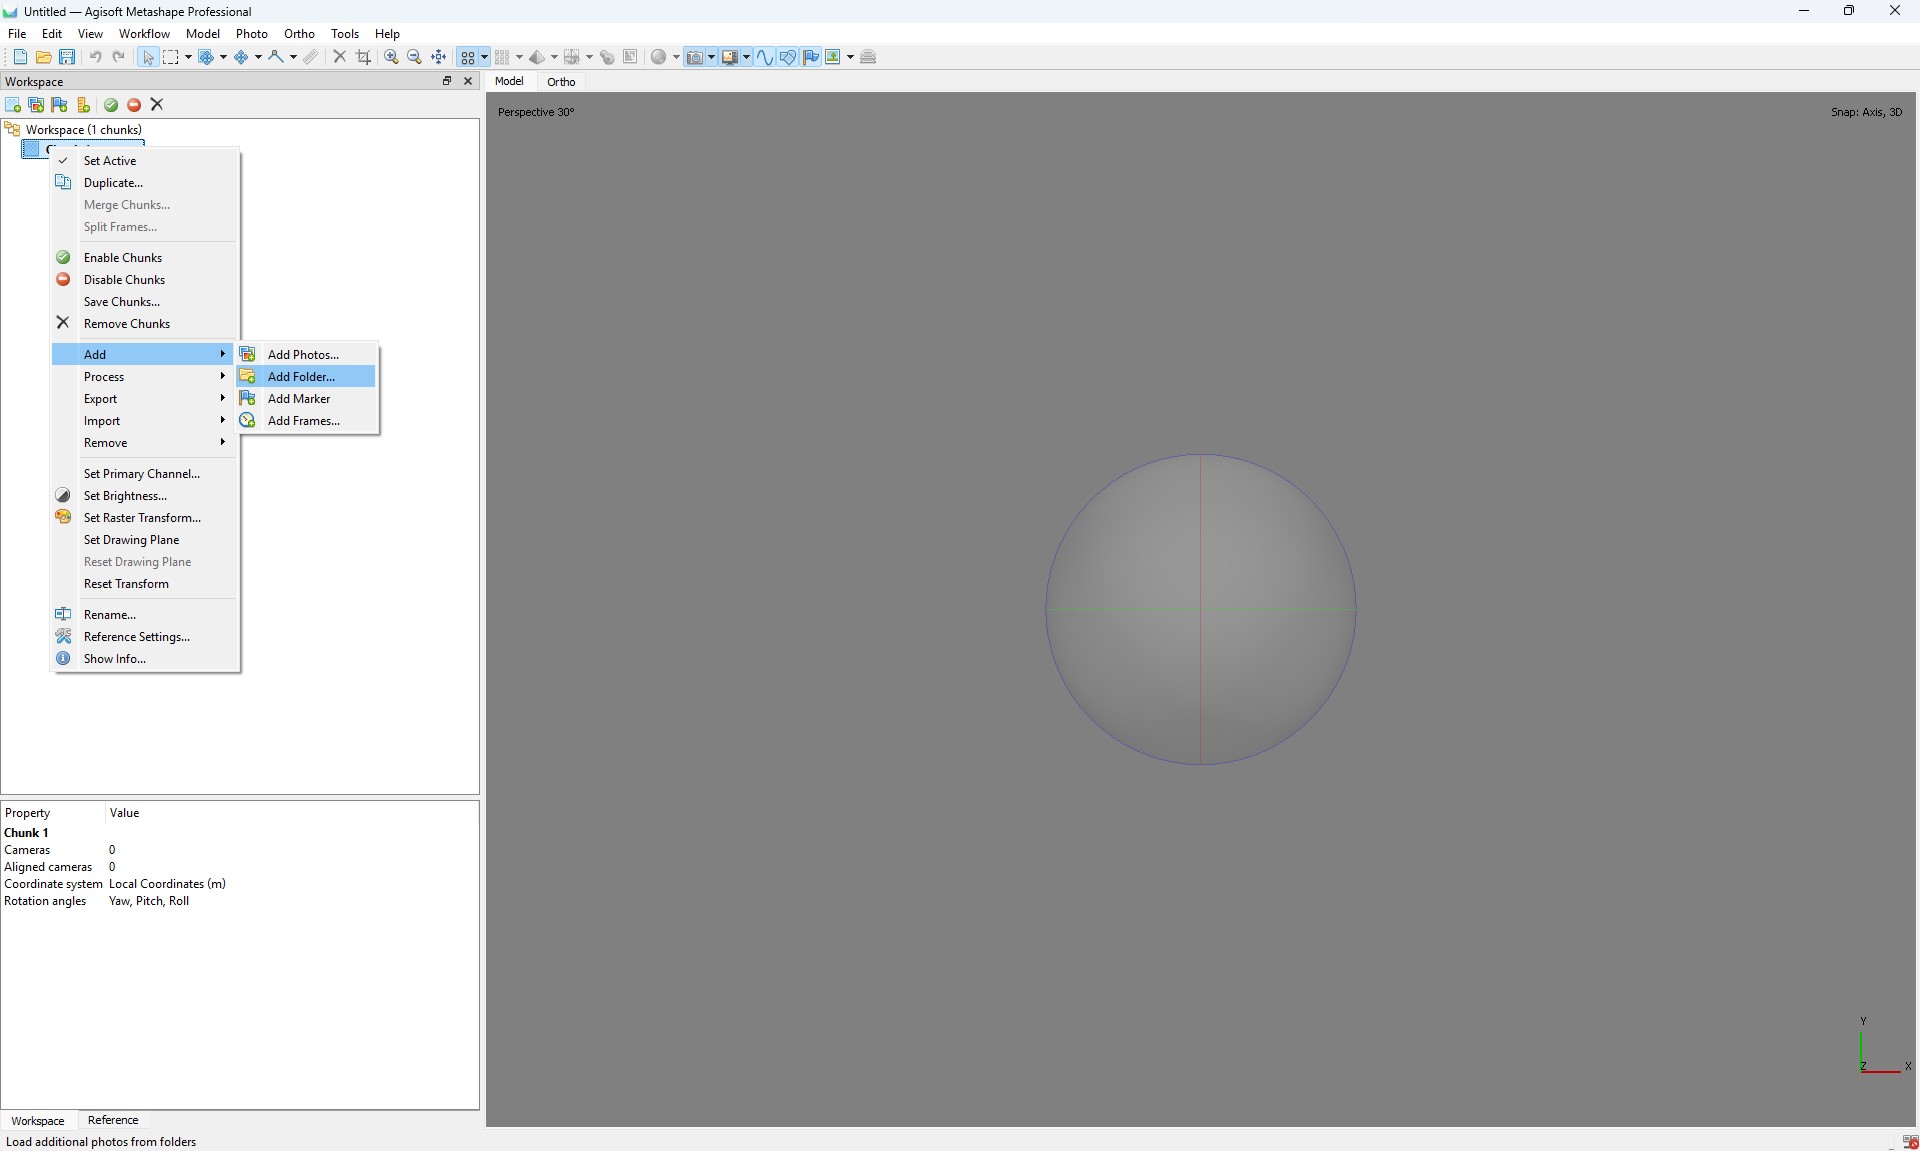
1. Open Agisoft Metashape program and select the folder where the acquired multispectral data are stored.
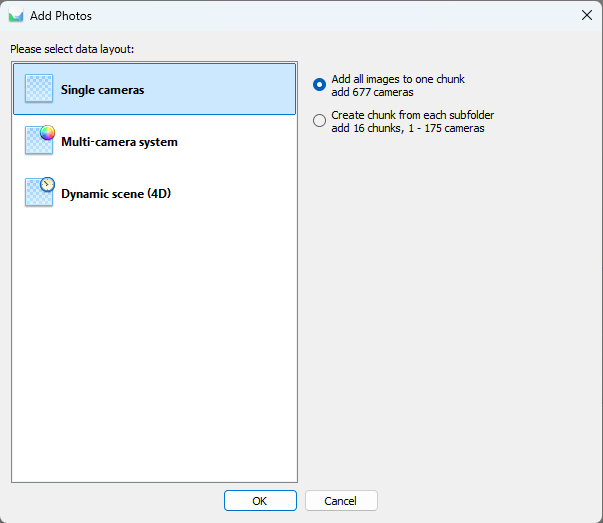
2. In the program interface, select the “Multi-camera system” option for correct data processing.
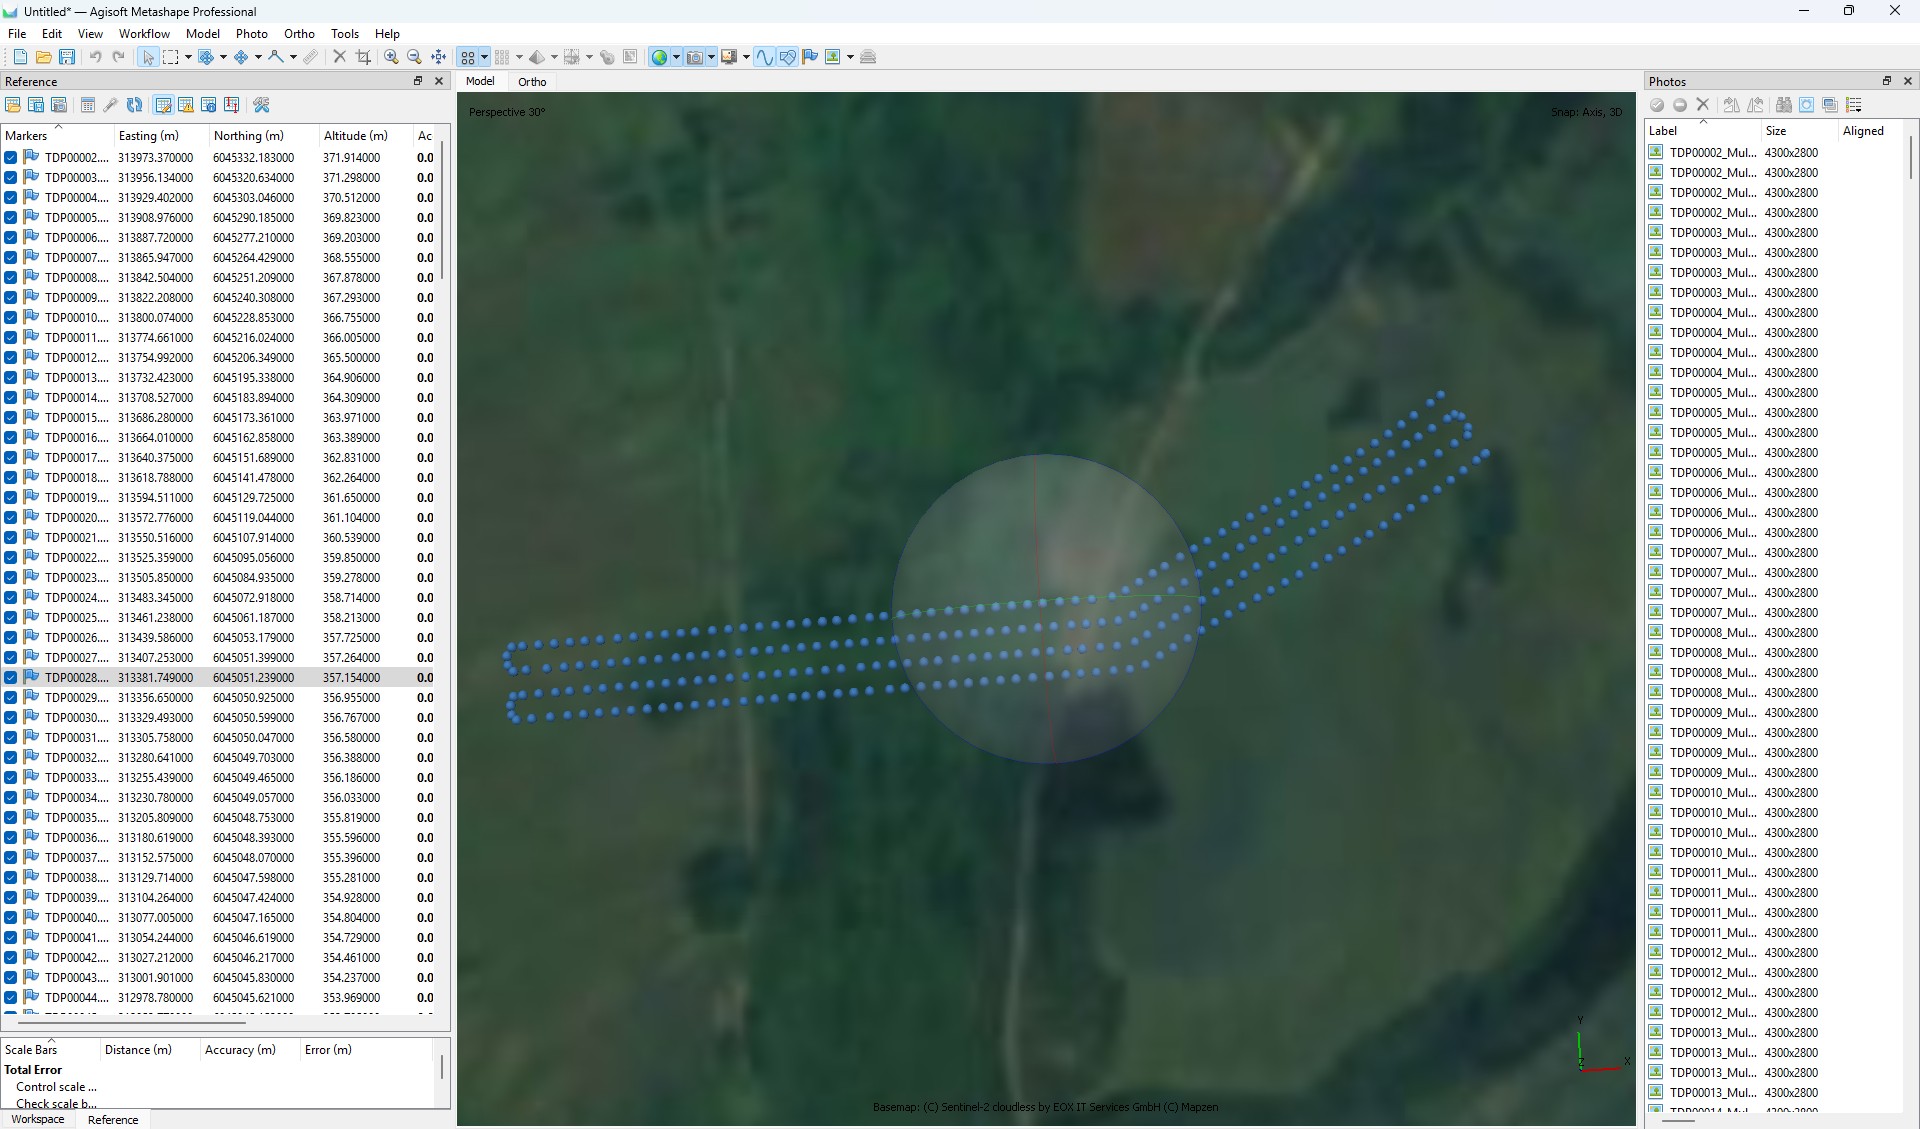
3. Open the Snap window and perform the following steps:
- Convert the photo centers to the local coordinate system;
- Set the coordinate accuracy according to the requirements of your task;
- Make sure that all cameras are correctly georeferenced to the local coordinate system.
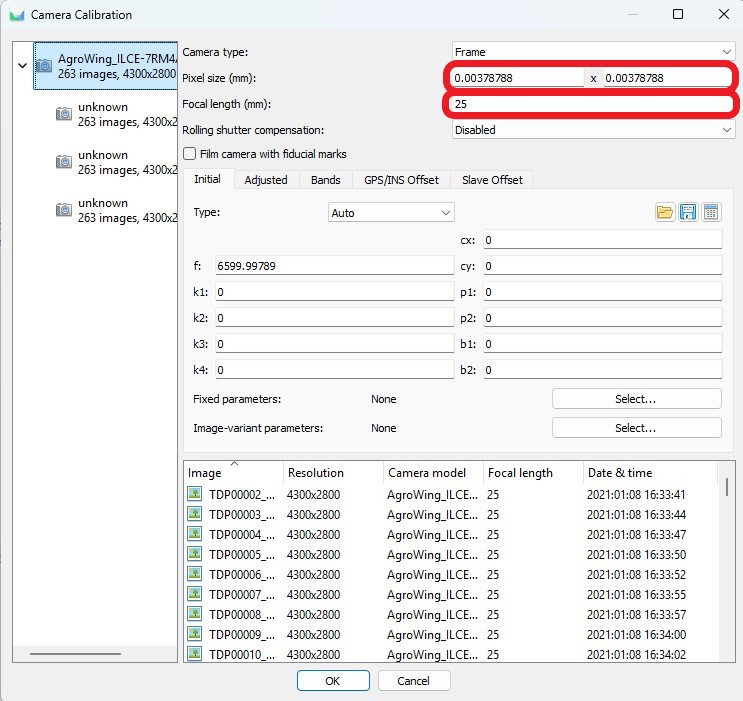
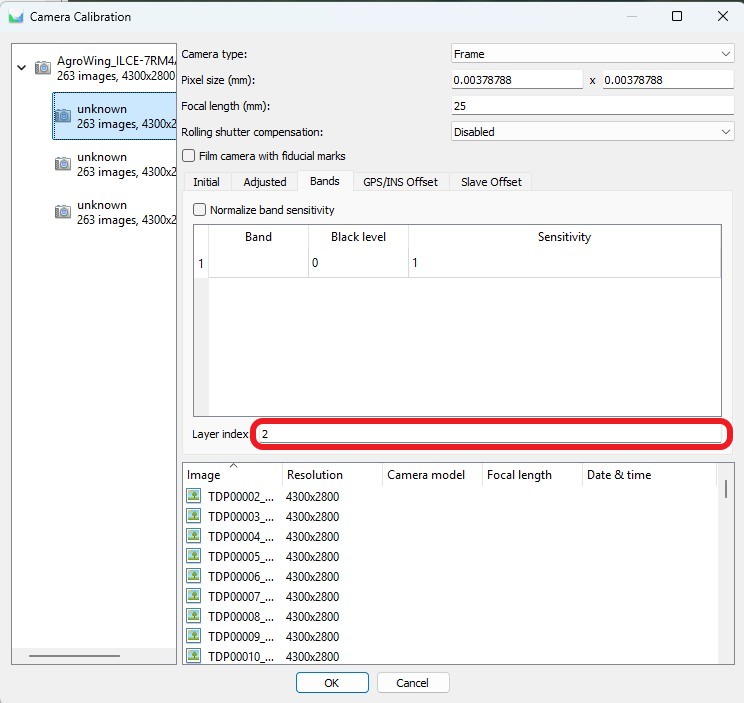
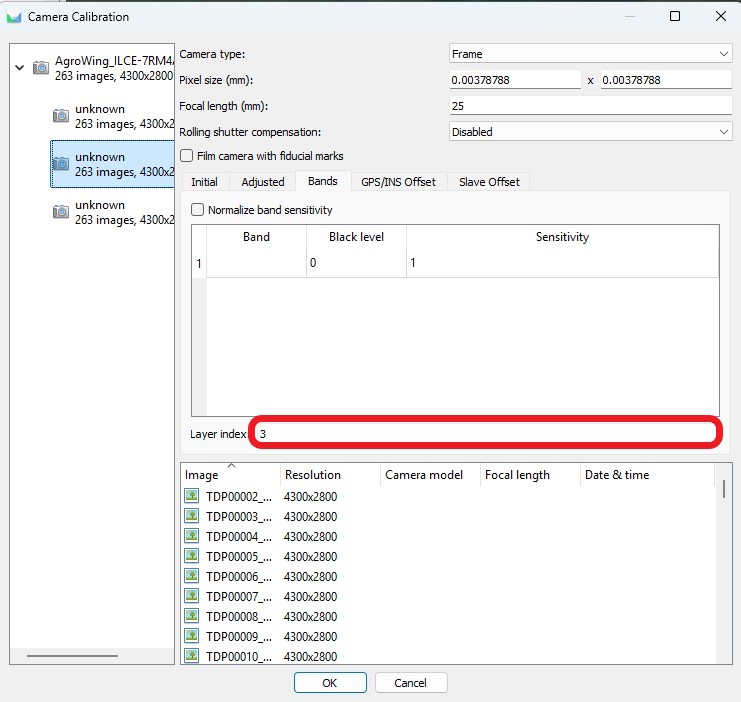
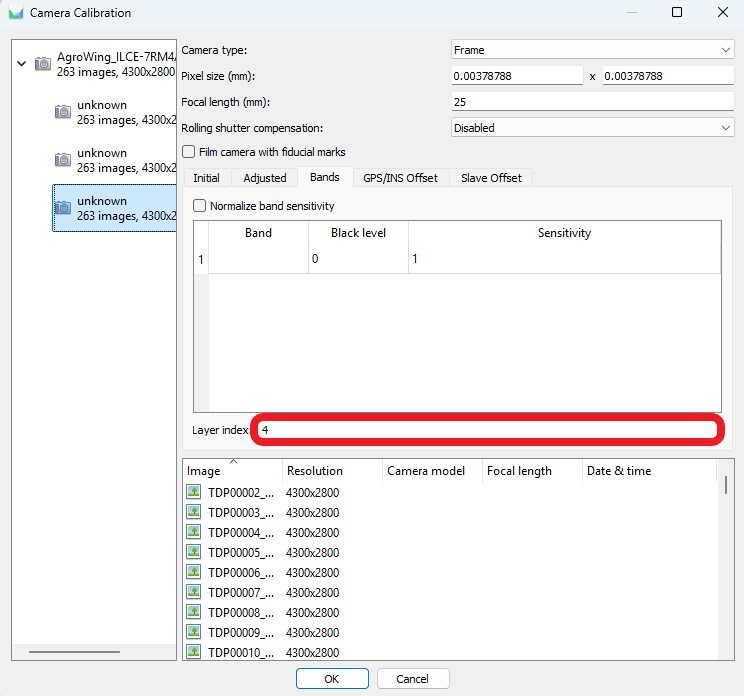
4. Go to “Camera Calibration” and follow the steps below:
- Set the physical pixel size and focal length;

- Set the sequence numbers of all multispectral channels.



5. When camera calibration is complete, perform the aerotriangulation process. This process includes:
- Create tie points based on the data from the cameras;
- Defining and refining aerotriangulation parameters to improve model accuracy.

After the aerotriangulation stage you can filter points based on the selected parameter using the “Model” tab, “Smooth selection” item.
6. Open the “Bounding” window and perform the following actions:
- Import control points in the project coordinate system;
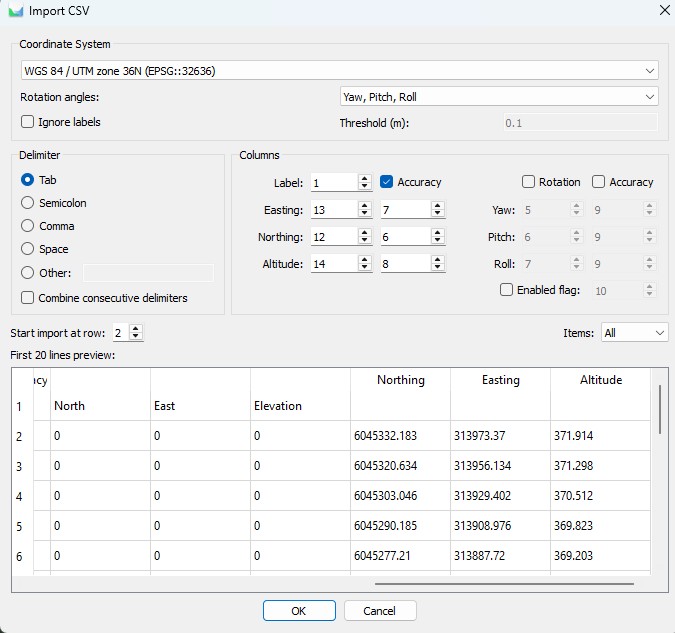
- Perform control point measurements on at least 6-9 images.

Adjust the focal length if necessary.
If the measurement accuracy meets the specified criteria, proceed to point cloud creation. Otherwise, analyze all steps of the process, from data collection to data processing, to identify and eliminate possible errors.
7. Construct a dense point cloud and digital elevation model.
8. Compute the required index information.
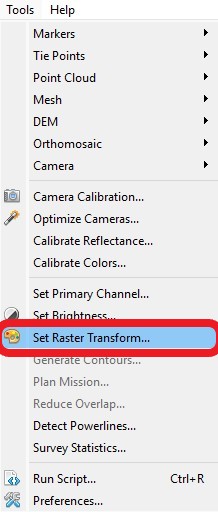
- In the toolbar, use the “Set Raster Transform” button;
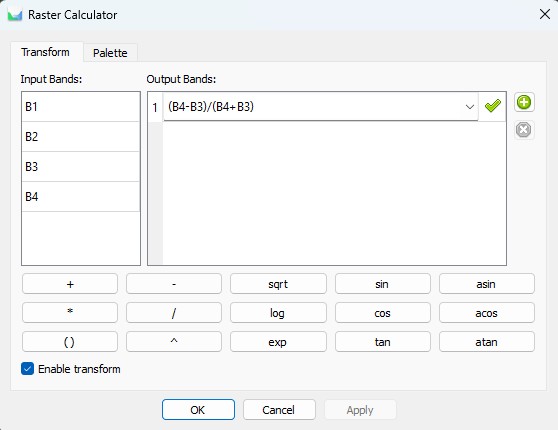
- In the raster calculator, enter the formula that will calculate your index;
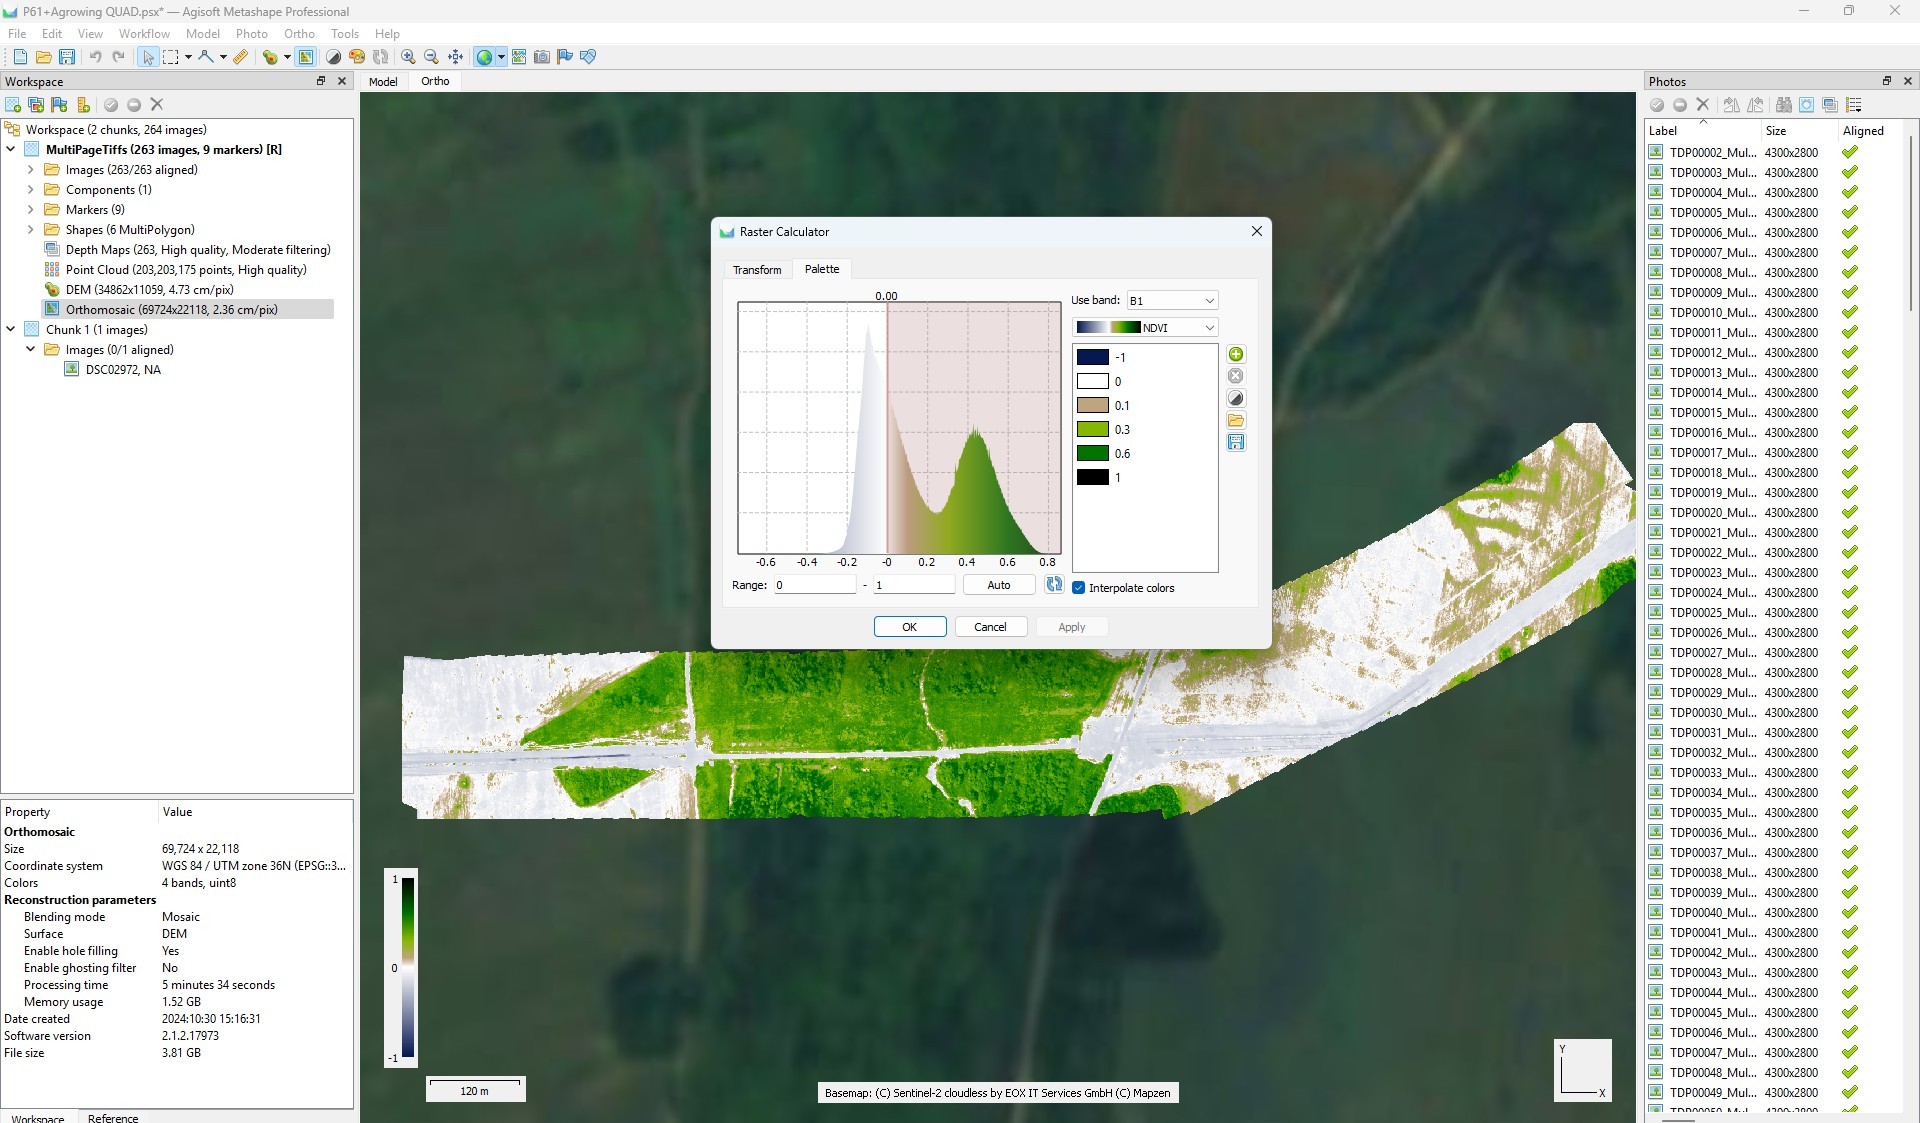
- Go to the “Palette” tab, set the desired range, select the appropriate palette and click “OK”.
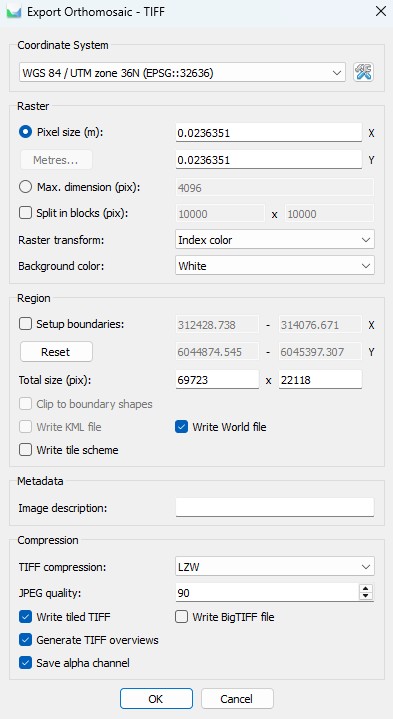
9. To export an orthomosaic, follow the steps below:
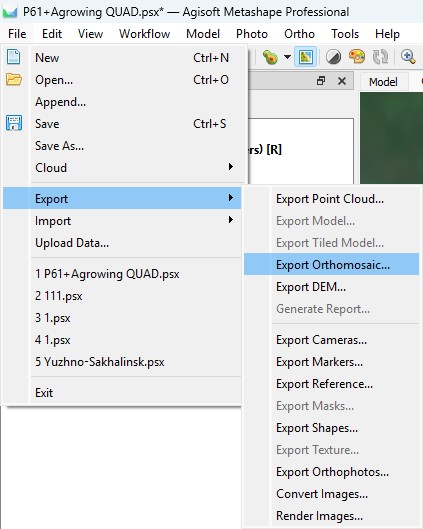
- Select “File” - “Export” - “Export Orthomosaic”
- Select the path and file name for saving the orthomosaic;
- Configure export settings following the recommendations on the screenshot. If necessary, divide the orthomosaic into blocks for convenient further use.
This completes the processing. All necessary materials can be exported in the same way as written in point 9.