| [](https://knowledge.topodrone.com/uploads/images/gallery/2025-02/9911.jpg) | [](https://knowledge.topodrone.com/uploads/images/gallery/2025-02/9912.jpg) |
| [](https://knowledge.topodrone.com/uploads/images/gallery/2025-02/9913.jpg) | [](https://knowledge.topodrone.com/uploads/images/gallery/2025-02/9914.jpg) |
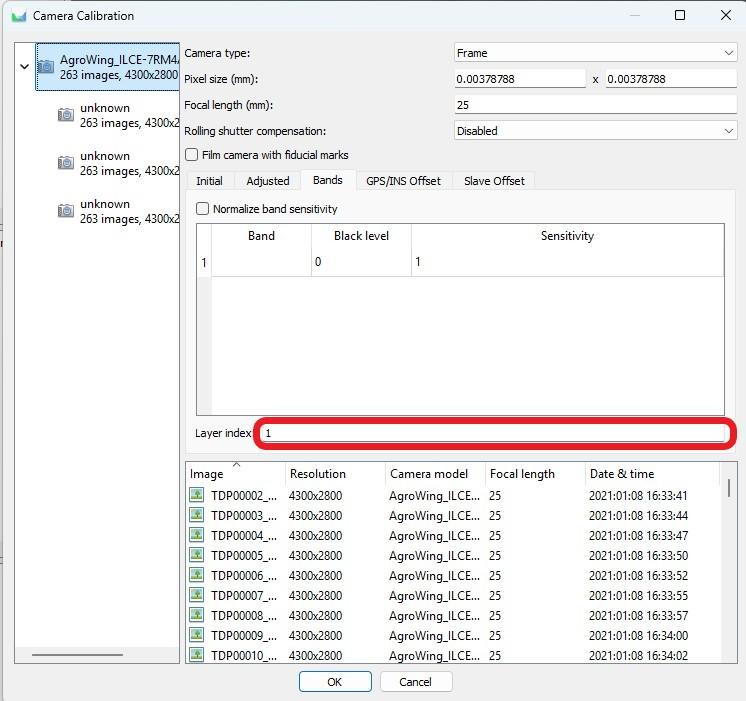
After the aerotriangulation stage you can filter points based on the selected parameter using the “Model” tab, “Smooth selection” item.
6\. Open the “Bounding” window and perform the following actions: - Import control points in the project coordinate system; [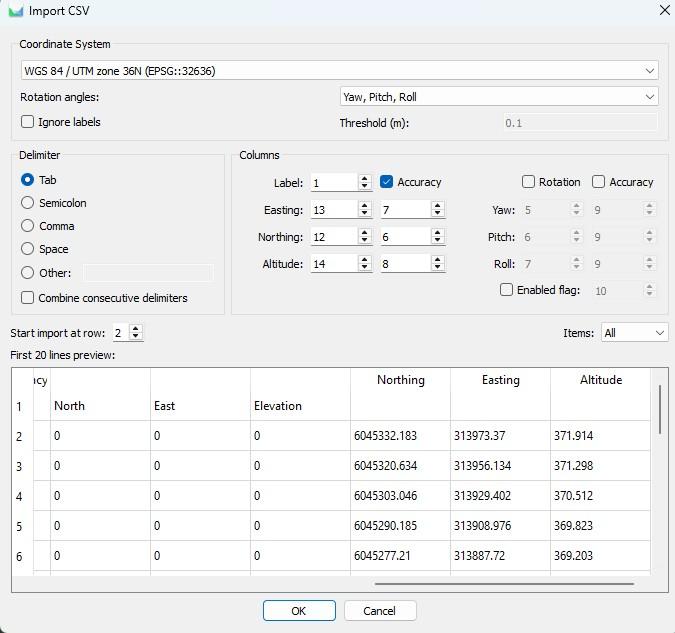](https://knowledge.topodrone.com/uploads/images/gallery/2025-02/88.jpg) - Perform control point measurements on at least 6-9 images. [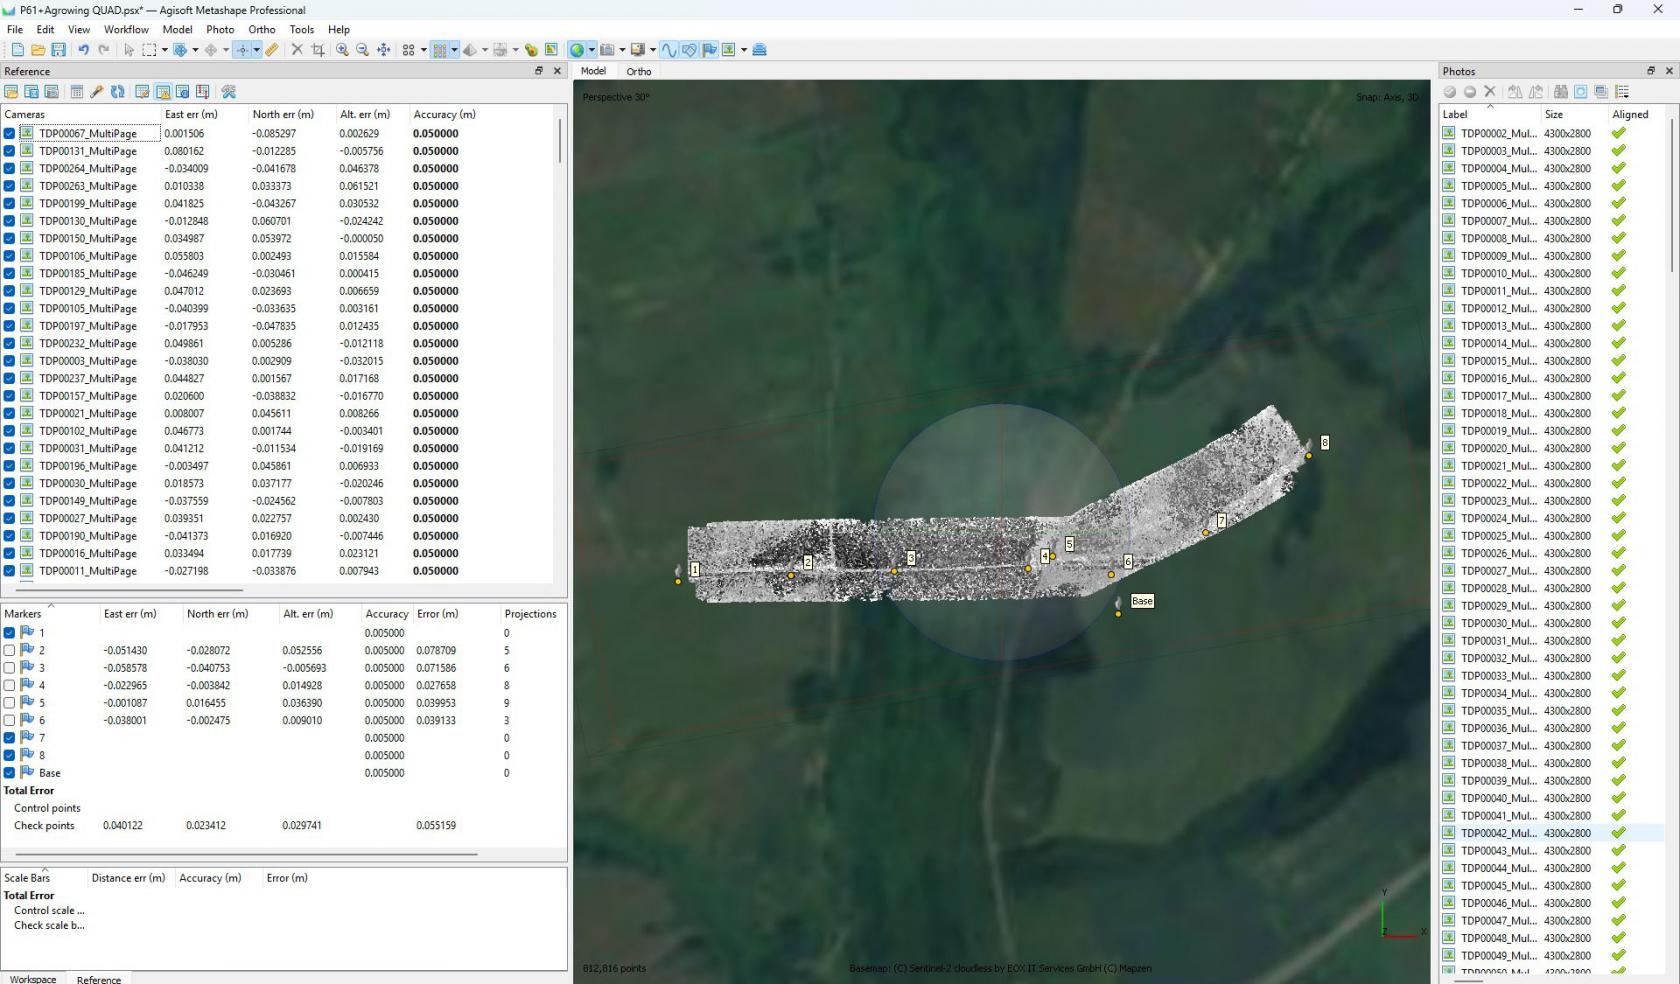](https://knowledge.topodrone.com/uploads/images/gallery/2025-02/8000.jpg)Adjust the focal length if necessary.
If the measurement accuracy meets the specified criteria, proceed to point cloud creation. Otherwise, analyze all steps of the process, from data collection to data processing, to identify and eliminate possible errors.
7\. Construct a dense point cloud and digital elevation model. 8\. Compute the required index information. - In the toolbar, use the “Set Raster Transform” button; [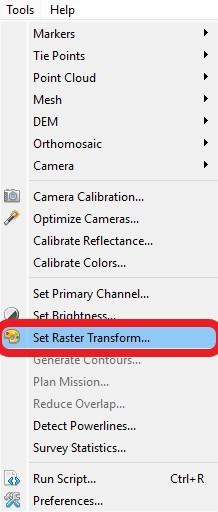](https://knowledge.topodrone.com/uploads/images/gallery/2025-02/882.jpg) - In the raster calculator, enter the formula that will calculate your index; [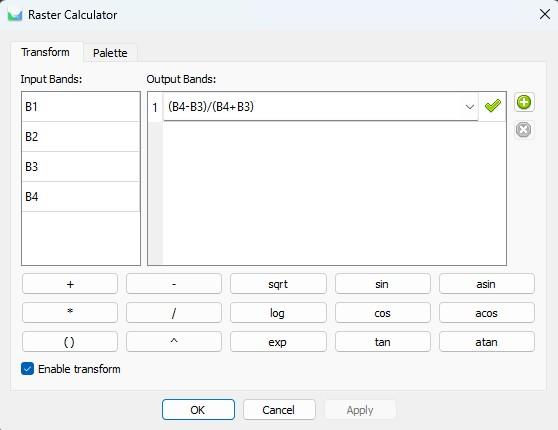](https://knowledge.topodrone.com/uploads/images/gallery/2025-02/883.jpg) - Go to the “Palette” tab, set the desired range, select the appropriate palette and click “OK”. [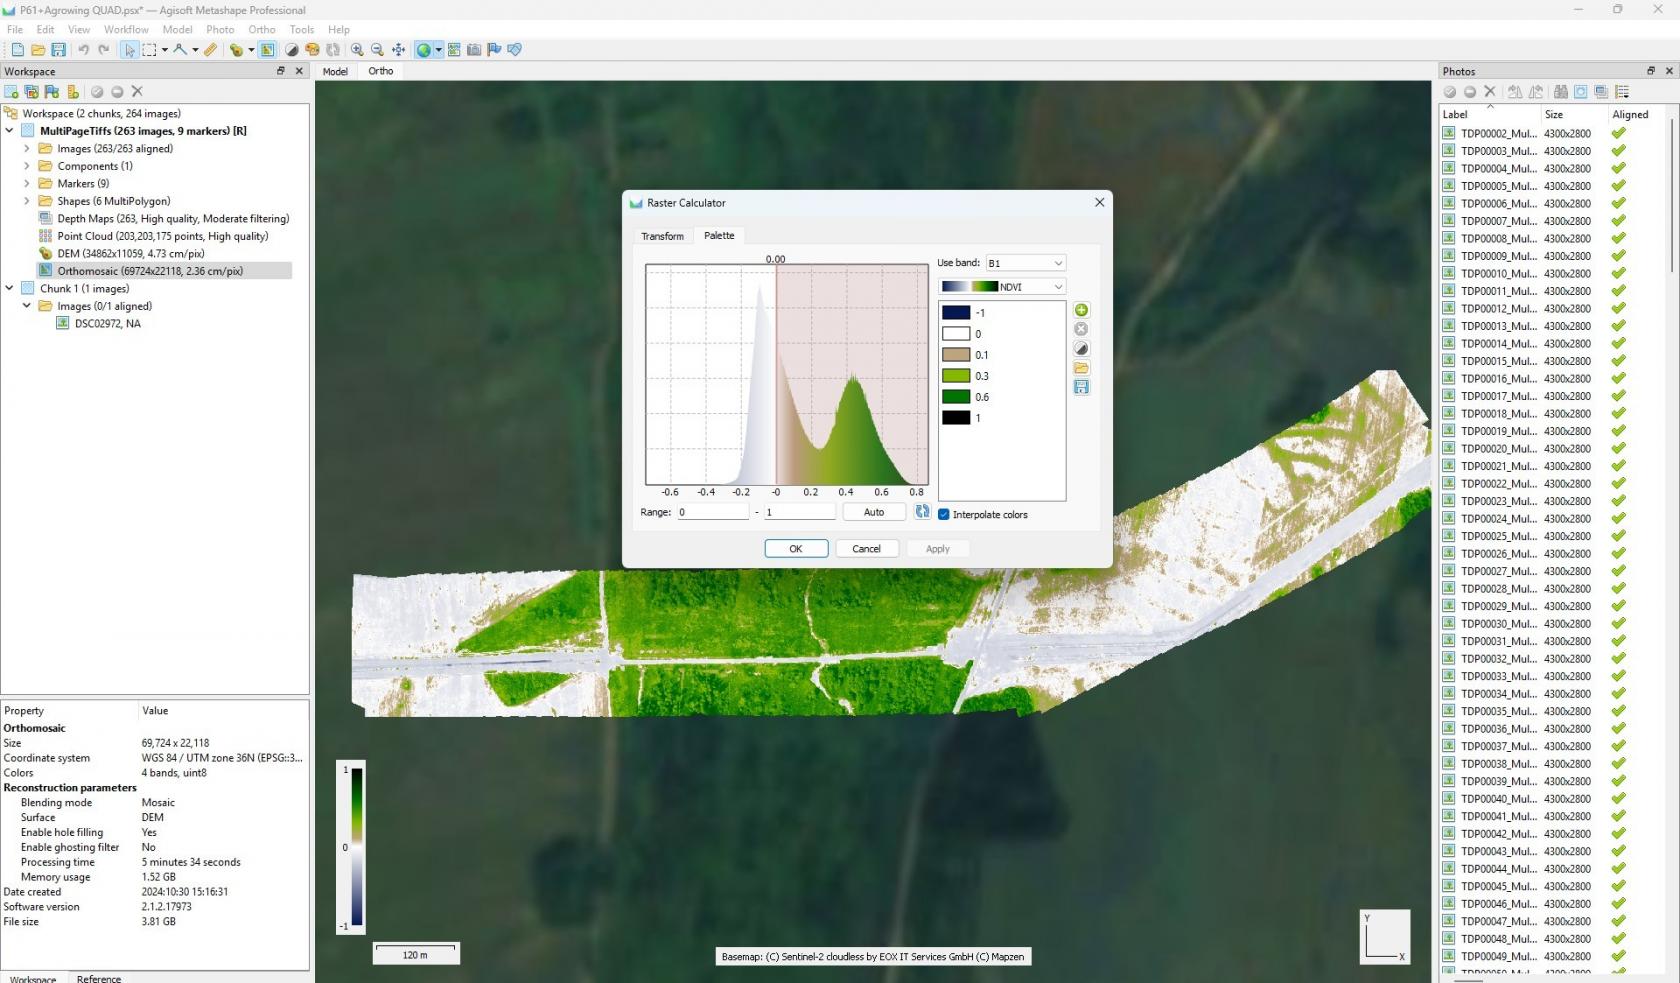](https://knowledge.topodrone.com/uploads/images/gallery/2025-02/1iN77788.jpg) 9\. To export an orthomosaic, follow the steps below: - Select “File” - “Export” - “Export Orthomosaic” [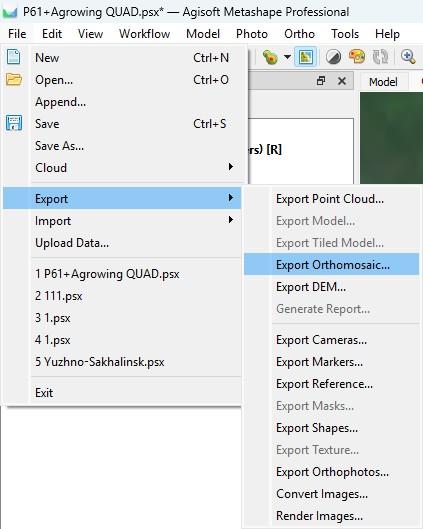](https://knowledge.topodrone.com/uploads/images/gallery/2025-02/777888.jpg) - Select the path and file name for saving the orthomosaic; - Configure export settings following the recommendations on the screenshot. If necessary, divide the orthomosaic into blocks for convenient further use. [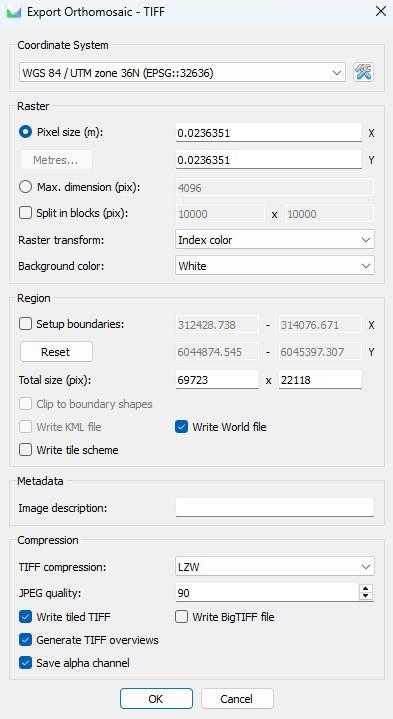](https://knowledge.topodrone.com/uploads/images/gallery/2025-02/7333.jpg) This completes the processing. All necessary materials can be exported in the same way as written in point 9.