TOPODRONE LiDAR to backpack installation
To install the TOPODRONE LiDAR on the backpack, you need the following components included in the package:

|
1. TOPODRONE LiDAR - 1 pc. 2. TOPODRONE Backpack - 1 pc. 3. Backpack LiDAR mount with antenna cable - 1 pc. 4. LiDAR mount spacer - 1 pc. 5. GNSS Antenna - 1 pc. 6. Power Bank - 1 pc. 7. LEMO 6 PIN - USB Type-C power cable - 1 pc. 8. Pole (30 cm) - 1 pc. |
9. Screw M3x8 - 4 pc. 10. Screw М4х8 - 1 pc. 11. 12. 13. 14. 15. |
ПриIt выполненииis всехstrongly дальнейшихrecommended шаговto настоятельноuse рекомендуетсяa использоватьprotective защитныйsoft мягкийcover чехолfor лазерного сканераthe TOPODRONE дляlaser избежанияscanner рискаto поврежденияavoid линзыthe лазерногоrisk сканирования!of Наdamaging фотографияхthe дляlaser лучшейscanning наглядности,lens! наFor представленныхbetter фотографияхclarity, in лазерныйthe сканерphotos shown, the TOPODRONE представленlaser безscanner чехла.is shown without the case.
ДляTo установкиinstall лазерного сканераthe TOPODRONE наlaser рюкзакscanner необходимоon выполнитьthe следующиеbackpack, действия:follow the steps below:
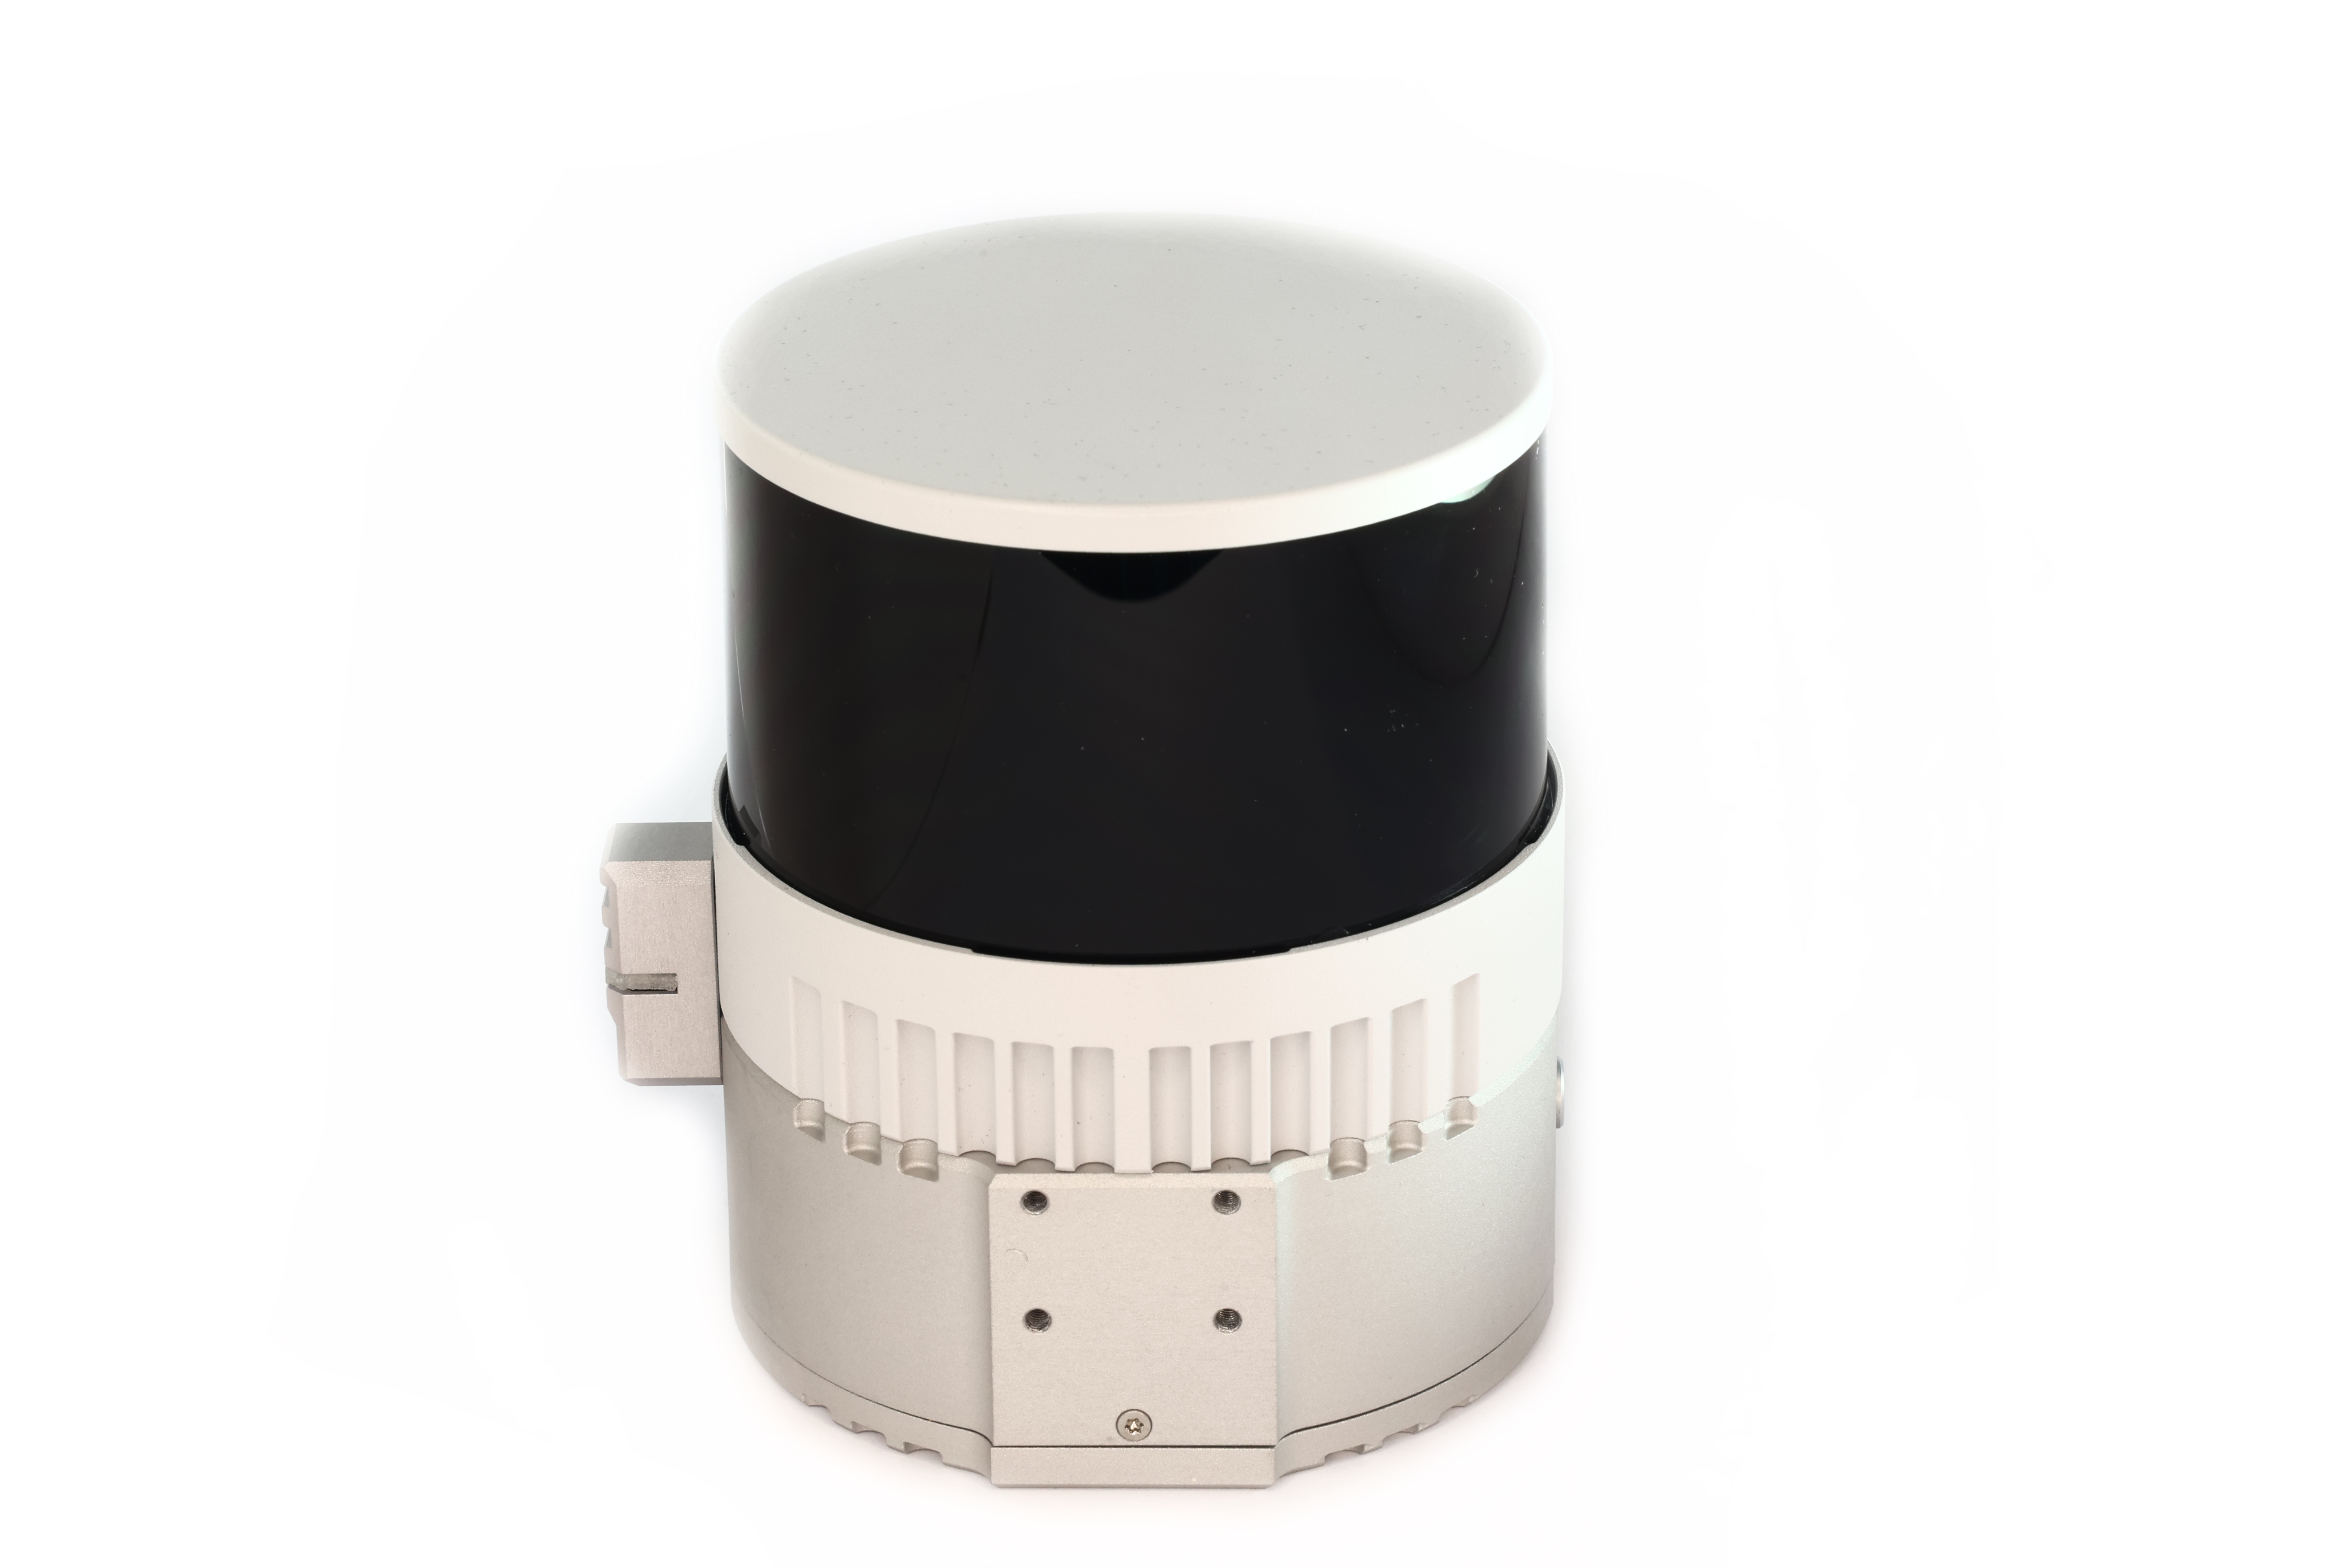
1. УстановитьPlace лазерный сканерthe TOPODRONE laser scanner (1) наon ровнуюa поверхностьflat какsurface показаноas наshown фото.in
the photo.
2. ПриUsing помощи отвёрткиa Hex М2.M2.5 screwdriver (13) и винтовand M3x8 screws (9), установитьinstall адаптерthe крепленияlaser лазерногоscanner сканераmount adapter (4) какas показаноshown наin фото.
the photo.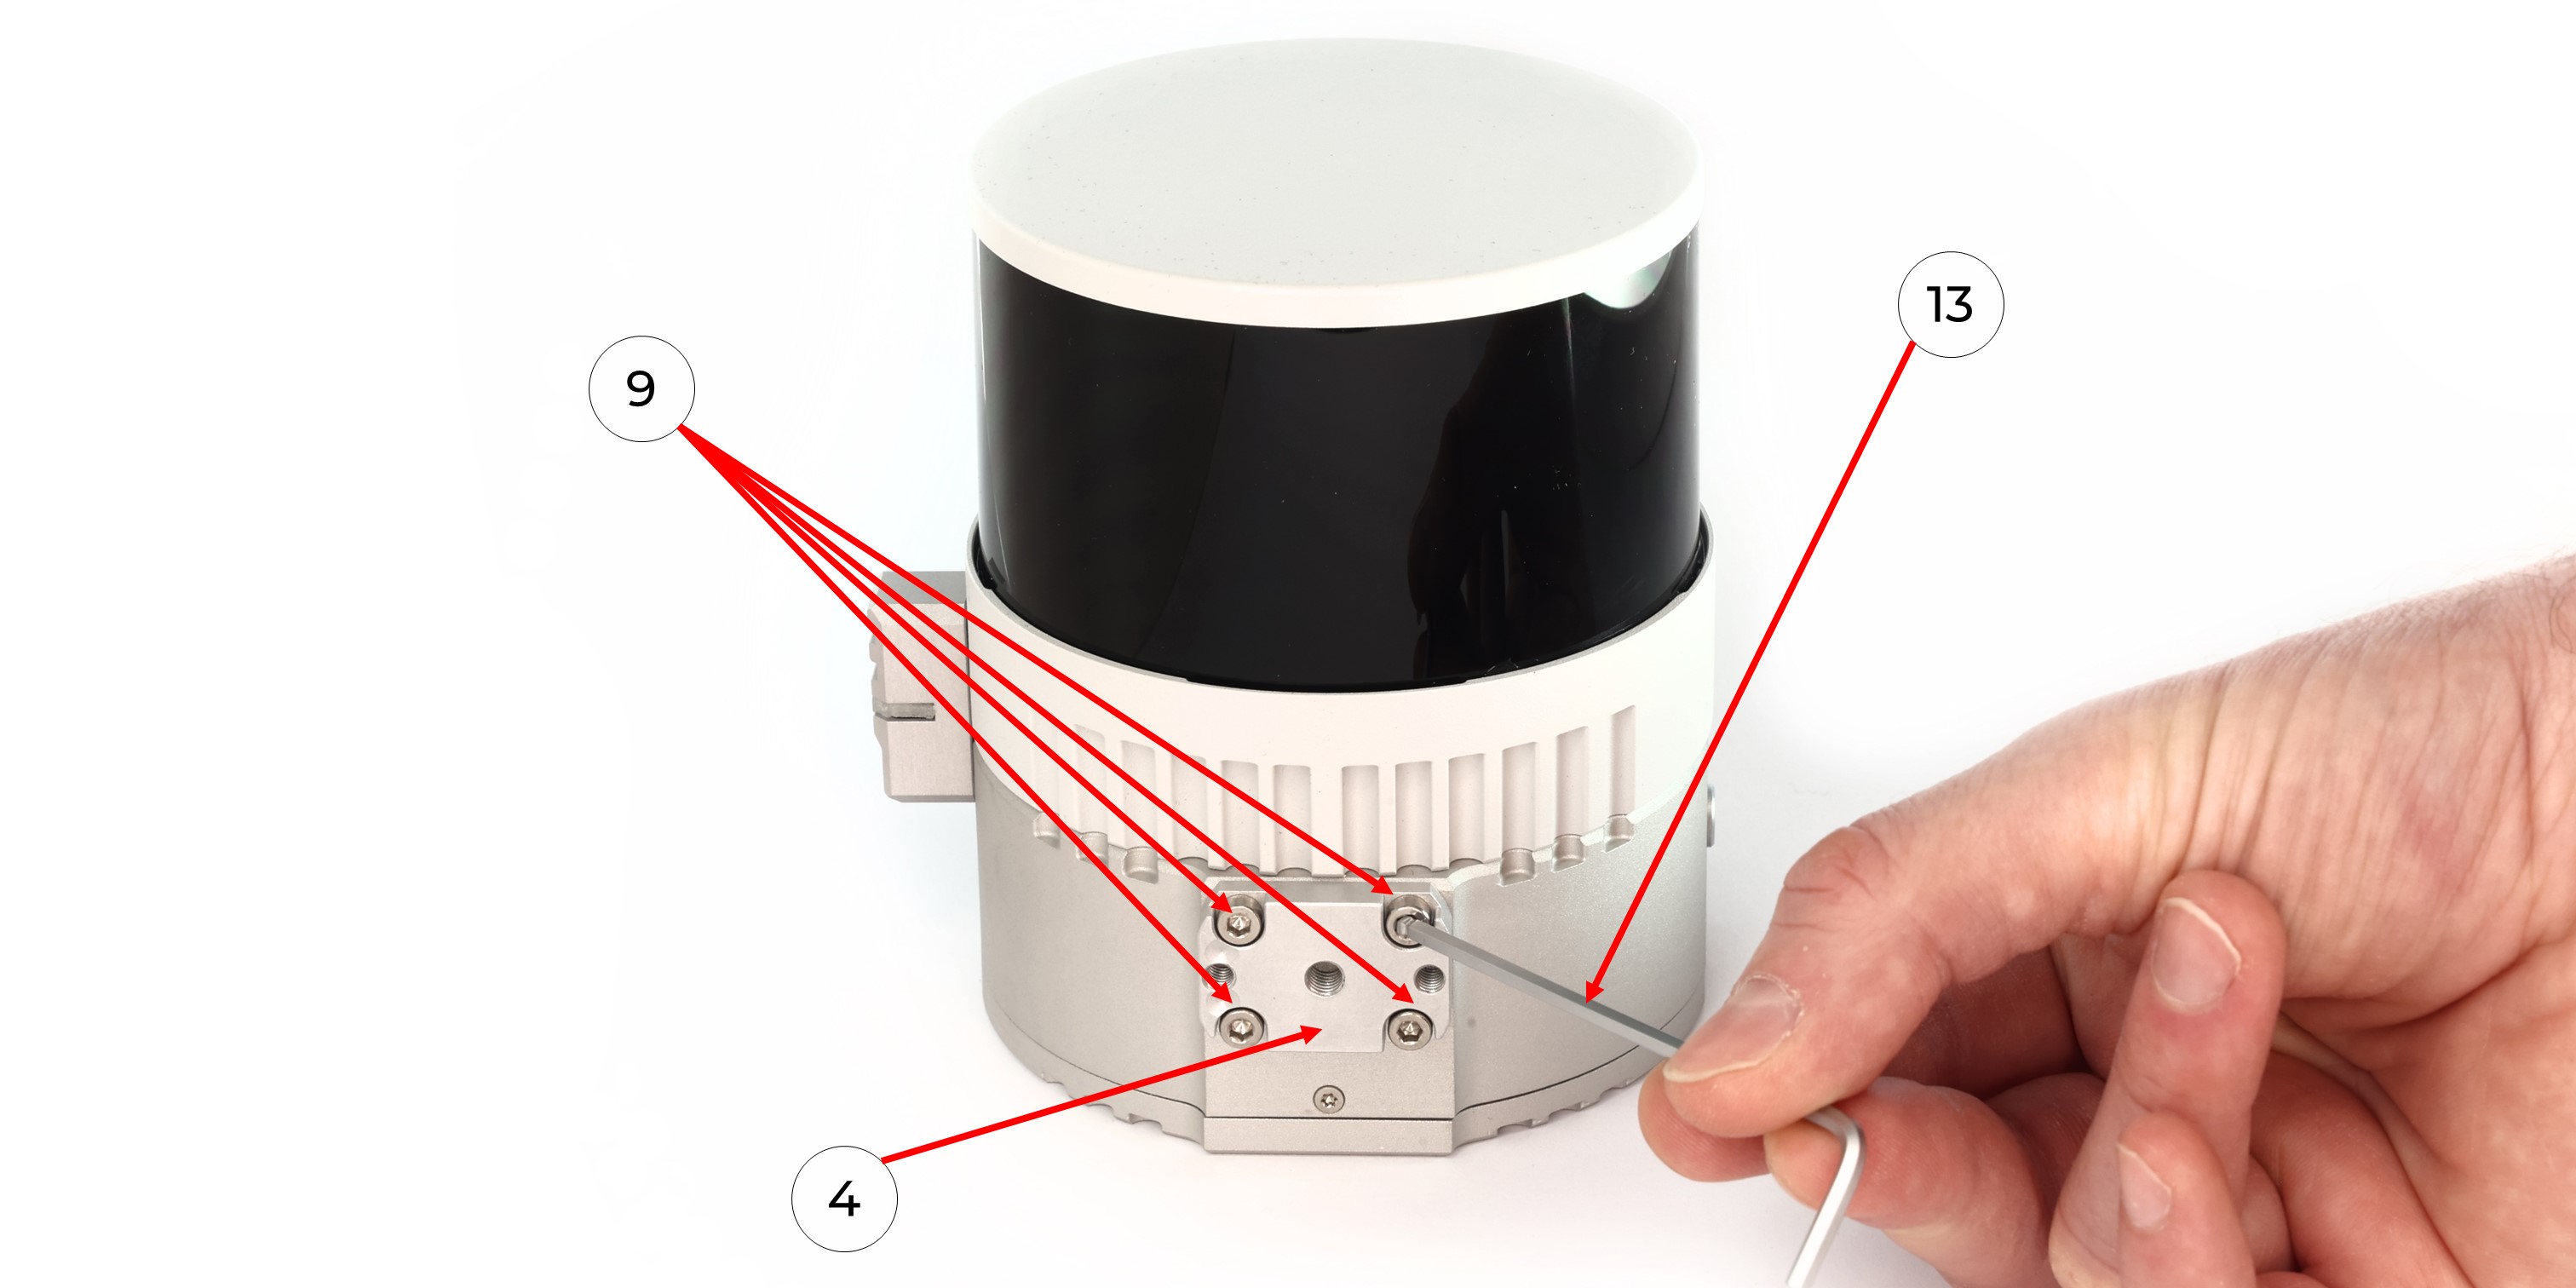
3. ВручнуюManually завинтитьscrew ГНССthe антеннуGNSS antenna (5) наonto Креплениеthe кBackpack рюкзакуMount cwith антеннымantenna кабелемcable (3) приusing помощи винтаa 5/8"8“ - 11 UNC x 3/4"4” screw (12) какas показаноshown наin фото.the
photo.
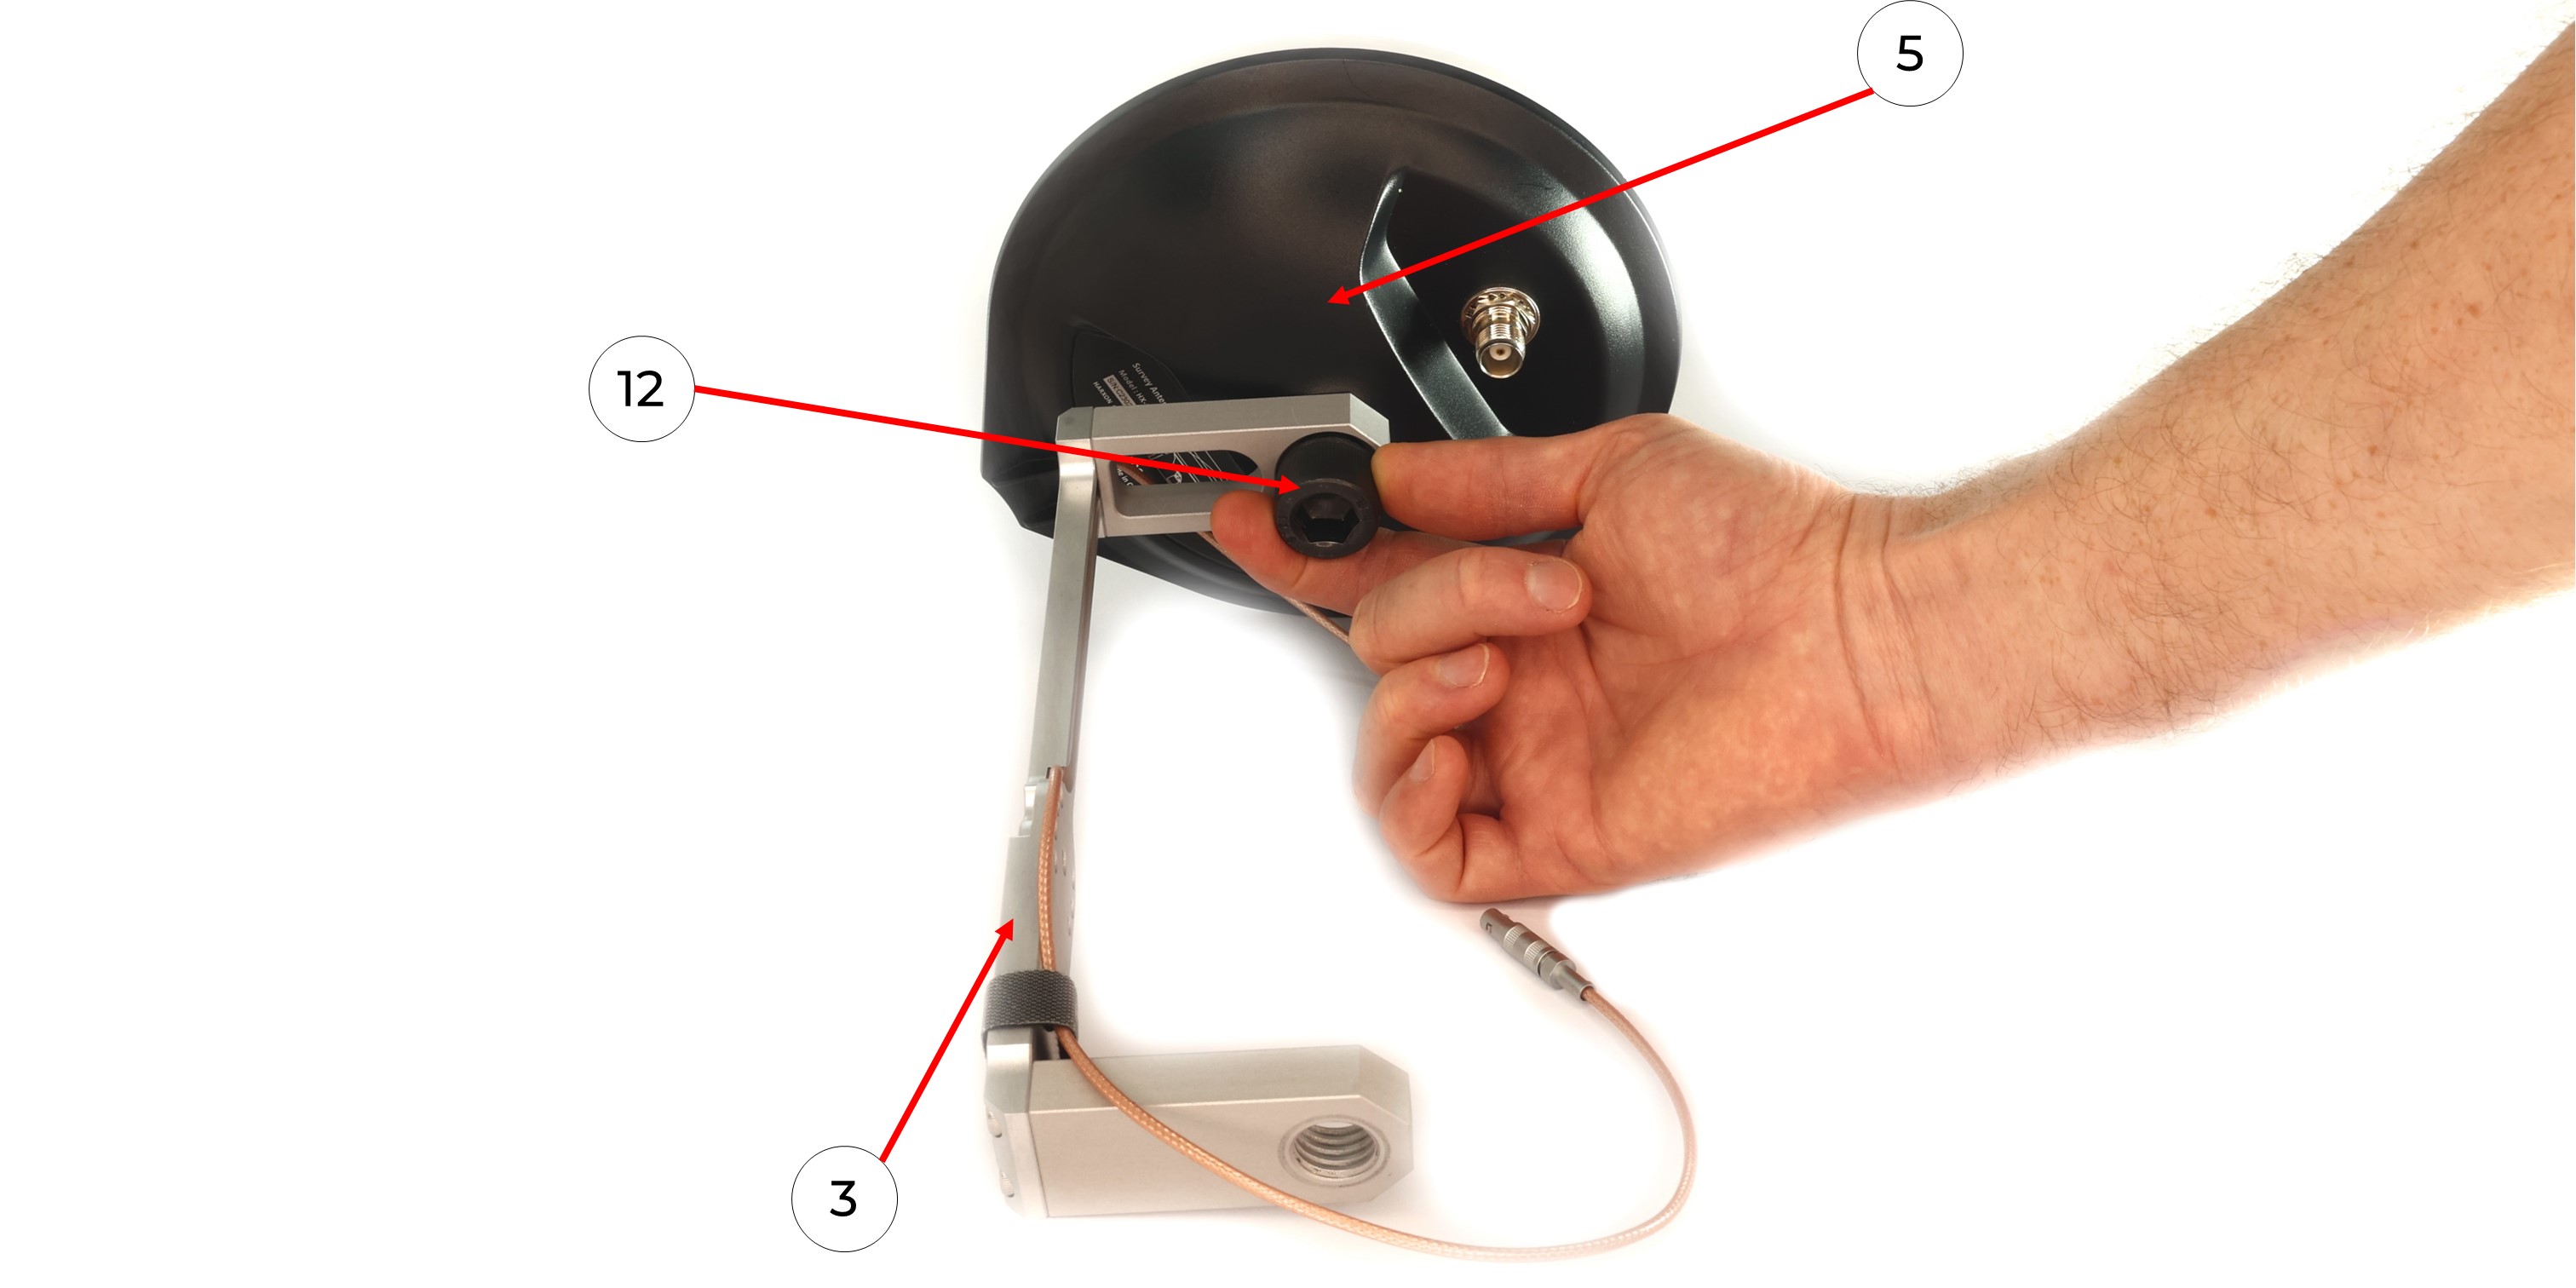
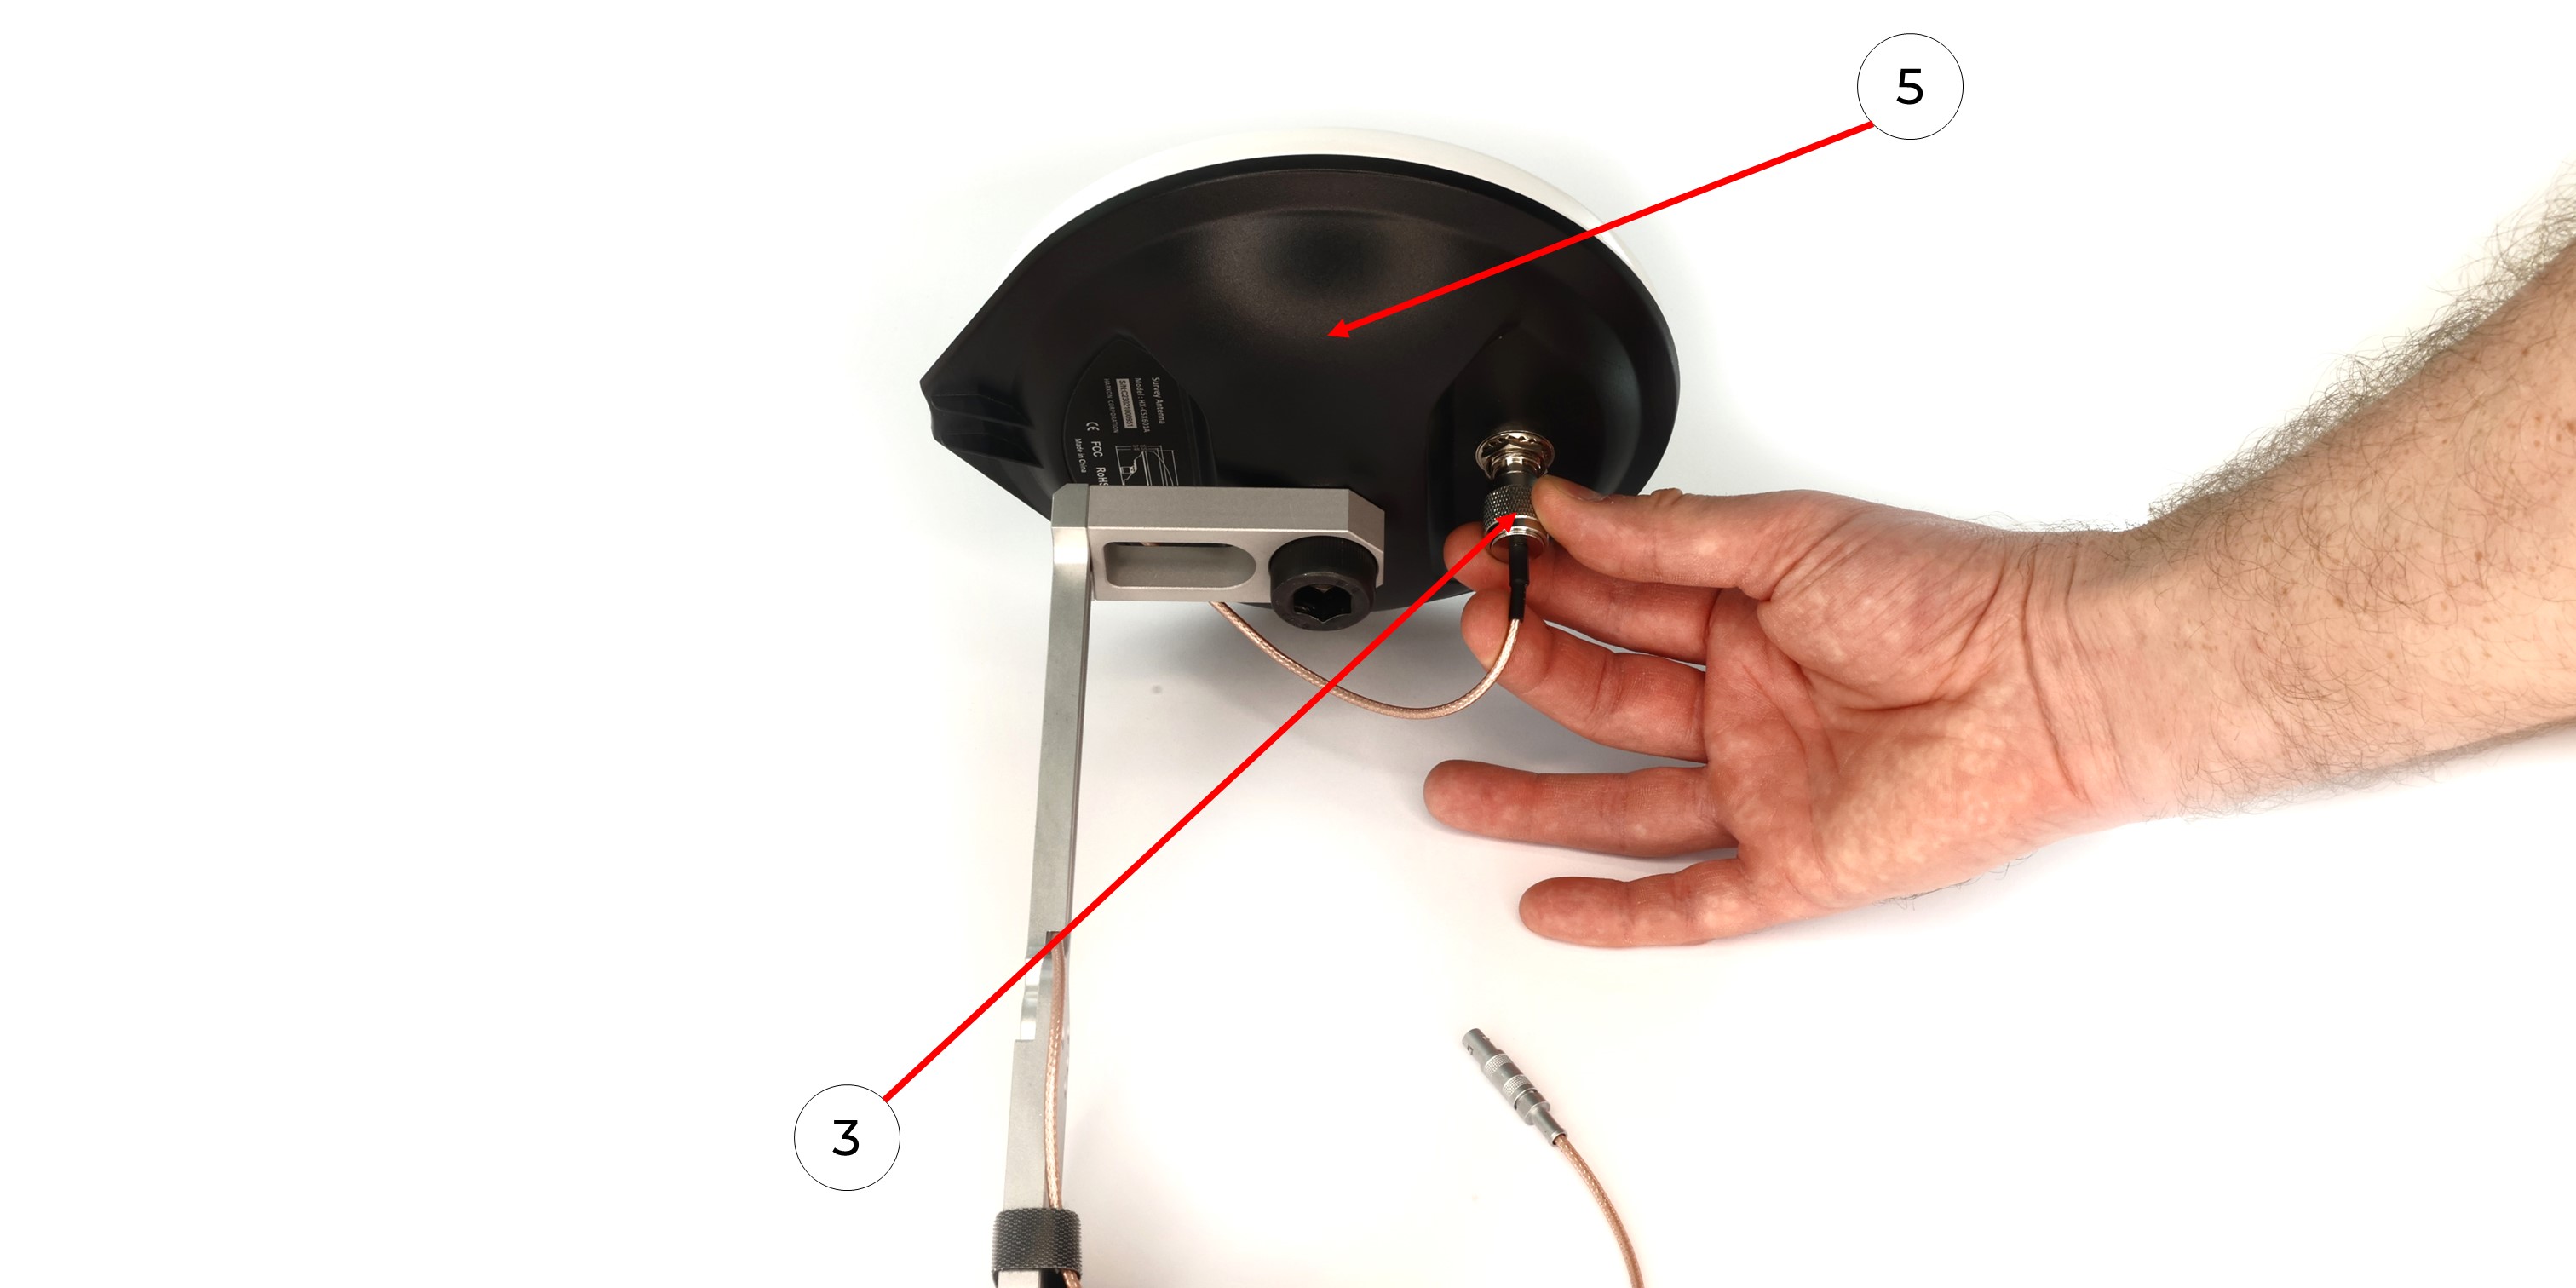
4. ПодсоединитьConnect антенныйthe кабельantenna cable (3) кto ГНССthe антеннеGNSS antenna (5), избегаяavoiding перегиба,bends какas показаноshown наin фото.
the photo.
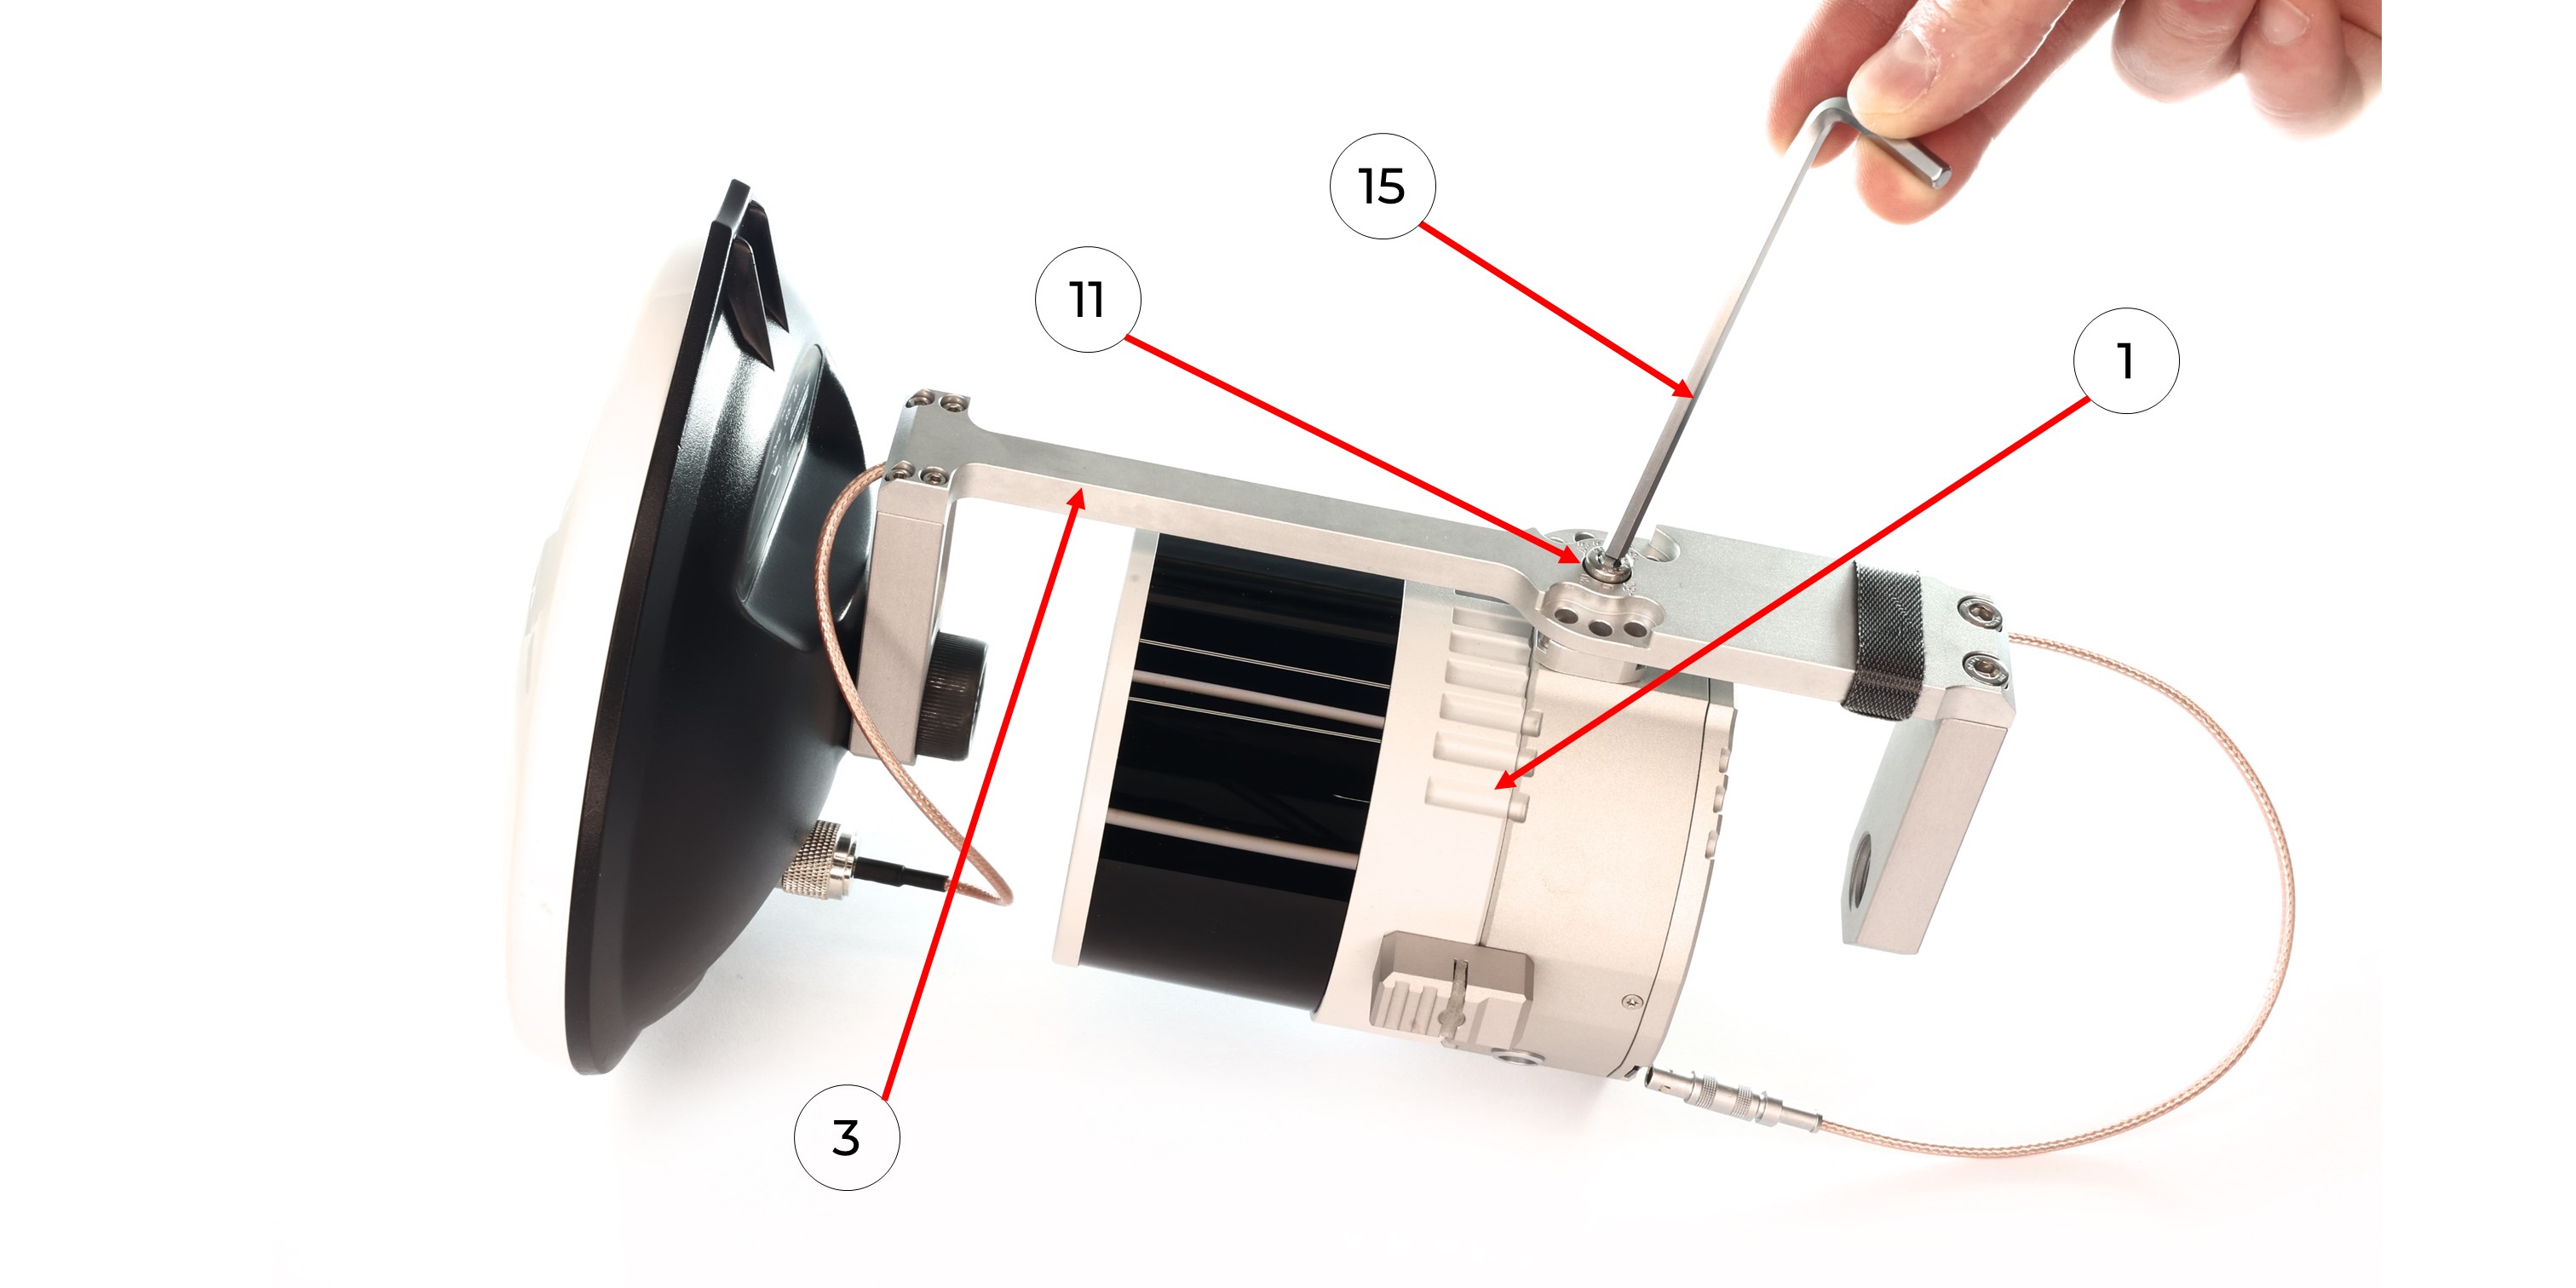
5. ПриUsing помощи отвёрткиa Hex 4 screwdriver (15) иand винтаan M5x8 screw (11), установитьmount лазерный сканерthe TOPODRONE кlaser крепёжнойscanner деталиto рюкзакаthe fastening part of the backpack (3), неwithout пережавpinching антенныйthe кабель.antenna
cable.
6. ВыставитьPosition лазерный сканерthe TOPODRONE наlaser крепленииscanner наon необходимыйthe уголmount иat зафиксироватьthe егоrequired винтомangle М4х8and fix it with the M4x8 screw (10) приusing помощи отвёрткиa Hex 3 screwdriver (14).

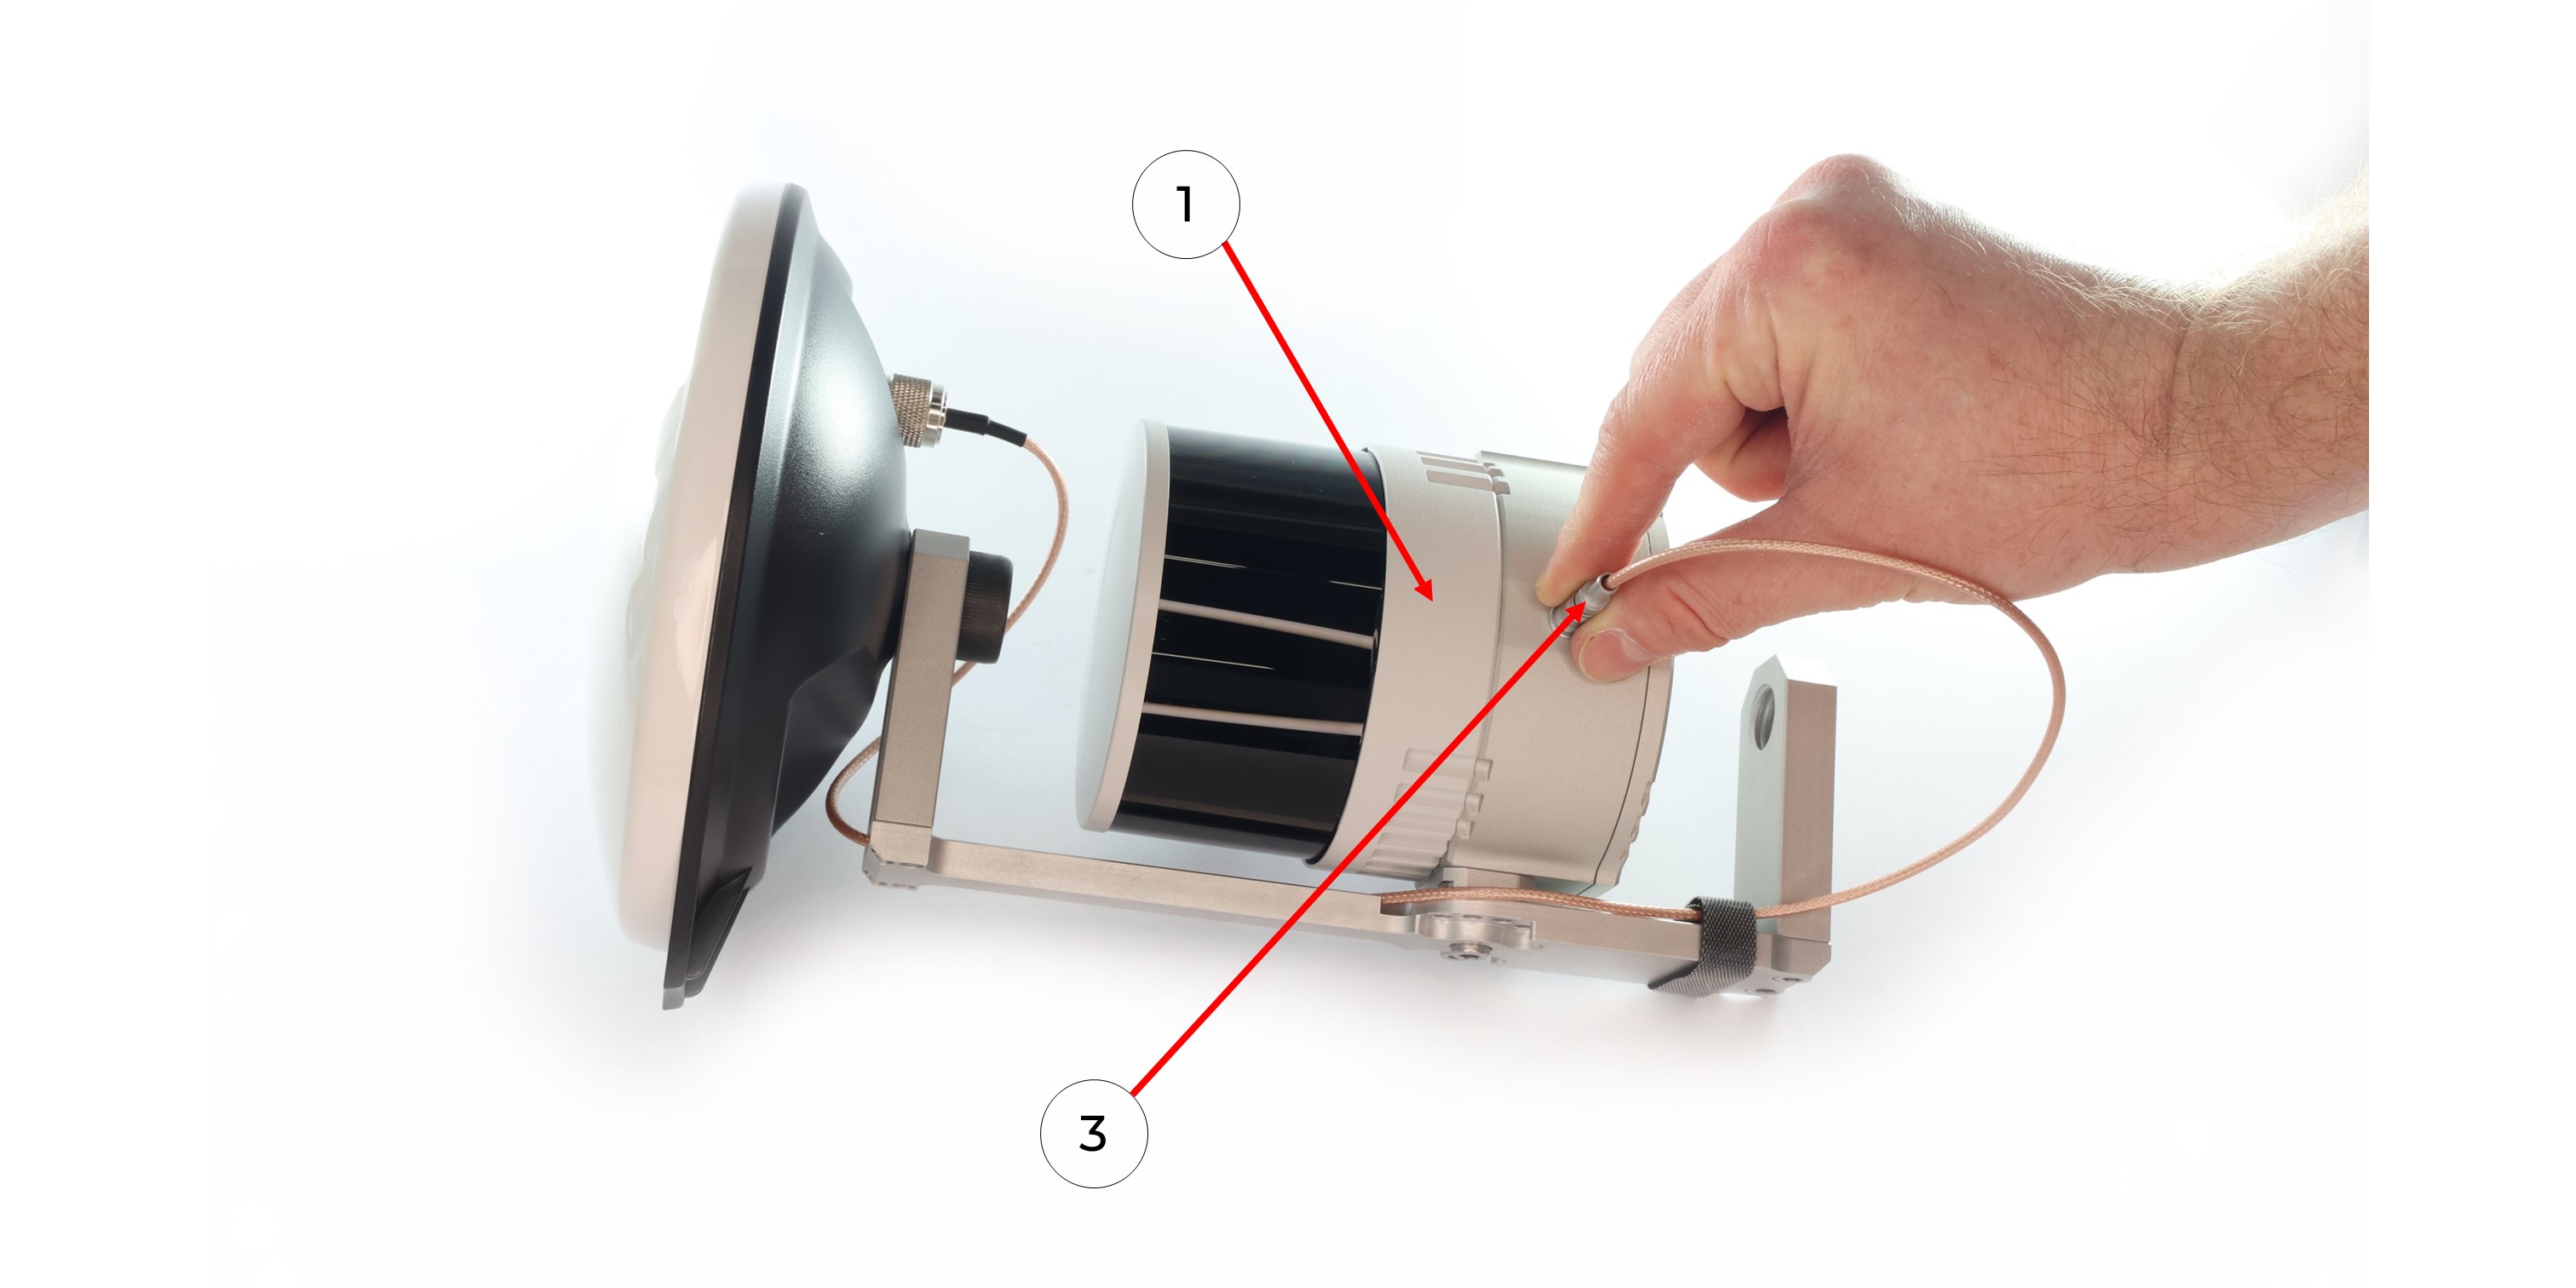
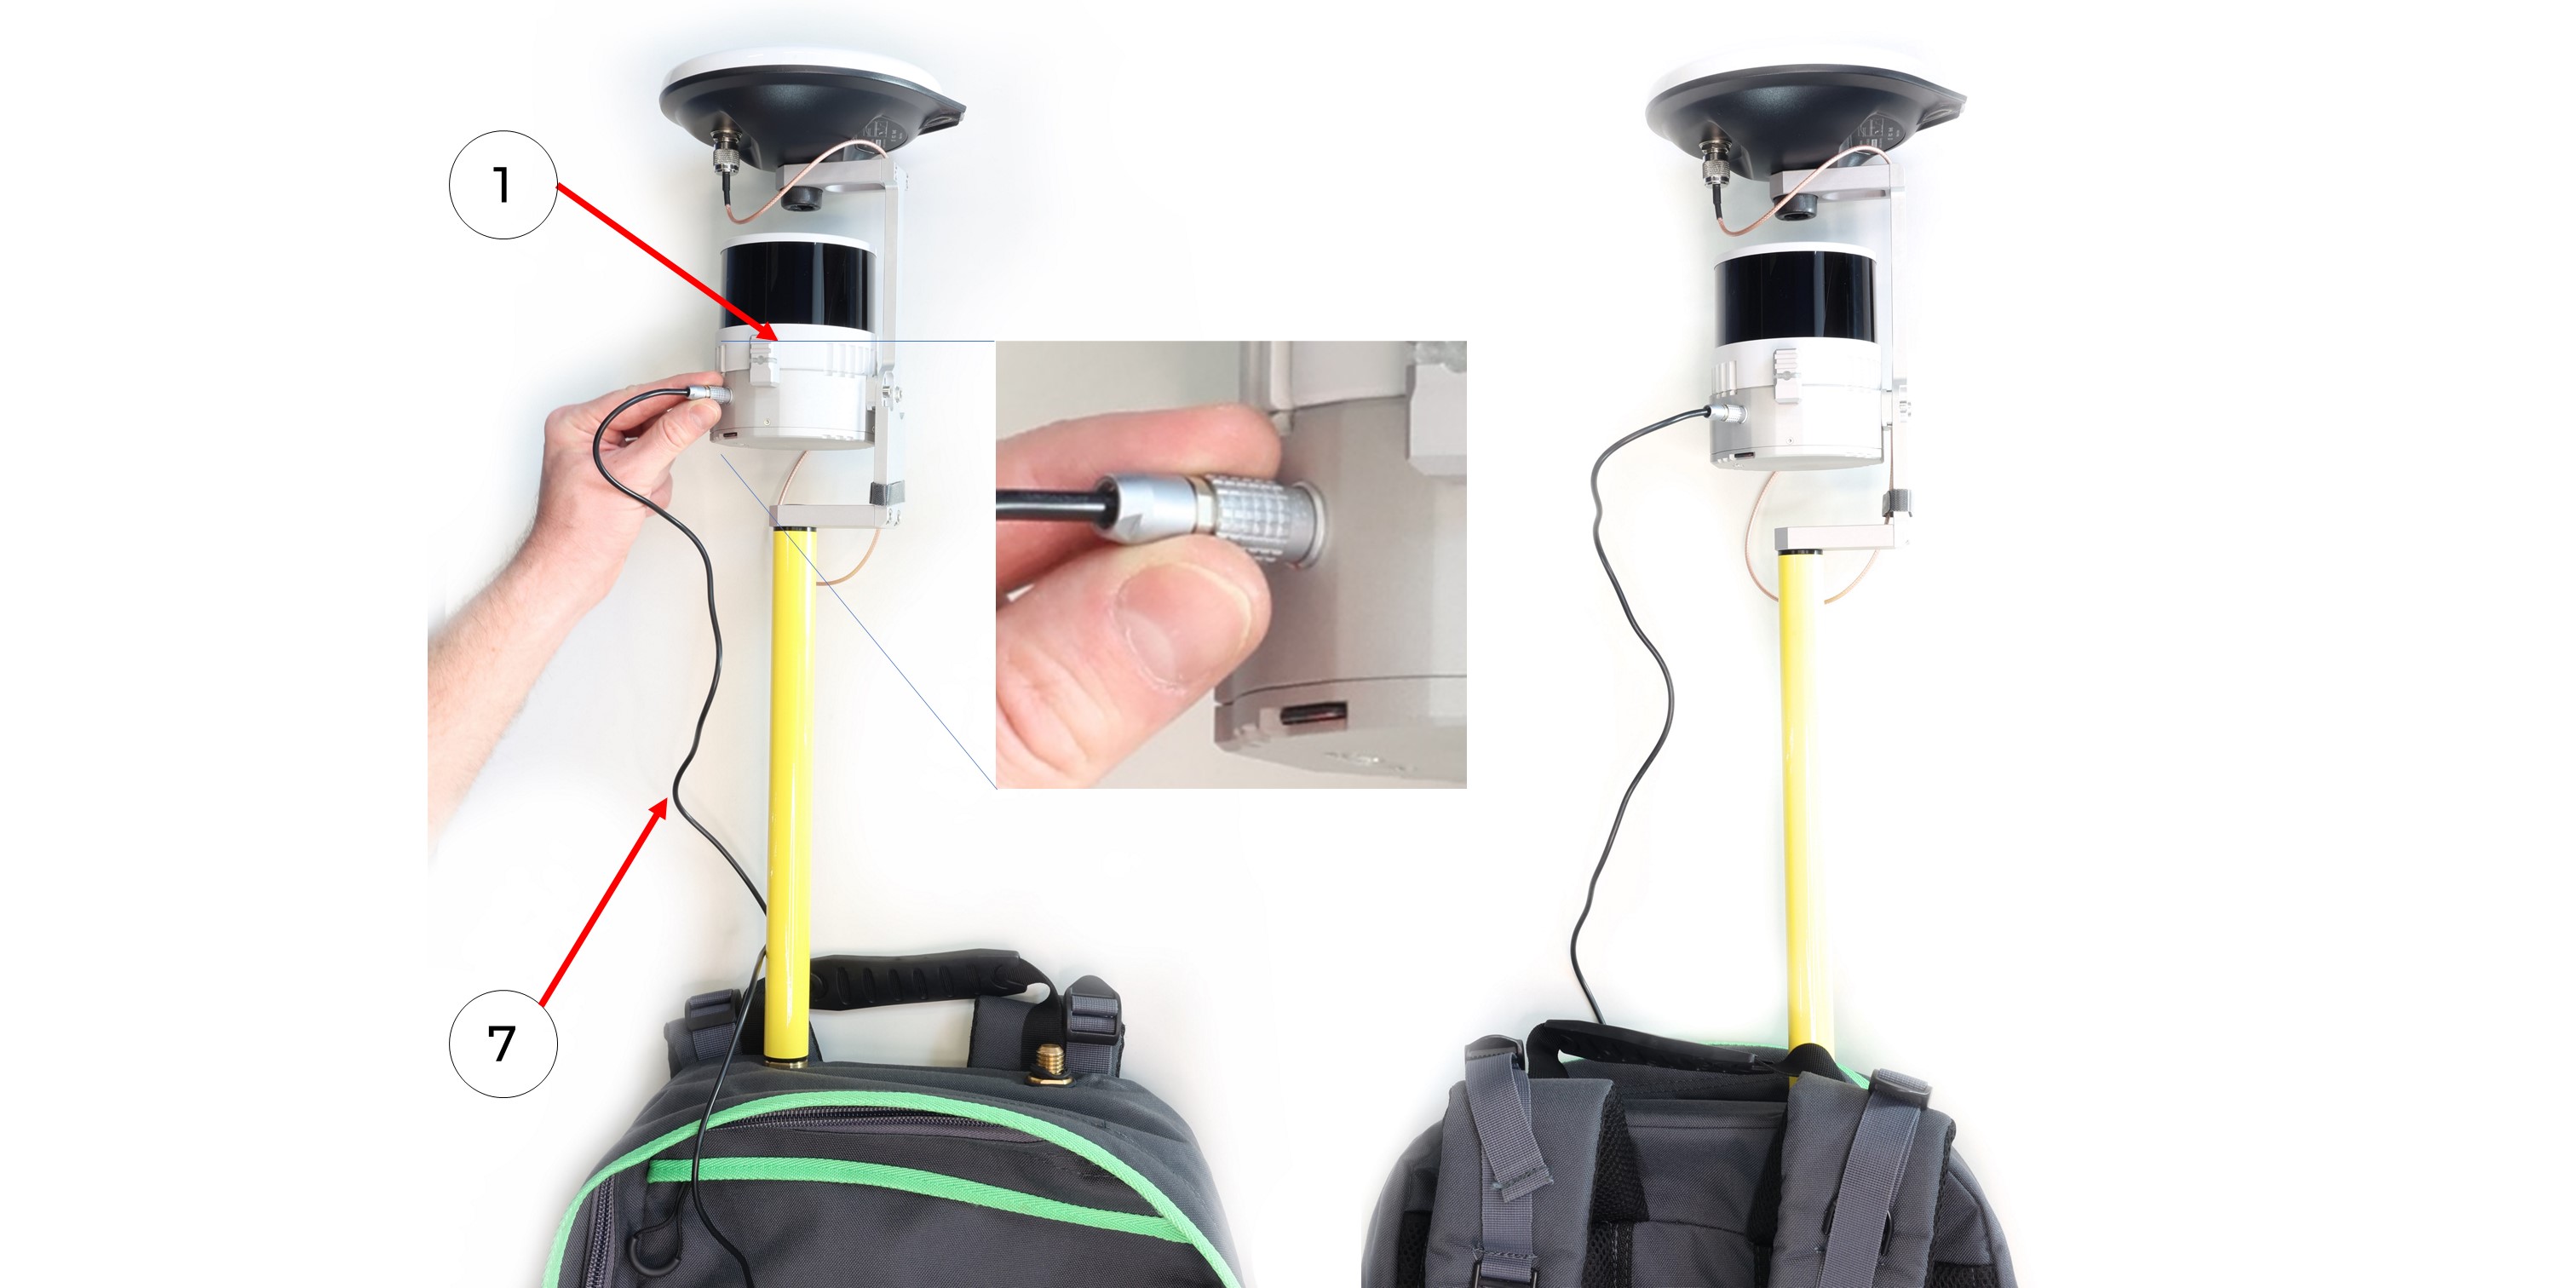
7. ПодключитьConnect антенныйthe разъёмantenna connector of the LEMO крепленияmount (3) кto лазероному сканеруthe TOPODRONE laser scanner (1)
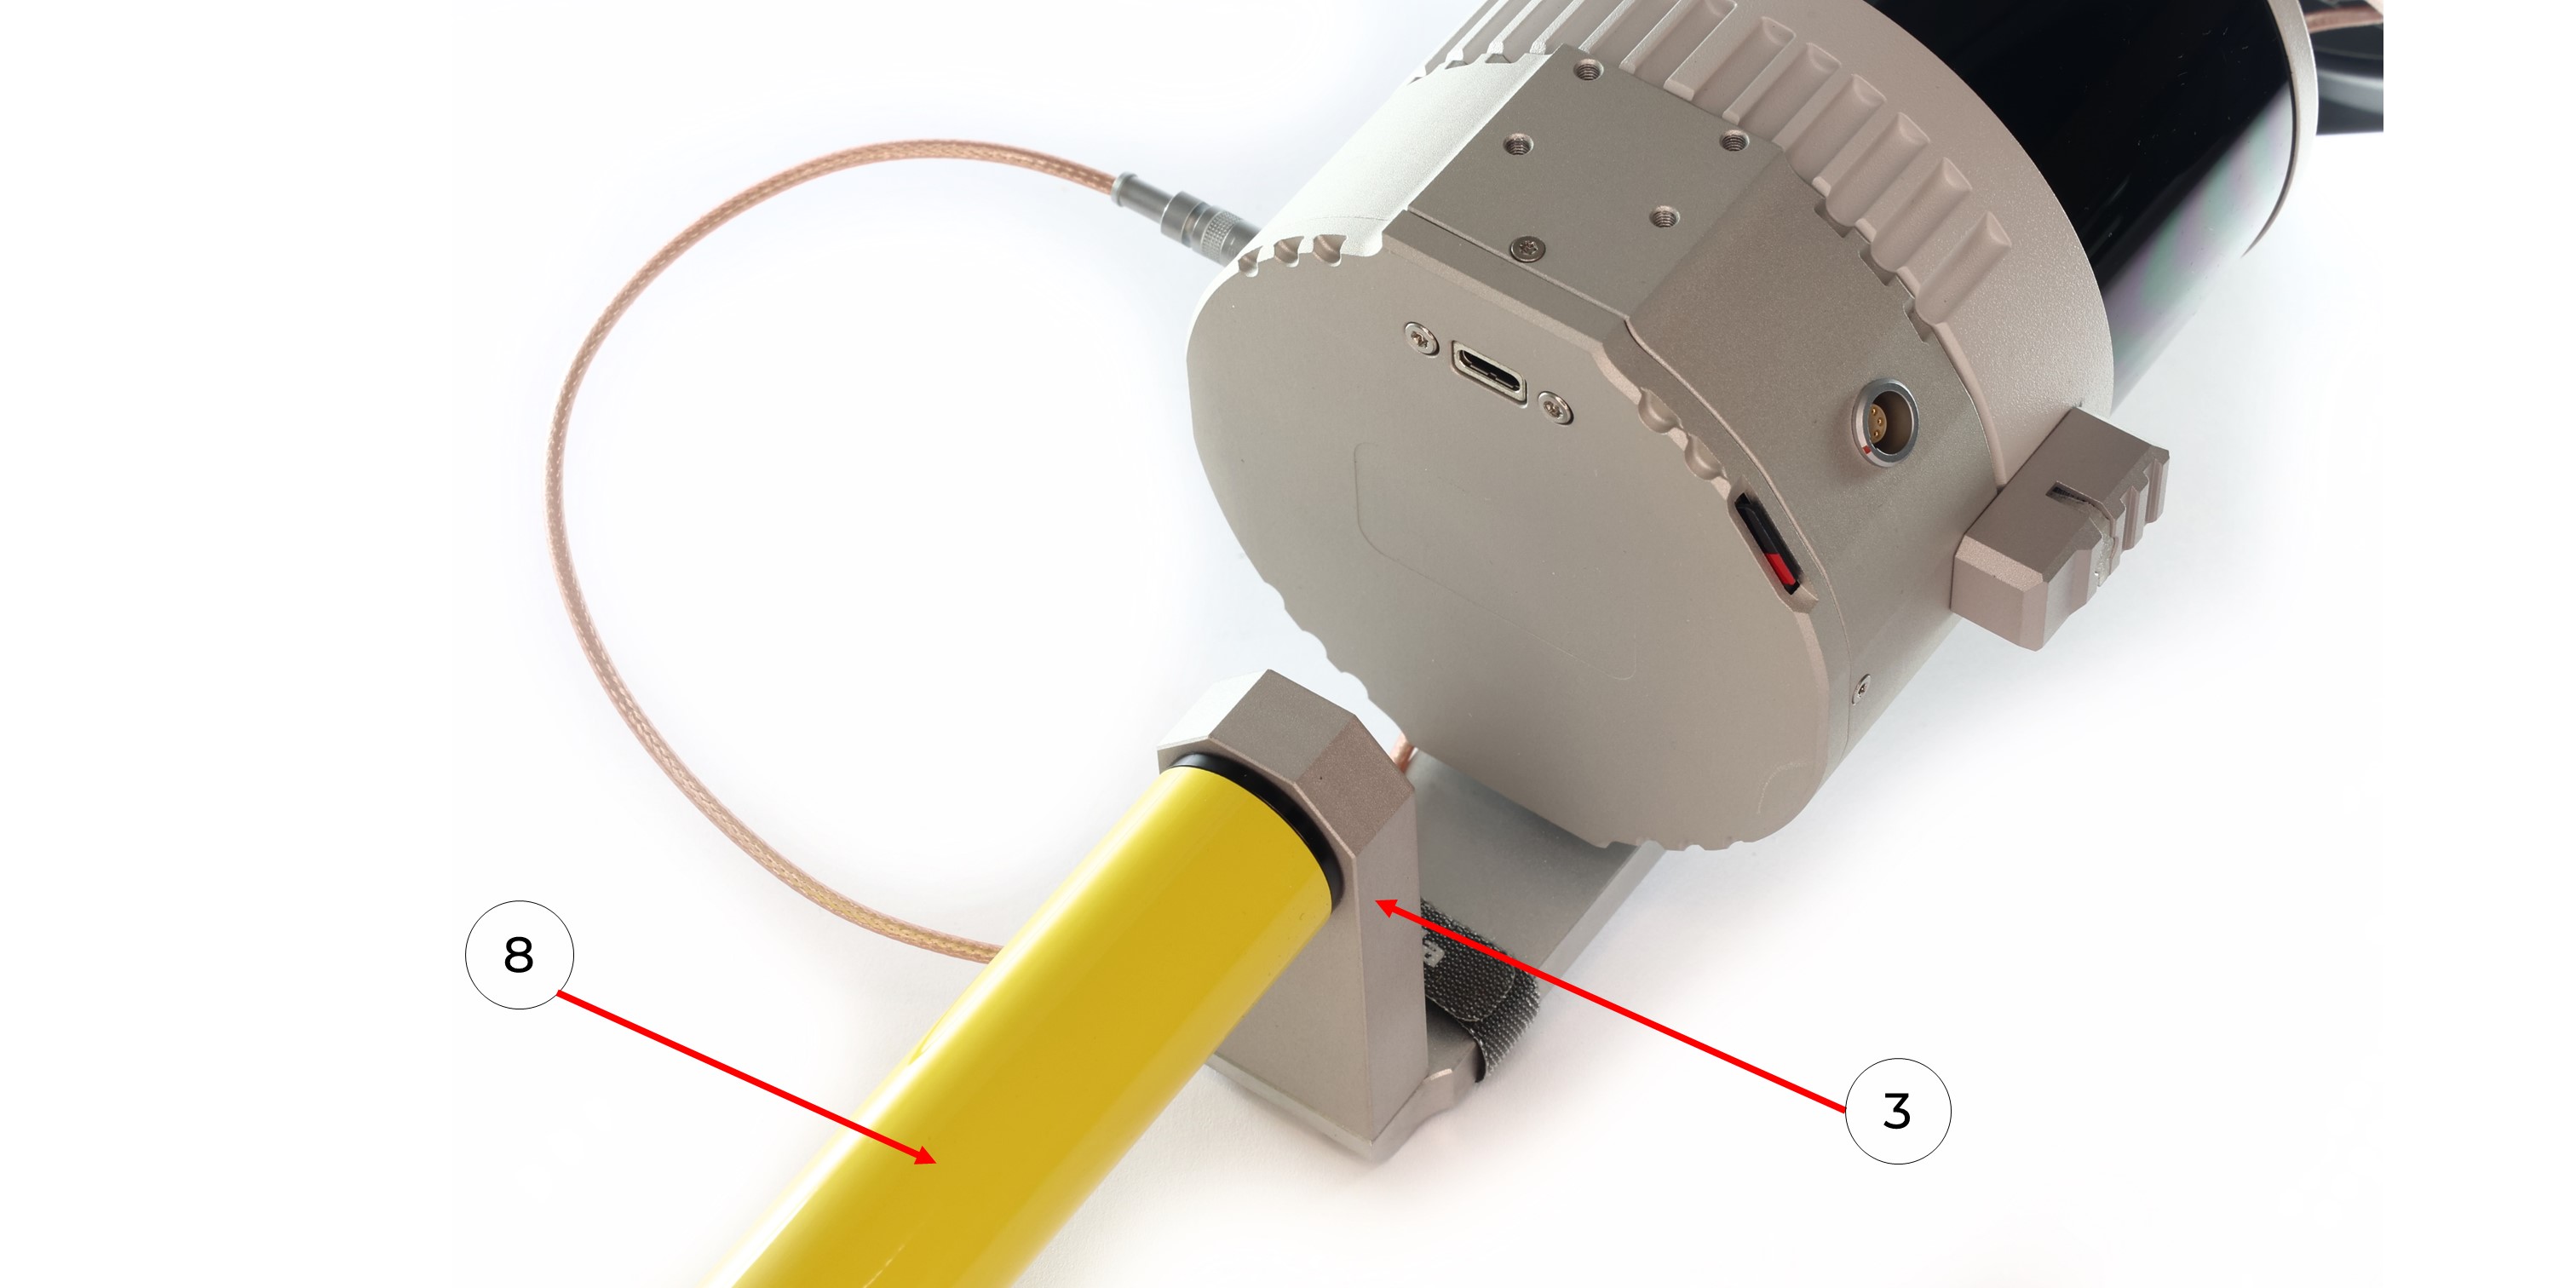
8. ПрикрутитьScrew вехуthe pole (8) кto креплениюthe кbackpack рюкзакуattachment (3).
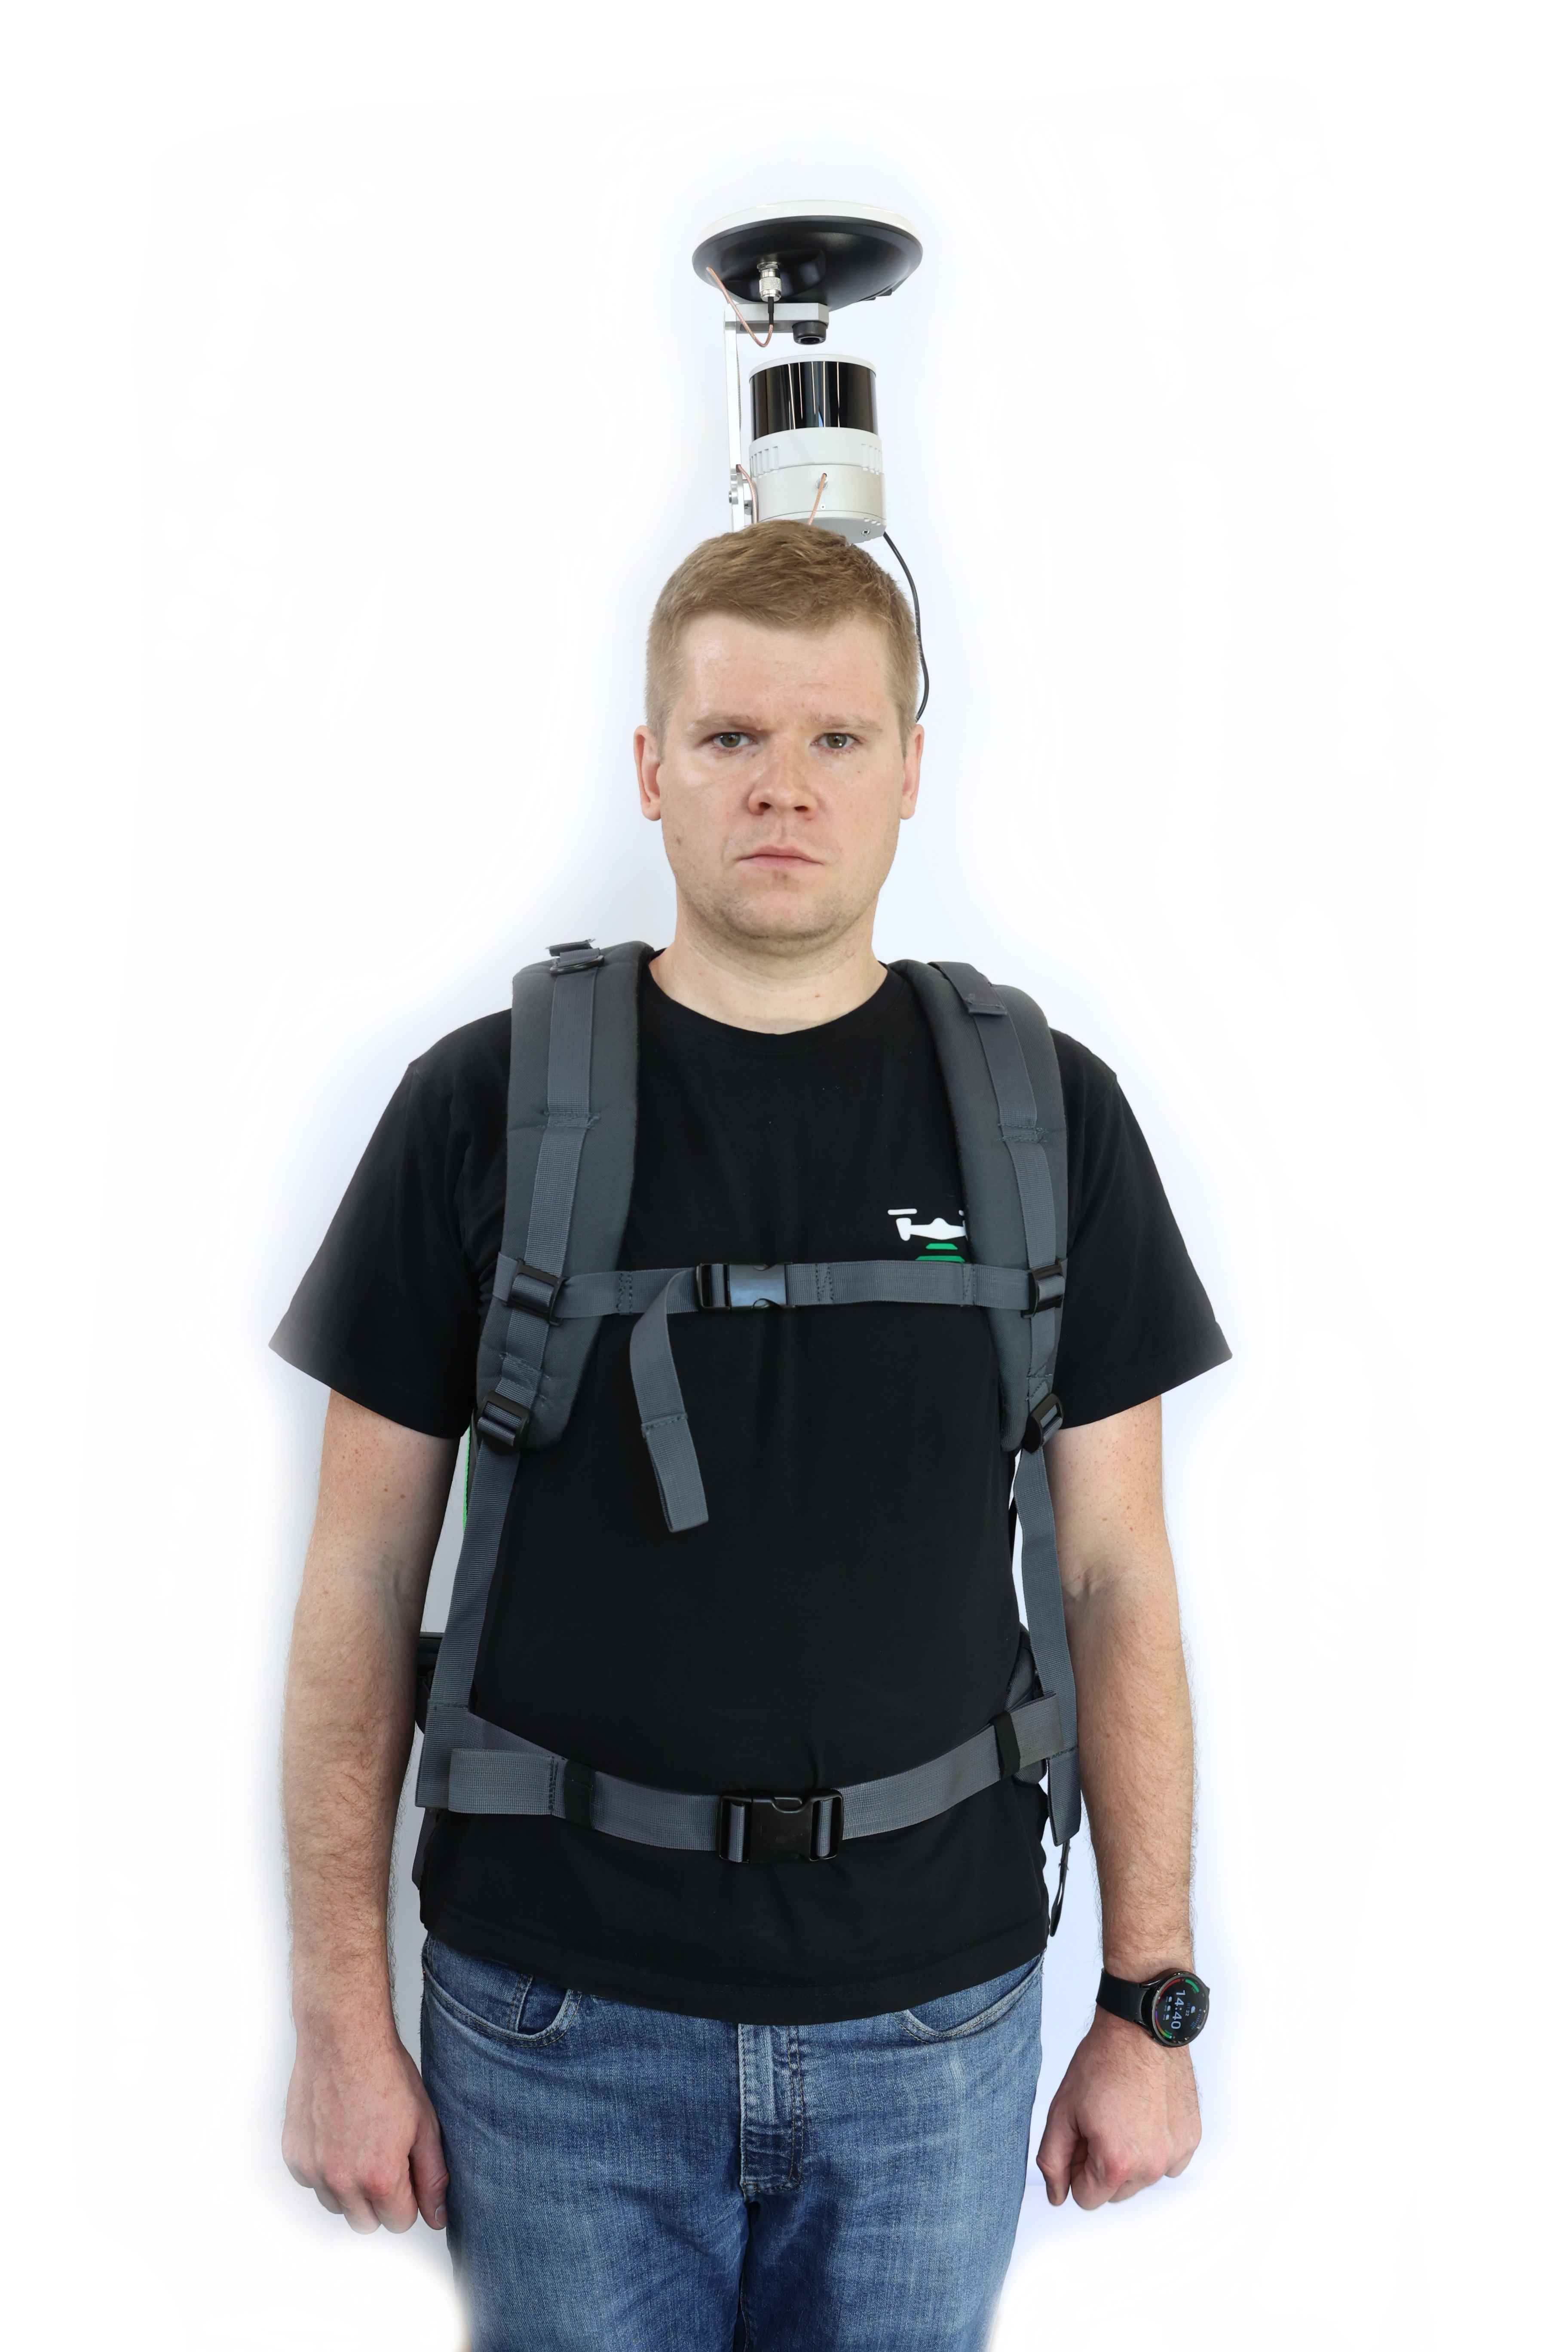
9. ПрикрутитьScrew вехуthe pole (8) кto рюкзакуthe backpack (2), какas показаноshown наin фото.the Светодиодphoto. лазерногоThe сканераLED of the TOPODRONE долженlaser располагатьсяscanner положениемshould назад.
be positioned backwards.

10. ПодключитьConnect кабель питанияthe LEMO 6 PIN -to USB Type-C power cable (7) кto лазерному сканеруthe TOPODRONE laser scanner (1)
.
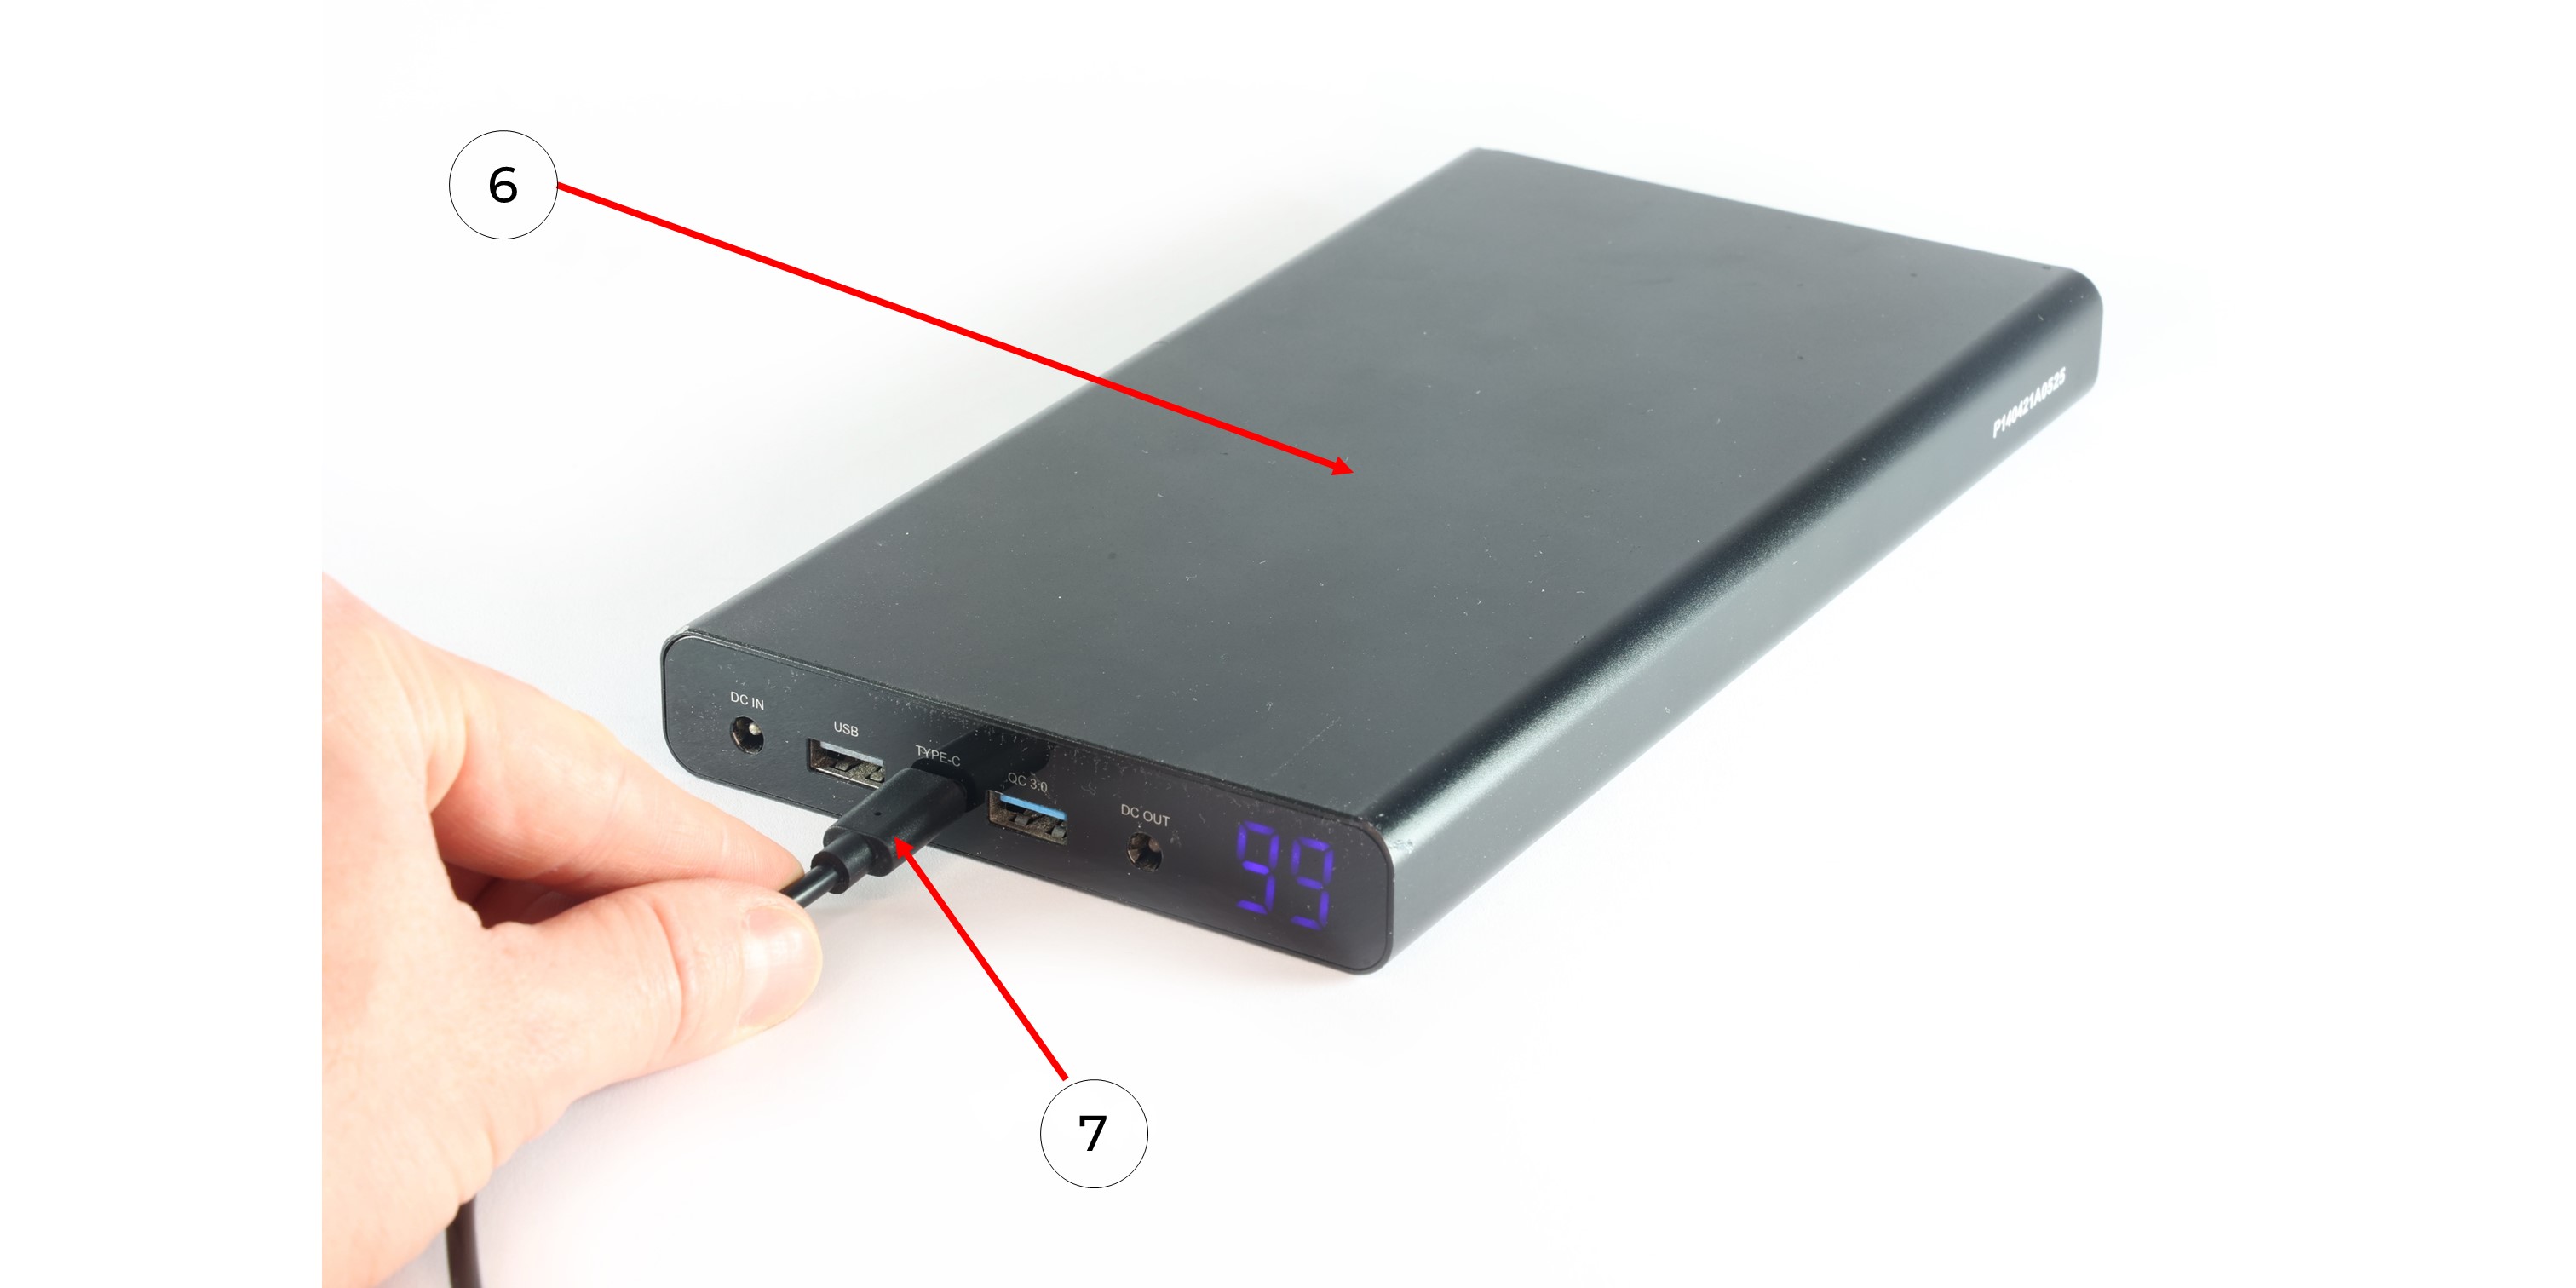
11. ПодсоединитьConnect кабель питанияthe LEMO 6 PIN -to USB Type-C power cable (7) кto the Power Bank (6) иand податьapply питание.
power.
12. УбратьPut the Power Bank (6) вinto карманthe рюкзакаbackpack pocket (2) иand дождатьсяwait включенияfor иthe инициализацииTOPODRONE лазероногоlaser сканера TOPODRONEscanner (1) to turn on and initialize. ДалееNext - надетьput рюкзакon какthe показаноbackpack наas фотоshown иin начатьthe выполнениеphoto МЛС.
and start the MLS.
|
|
|