
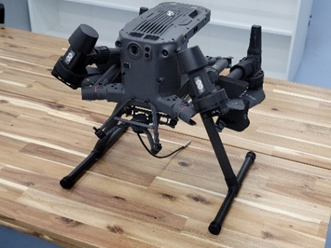
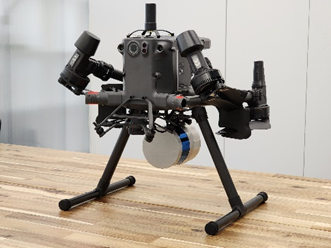
Installing TOPODRONE laser scanner on DJI M300

The following components and tools will be required for installation:

Version 1, powered by SkyPort connector

3EIDimage.jpg
  1. TOPODRONE laser scanner
  2. Mounting platform with dampers
  3. "Dovetail" mount
  4. Set of fixing screws M3x6 - 4 pcs.
  5. Set of fixing screws M4x10 - 2 pcs..
  6. Set of fixing screws M3x8 - 4 pcs.
  7. Set of fixing screws M3x10 - 2 pcs.
  8. Helix antenna
  9. Cable LEMO 6 PIN - SkyPort
  10. Spider antenna mount with cable
  11. USB Type-C OTG Adapter
  12. USB Type-C / USB flash drive
  13. Thread lock “Blue ”*
  14. 2.5mm hex screwdriver*

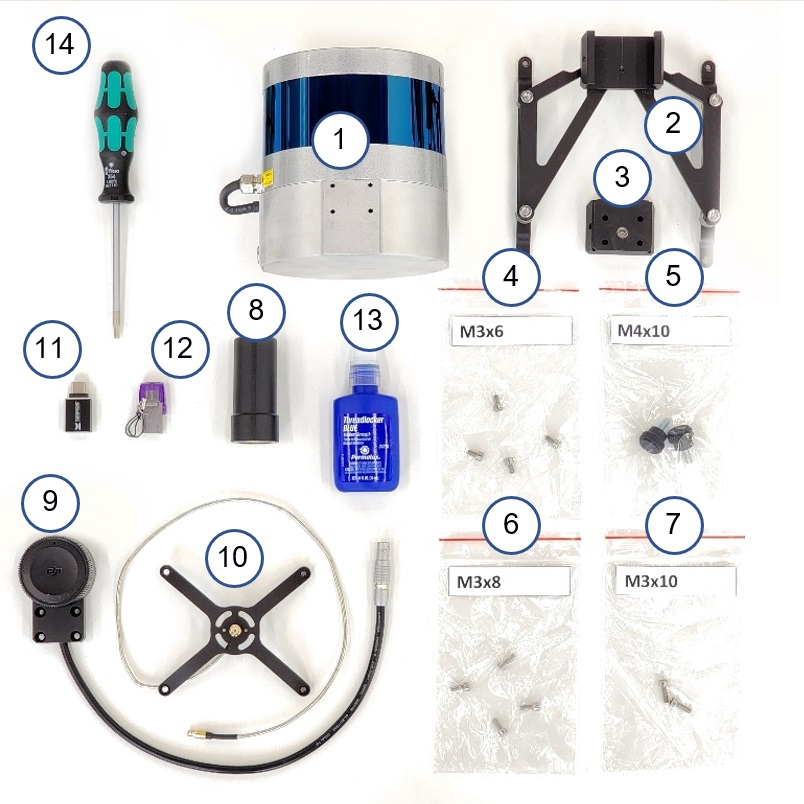
Version 2, powered by Type-C connector

4Kz1image.jpg
  1. TOPODRONE laser scanner
  2. Mounting platform with dampers
  3. "Dovetail" mount
  4. Set of fixing screws M3x6 - 4 pcs.
  5. Set of fixing screws M4x10 - 2 pcs..
  6. Set of fixing screws M3x8 - 4 pcs.
  7. Set of fixing screws M3x10 - 2 pcs.
  8. Helix antenna
  9. Cable LEMO 6 PIN - SkyPort
  10. Spider antenna mount with cable
  11. USB Type-C OTG Adapter
  12. USB Type-C / USB flash drive
  13. Thread lock “Blue ”*
  14. 2.5mm hex screwdriver*
  15. Phillips screwdriver*
  16. Hexagonal screwdriver 1.5 mm* 
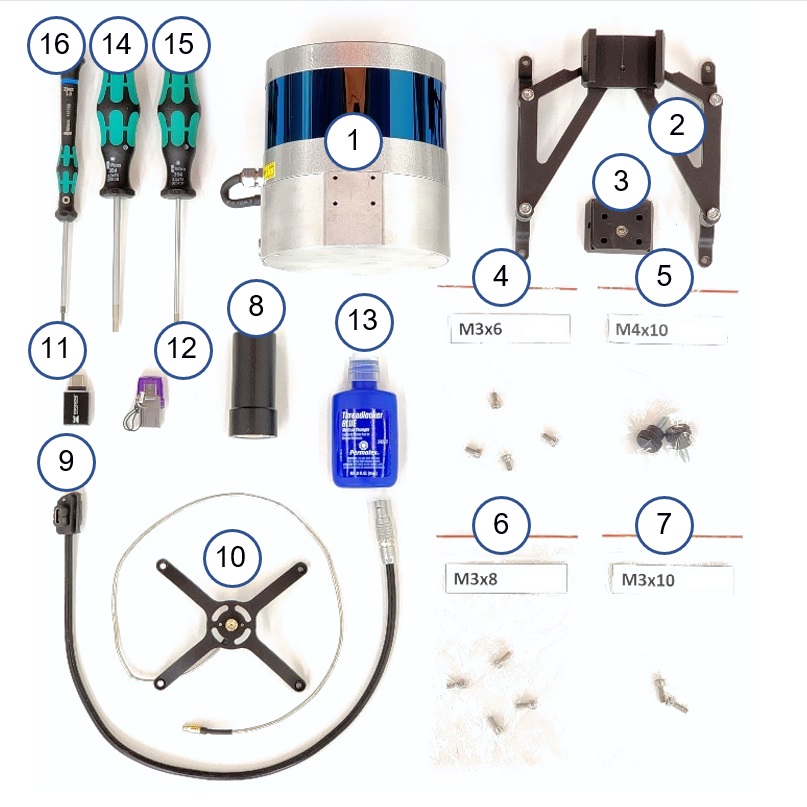
  • Not included with the TOPODRONE laser scanner.

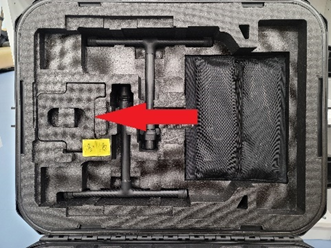
Step 1. Remove the polyurethane lodgement base of the drone from the case


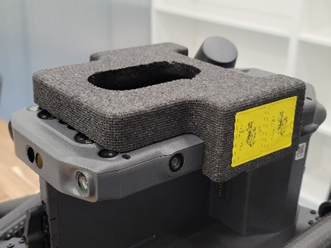
Step 2: Install the polyurethane lodgement harness on the drone


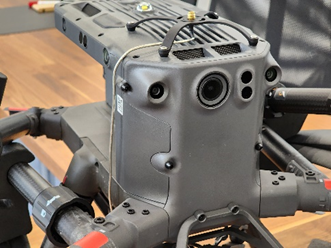
Step 3: Turn the DJI M300 drone upside down


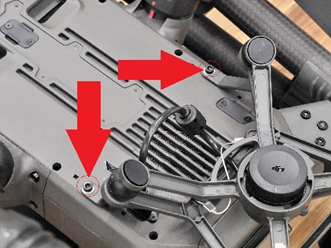
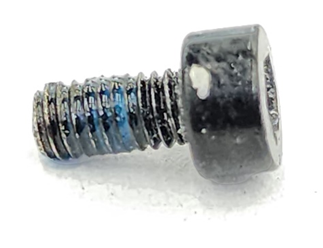
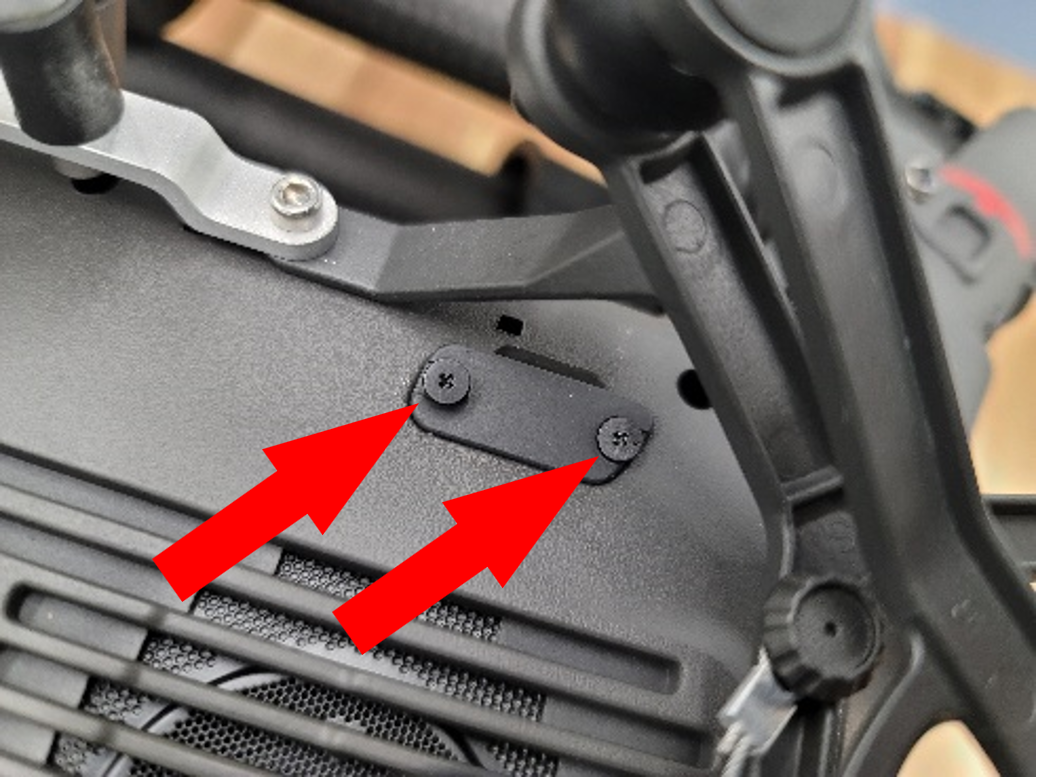
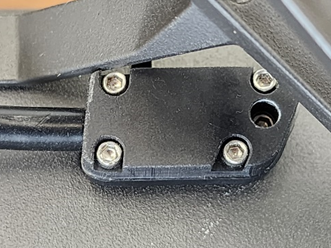
Step 4. Remove the two black screws with a Hex 2.5mm screwdriver and set them aside


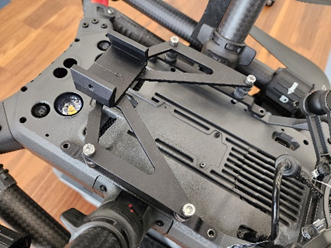
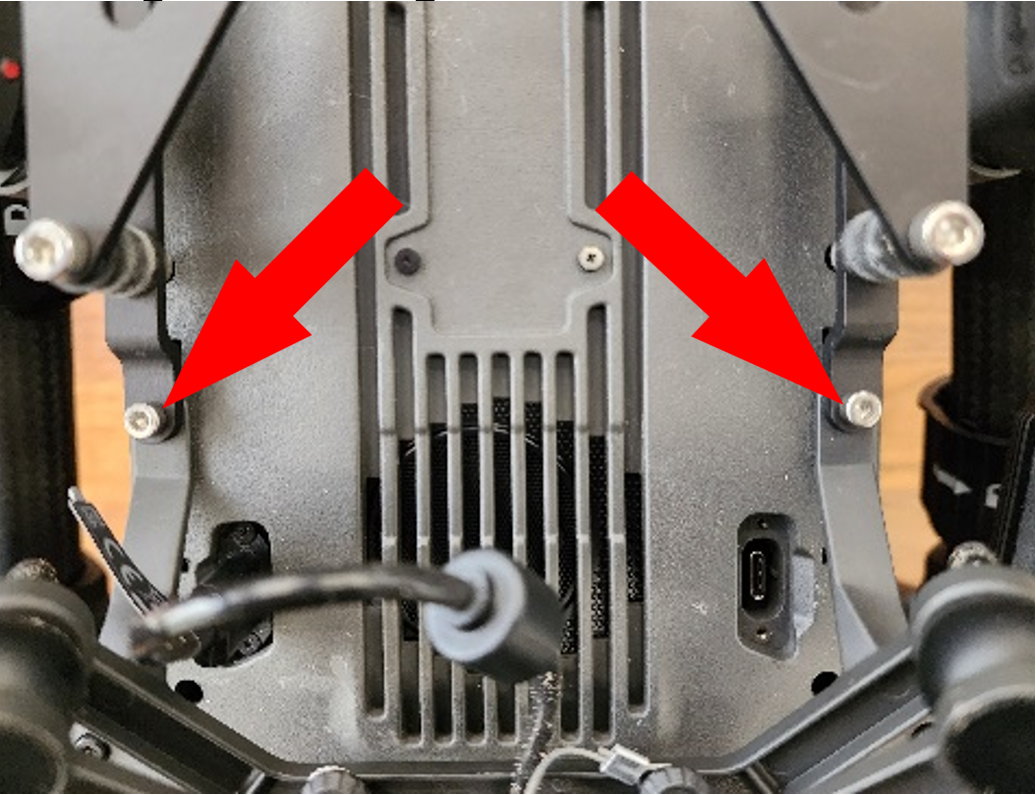
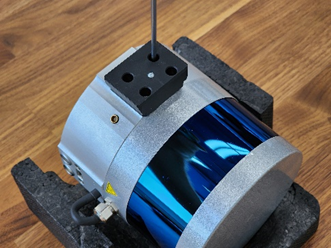
Step 5: Install the mounting pad on the  drone`s bottom

image.png

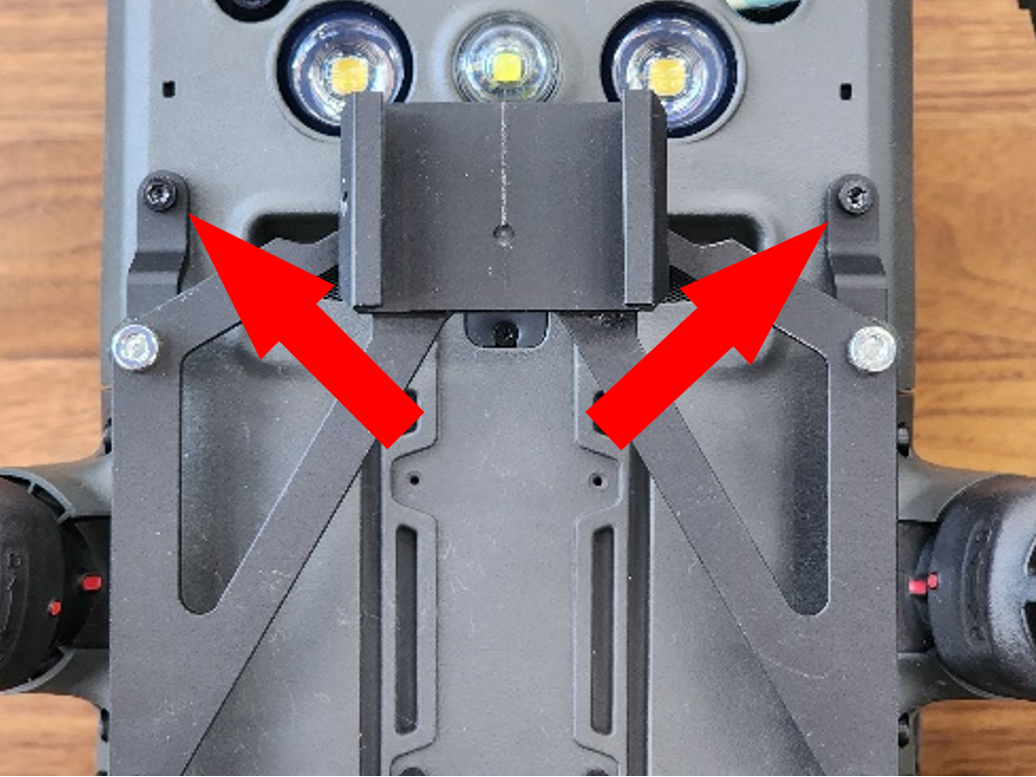
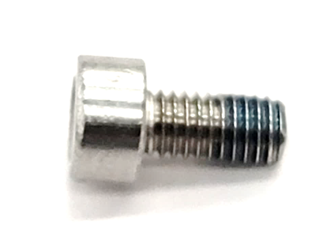
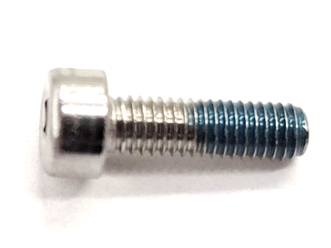
Step 6: Screw in the 2 M3 x 10 screws with a 2.5 mm Hex screwdriver.


Important! Use thread locker for this step! Tighten the screws firmly when installing.

image.png

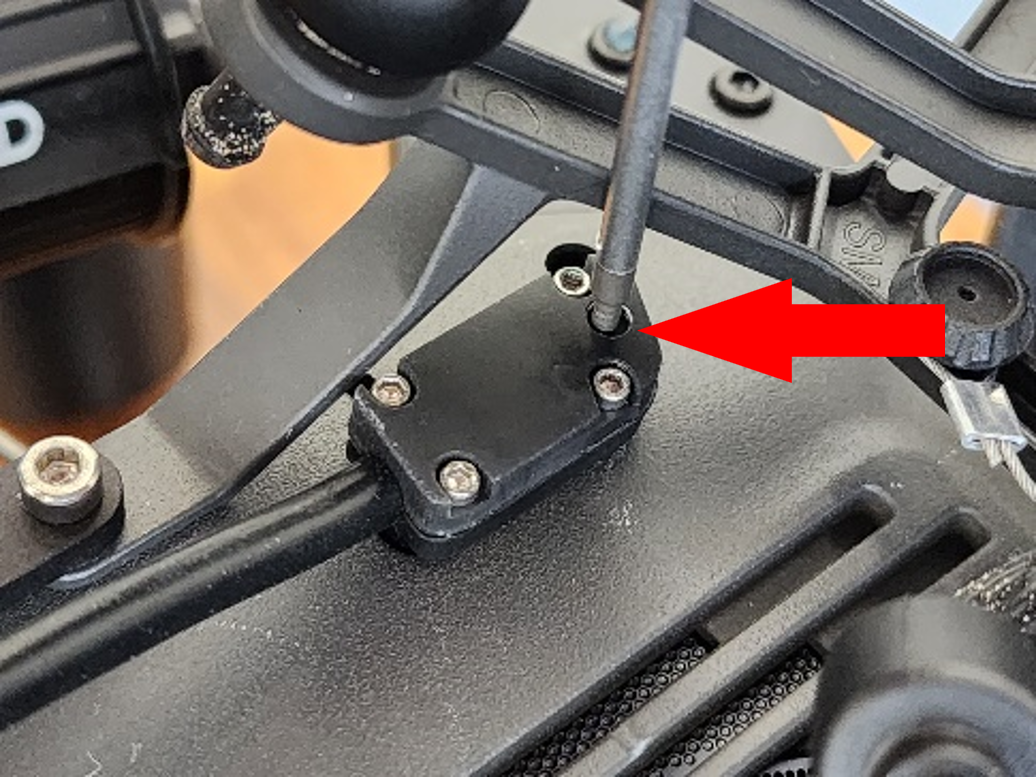
Step 7: Using a Hex 2.5mm screwdriver, screw in the 2 black screws from step 4

Important! Use thread locker for this step! Tighten the screws firmly when installing.

image.png

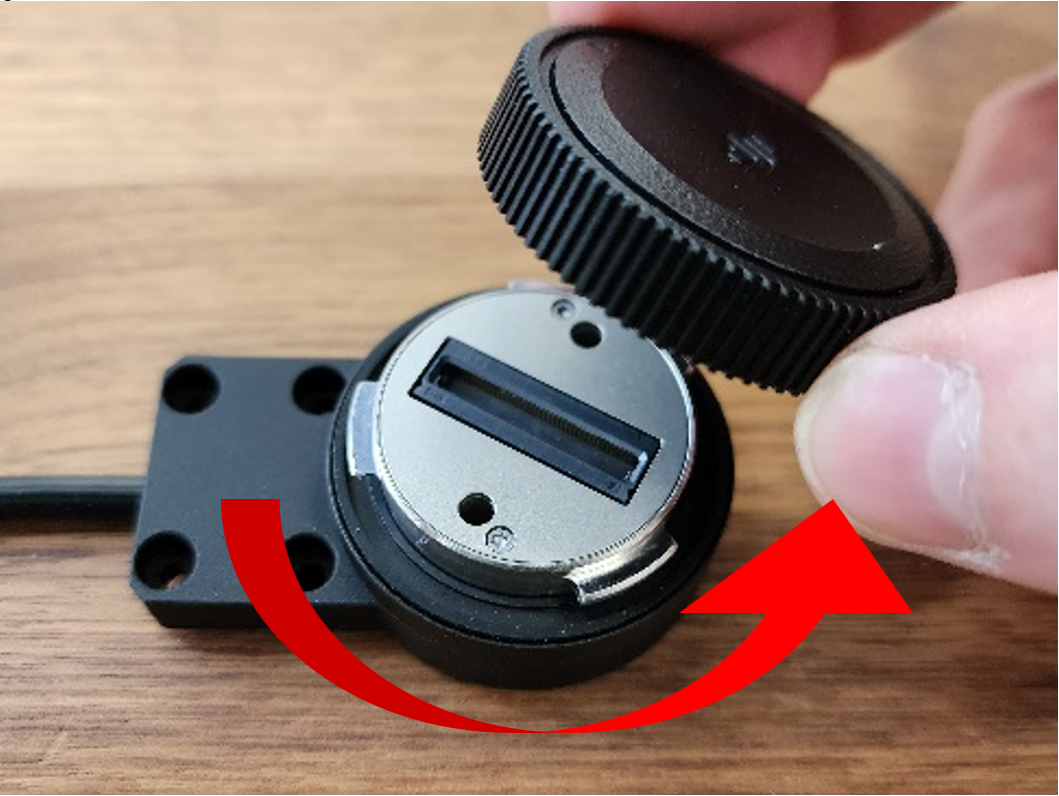
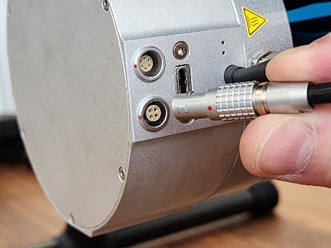
Step 8. (Version.1). Remove the cover from the SkyPort connector of the LEMO 6 PIN to SkyPort cable

image.png

Step 9. (Version 1). Remove the cover from the drone's SkyPort connector

image.png

Step 10. (Version 1). Connect the cable to the SkyPort connector of the drone

image.png

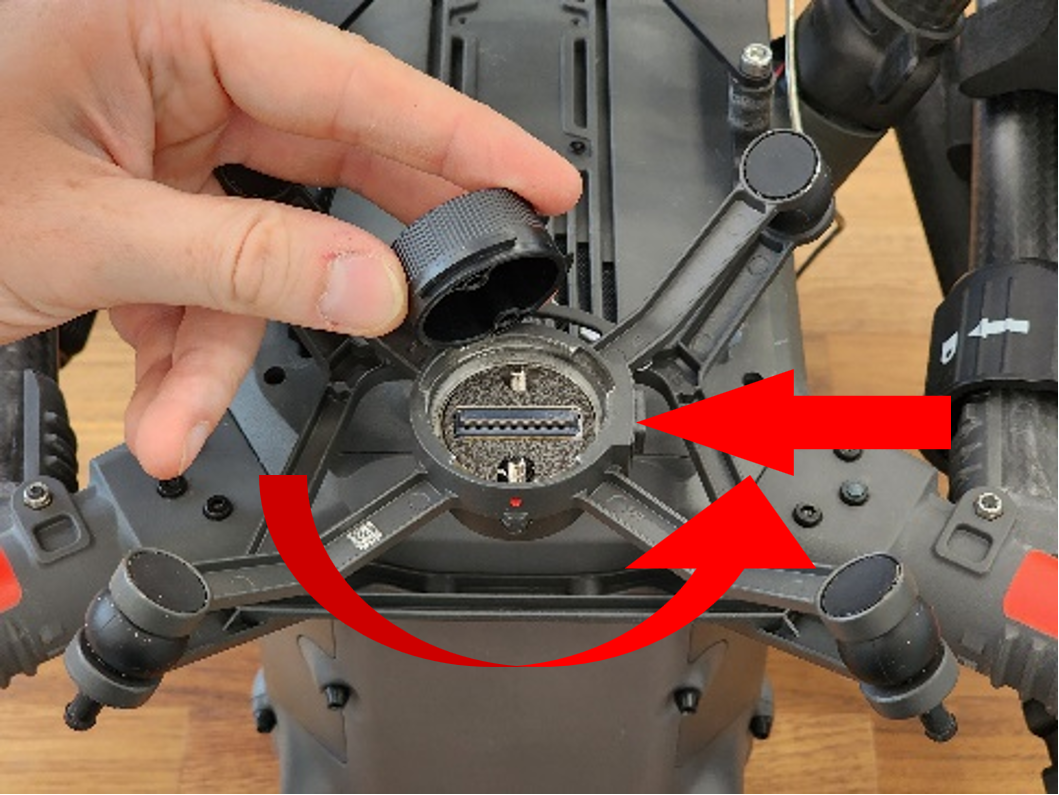
Step 8. (Version.2). Remove the 2 screws of the USB Type-C cover with a Phillips screwdriver


Step 9 (Version 2). Install the USB Type-C connector of the cable into the drone, following the key pattern

image.png

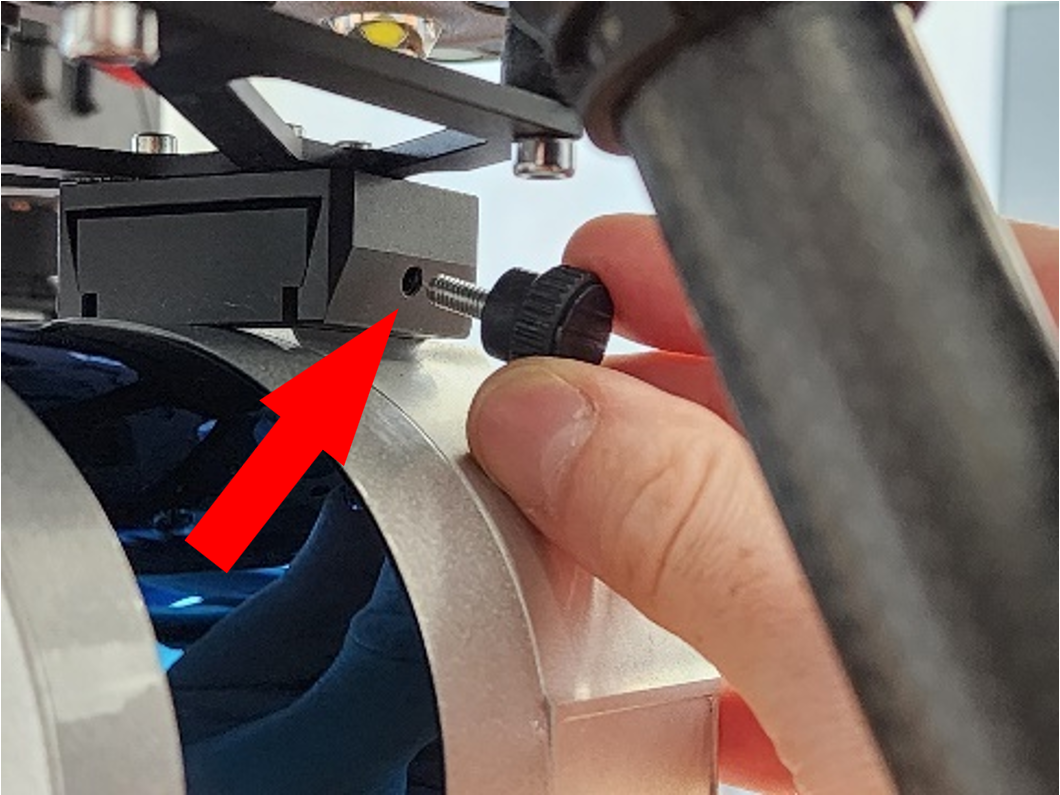
Step 10 (Version 2). Using a 1.5 mm hex screwdriver, tighten the retaining screw


Step 11. Turn the DJI M300 RTK upside down and remove the polyurethane lodgement

image.png

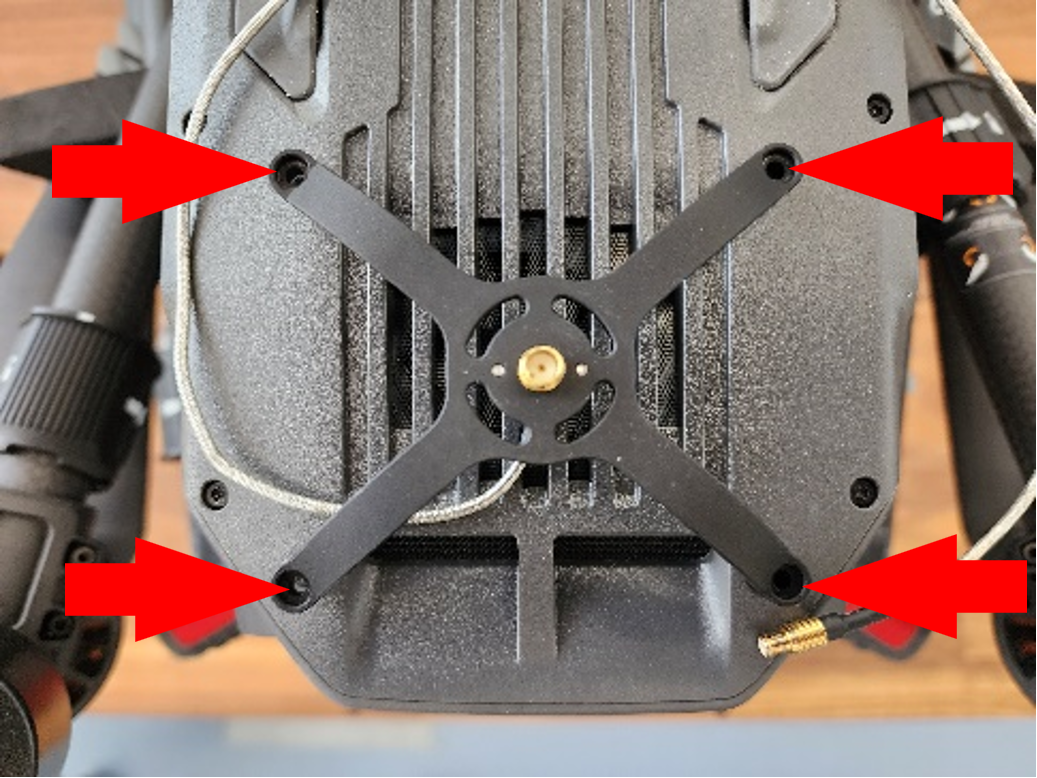
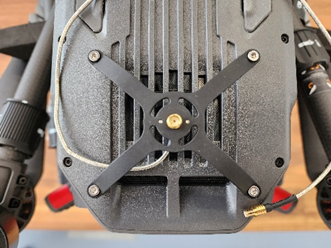
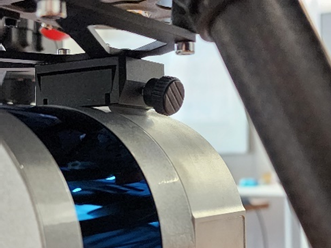
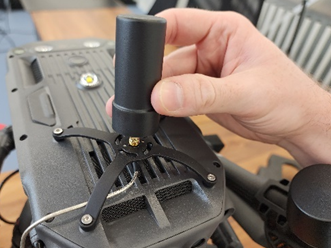
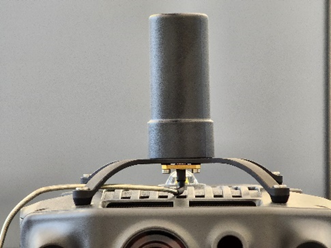
Step 12: Install the antenna spider mount to the top of the drone


Step 13. Secure the mount using M3x6 screws and a Hex 2.5 mm screwdriver.


Important! Use thread locker for this step! Tighten the screws firmly when installing.


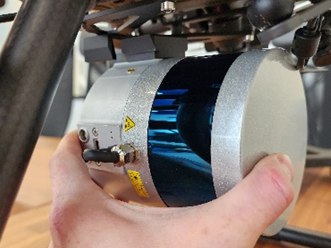
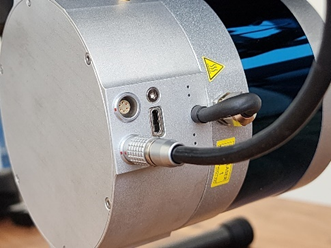
Step 14. Route the cable along the enclosure as shown in the photo


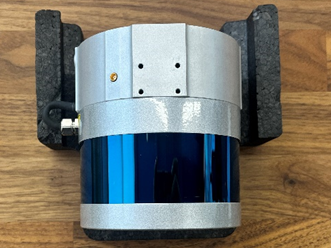
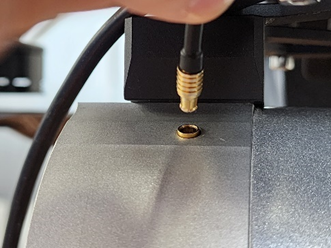
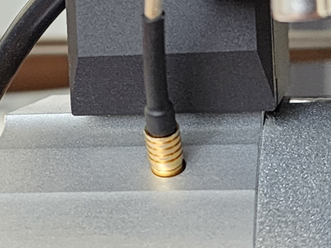
Step 15: Place the TOPODRONE laser scanner on the drone's polyurethane foam carrier, with the antenna connector on top of it


ШагStep 16. УстановитеInstall креплениеthe «ласточкин"dovetail" хвост»mount иand закрутитеtighten винтамиwith M3x8 приscrews помощиusing отверткиa screwdriver


Важно!Important! ИспользуйтеUse фиксаторthread резьбыlocker наfor этомthis шаге!step! ПлотноTighten закручивайтеthe винтыscrews приfirmly установке.when installing.


ШагStep 17.17. УстановитеMount лазерный сканерthe TOPODRONE наlaser быстросъёмноеscanner креплениеon the quick-release mount.

image.png

РекомендуетсяIt устанавливатьis лазерныйrecommended сканерto спередиmount the назадlaser scanner from front to back.

image.png

ШагStep 18.18. ЗавинтитеScrew фиксирующийin барашковыйthe винтretaining screw


ШагStep 19.19. ВинтThe долженscrew бытьshould закрученbe плотно,tightened ноfirmly, безbut чрезмерногоwithout усилияexcessive force.


ШагStep 20. ПодключитеConnect антенныйthe разъёмantenna кconnector лазерномуto сканеруthe laser scanner.


ПослеAfter подключенияconnecting антенногоthe разъемаantenna онconnector, долженit выглядетьshould какlook наlike фотоin the photo


ШагStep 21.21. ПодключитеPlug разъем питанияthe LEMO вpower соответствующийconnector порт.into the appropriate port. 


ПослеOnce подключенияthe разъемаpower питанияconnector онis долженplugged выглядетьin, какit наshould фотоlook like the one in the photo


ШагStep 22.22. НавинтитеScrew the GNSS антеннуantenna наonto разъемthe крепленияspider типаmount «паук»connector


The GNSS антеннаantenna должнаshould бытьbe закрученаscrewed плотно,in ноtightly, безbut чрезмерногоwithout усилияexcessive force


ШагStep 23.23: ЧтоTo быavoid неlosing потерятьthe защитныеprotective колпачкиcaps можноyou соединитьcan ихjoin вместеthem together


ШагStep 28.24. ДронDrone вassembly сборе с лазерным сканеромwith TOPODRONE выглядитlaser такscanner looks like this


МожноAerial приступатьlaser кscanning выполнениюcan воздушного лазерного сканированияbegin.

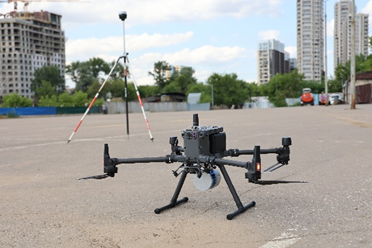
* Из-заDue частичногоto перекрытияpartial датчиков,overlapping использованиеof нижнейsensors, системыthe визуальногоuse позиционированияof приthe установленномlower лазерномvisual сканереpositioning system with the TOPODRONE неlaser рекомендуется.scanner Посадкуinstalled дроновis приnot проведенииrecommended. ВЛСIt рекомендуетсяis выполнятьrecommended вto ручномland режимеthe дляdrone уменьшенияin ударныхmanual воздействийmode наwhen шассиconducting иALS to reduce shock effects on the landing gear and TOPODRONE приduring посадке.landing. ПроизводительThe неmanufacturer несетis ответственностиnot заresponsible стабильностьfor эксплуатацииthe квадрокоптераstability of operation of the DJI M300 RTK приdrone включенныхwith нижнихthe сенсорахlower визуальногоvisual позиционирования.positioning sensors turned on.