
TOPODRONE LiDAR to mobile mount installation
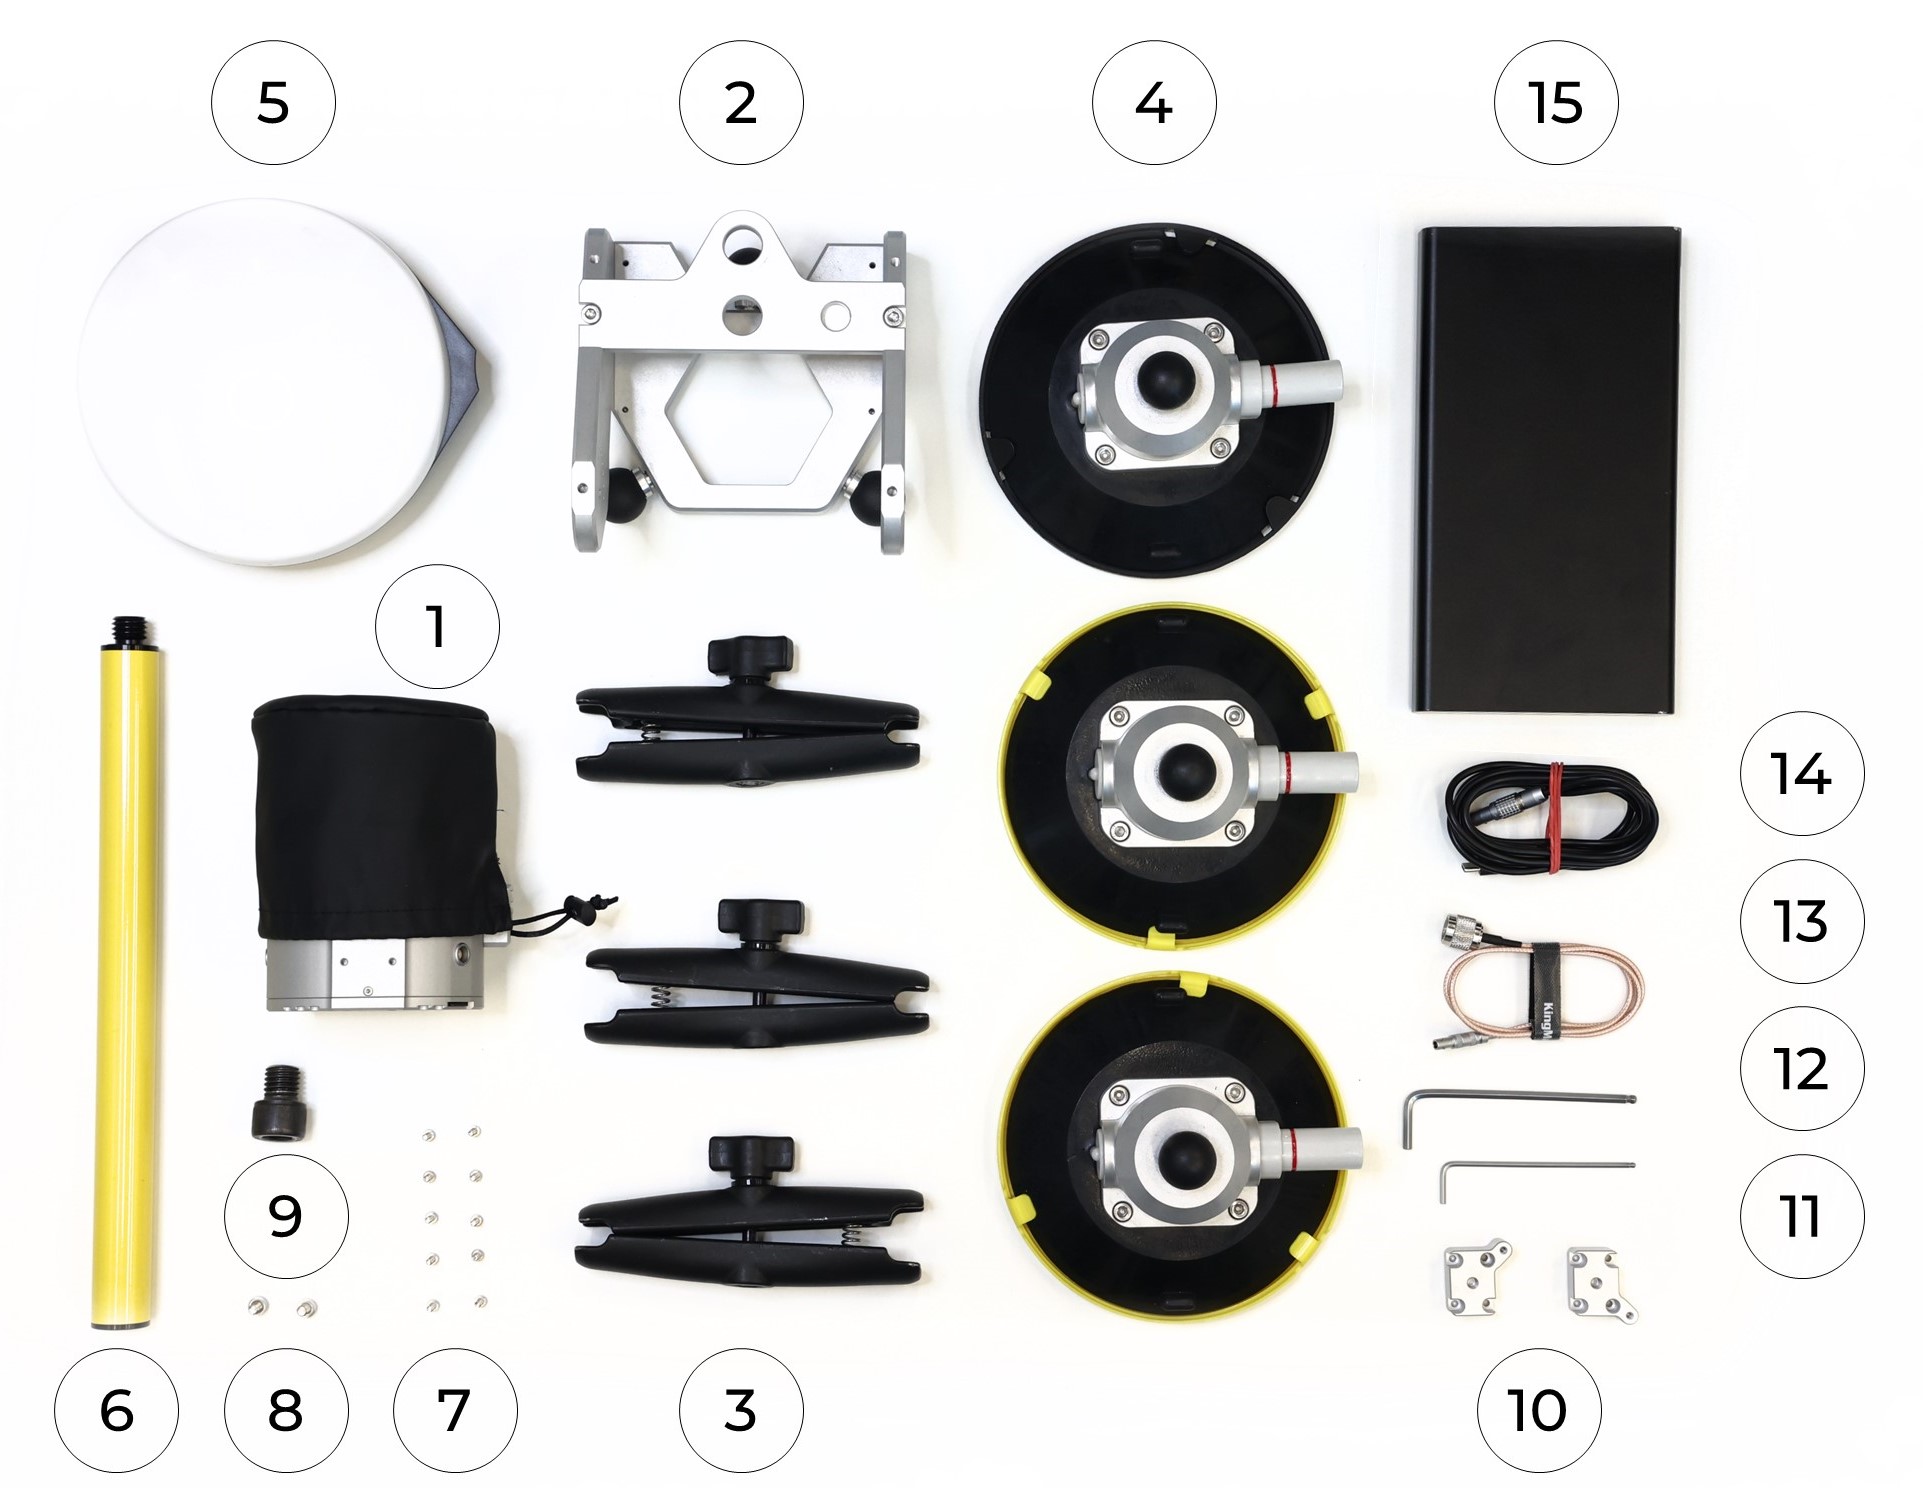
To install the TOPODRONE LiDAR on the mobile mount, you will need the following components included in the kit:
|
1. TOPODRONE LiDAR - 1 pc. 2. Mobile mount base - 1 pc.. 3. Mobile mount arm - 3 pc. 4. Mobile mount suction cup - 3 pc. 5. GNSS antenna - 1 pc. 6. Pole (30 cm) - 1 pc. 7. M3x10 screw - 10 pc. 8. М5х10 screw - 2 pc. |
9. 5/8" - 11 UNC x 3/4" screw - 1 pc. 10. TOPODRONE LiDAR spacer - 2 pc. 11. Hex 2.5 screwdriver - 1 pc. 12. Hex 4 screwdriver - 1 pc. 13. Antenna cable - 1 pc. 14. LEMO 6 PIN - USB Type-C power cable - 1 pc. 15. Power Bank - 1 pc. |
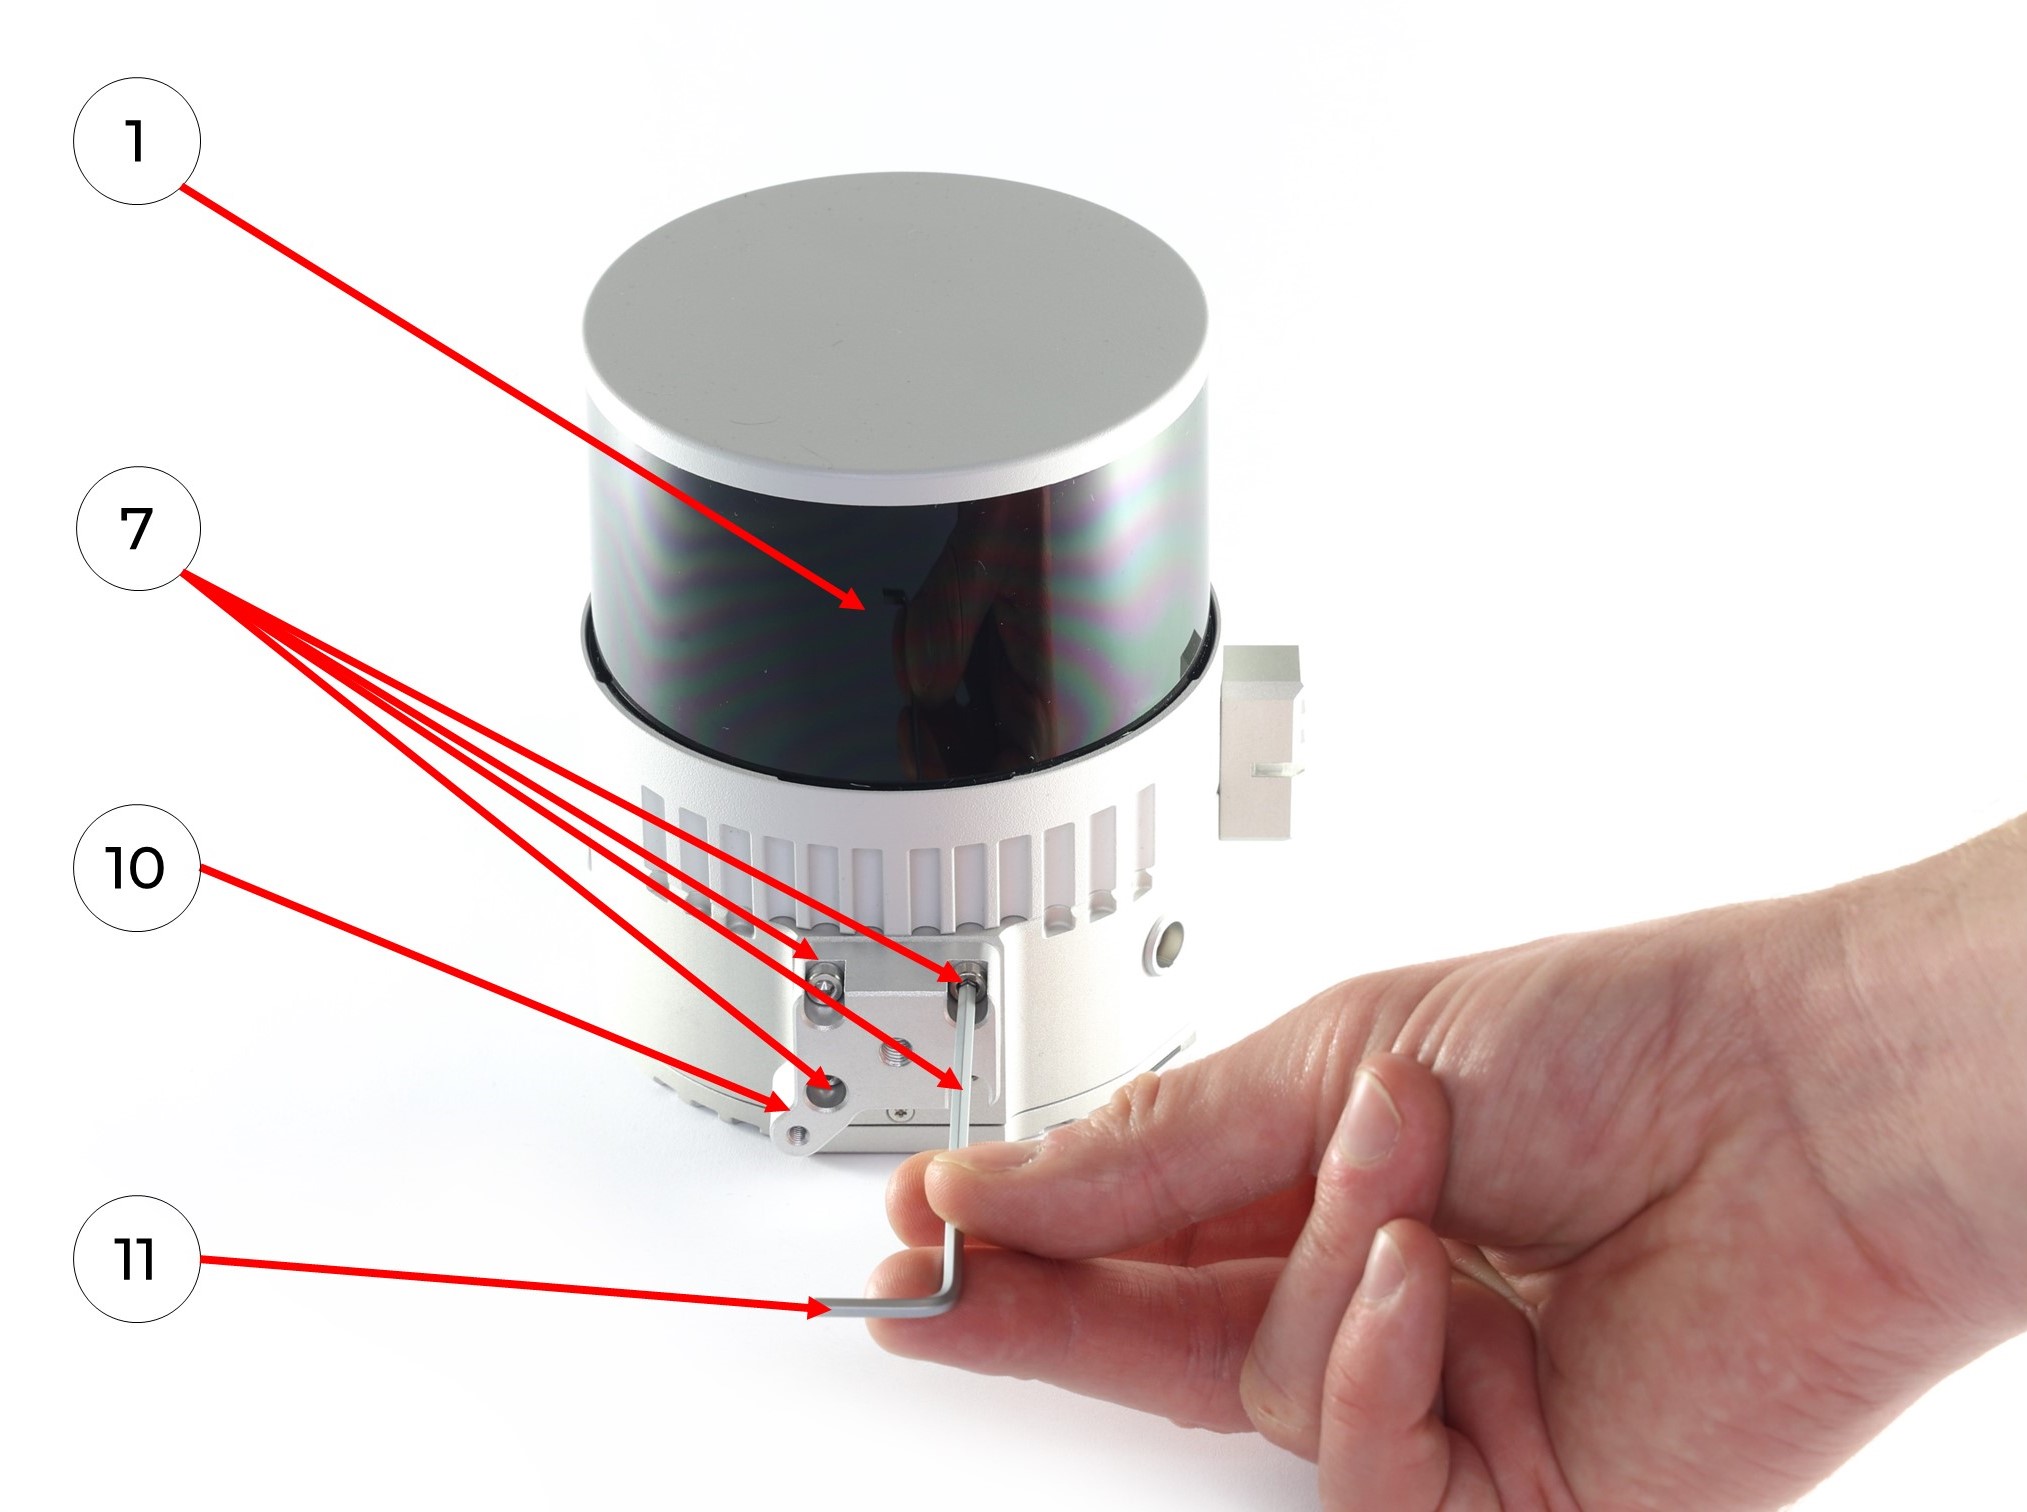
It is strongly recommended to use a TOPODRONE LiDAR protective soft cover for to avoid the risk of damaging the laser scanning lens! For better clarity, in the photos shown, the TOPODRONE TOPODRONE LiDAR is shown without the case.
1. Install the two mobile mount spacers on the TOPODRONE LiDAR laser scanner with 8 M3x10 screws using a Hex 2.5 screwdriver as shown in the photo:
|
|
|
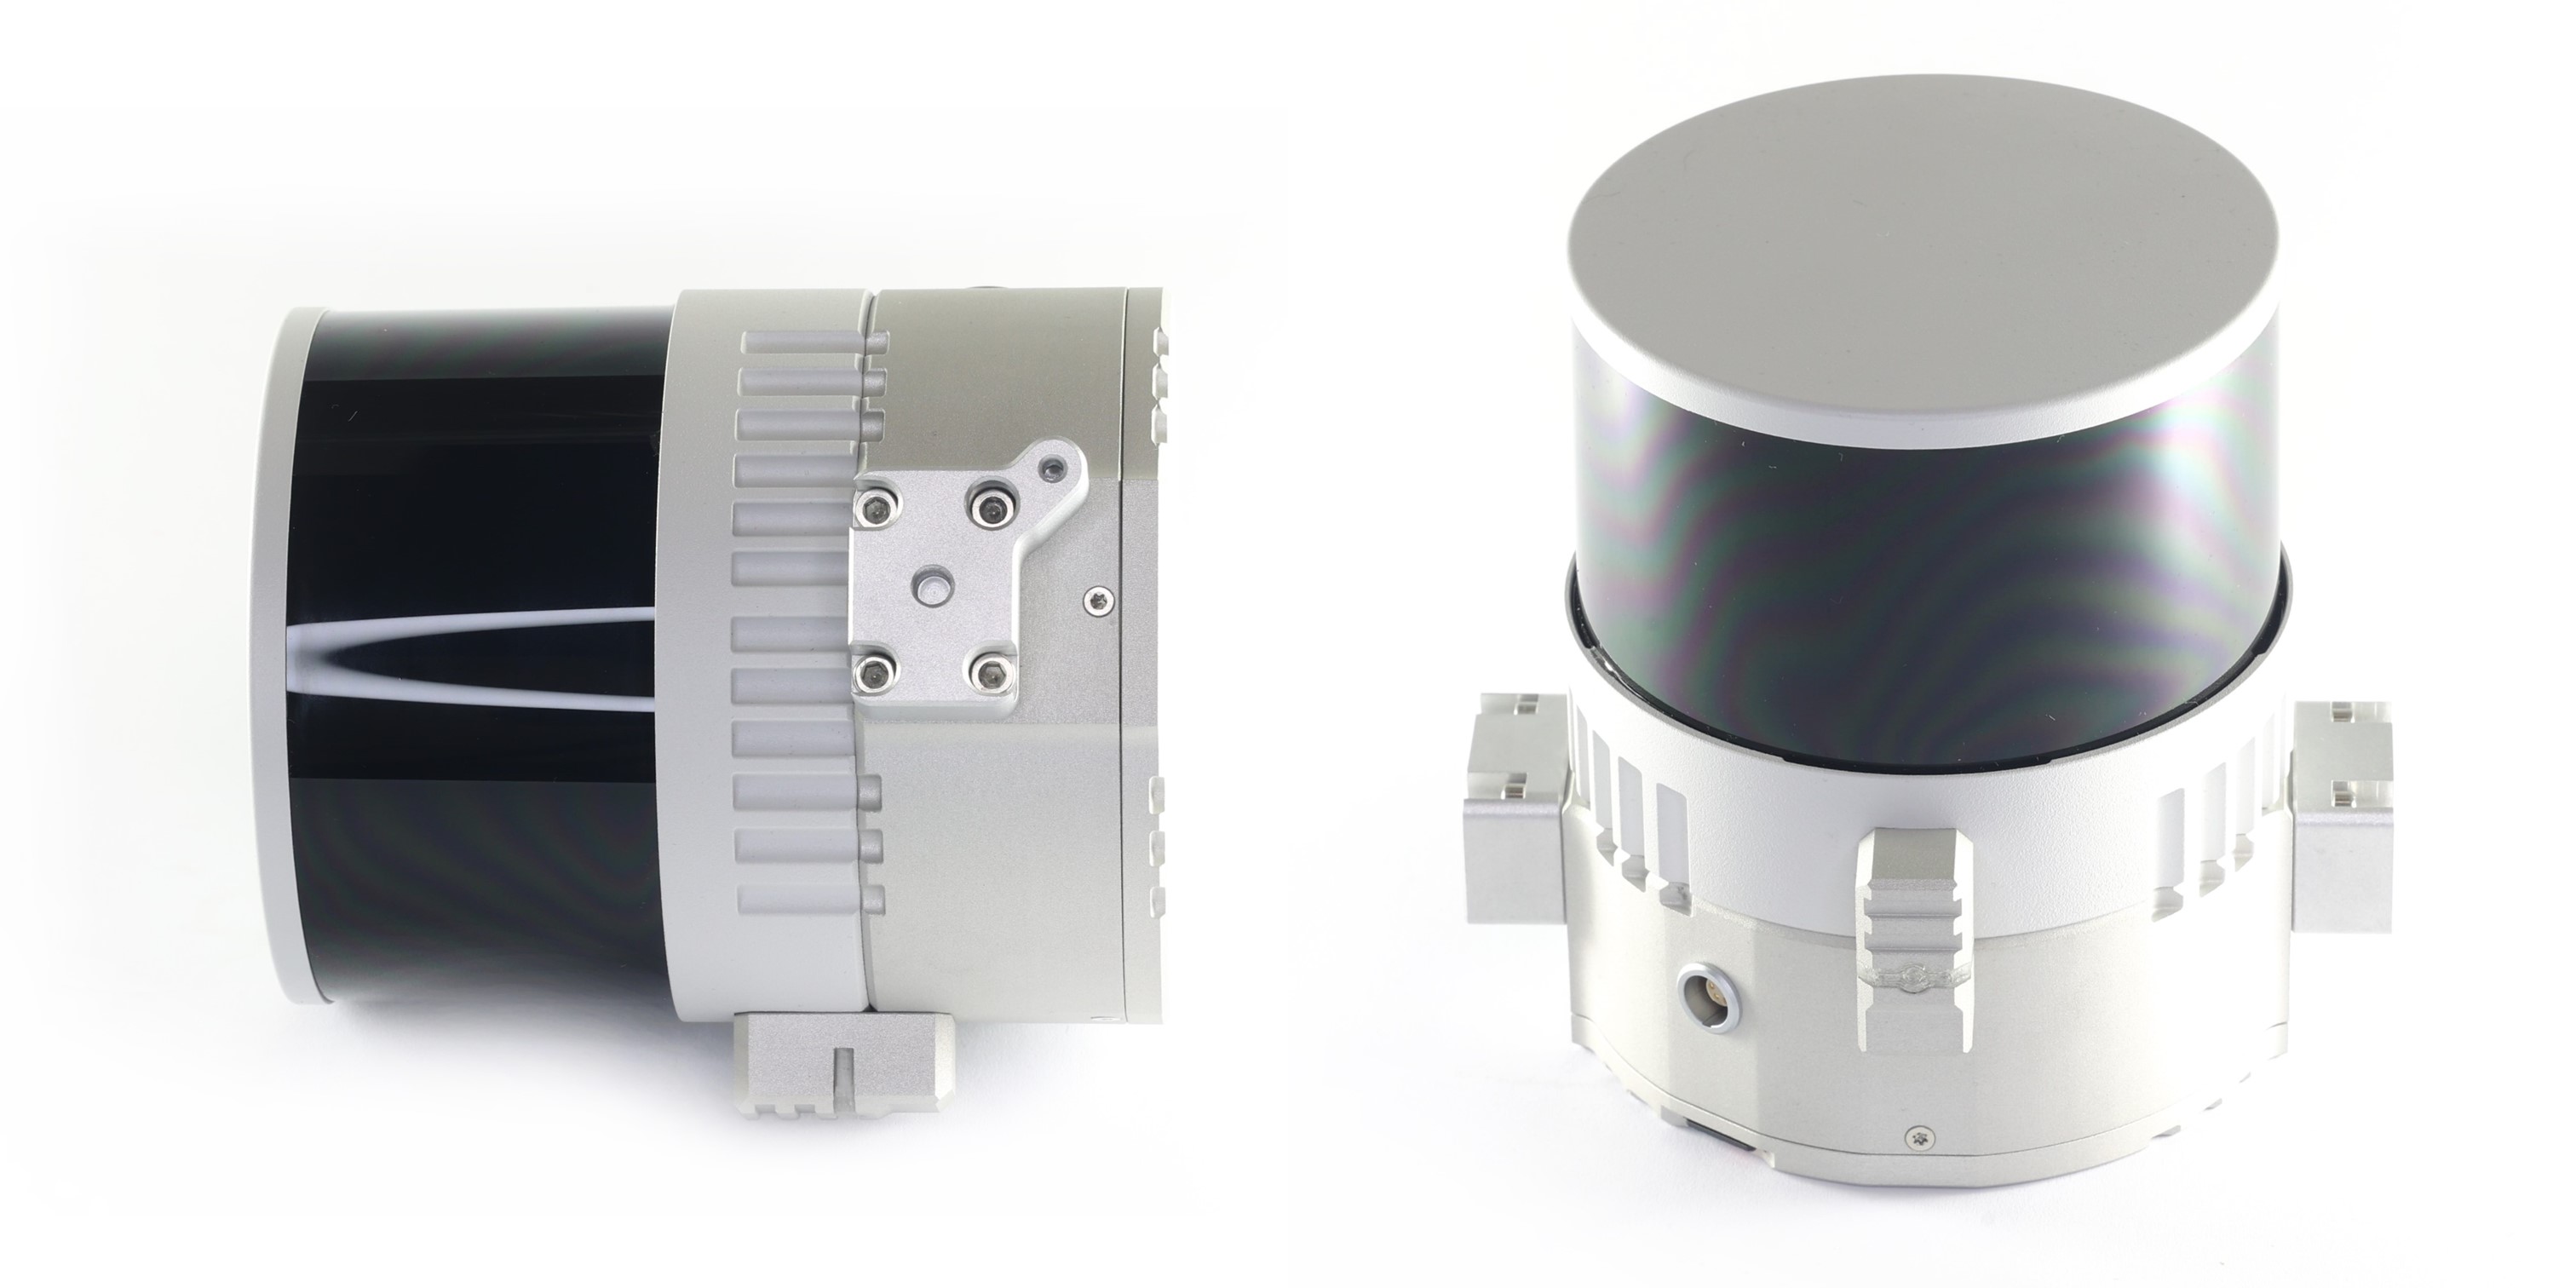
2. Install TOPODRONE LiDAR on the main part of the mobile mount with two M5x10 screws using a Hex 4 screwdriver. Be extremely careful at this step!
Hold the TOPODRONE laser scanner so that it does not fall and proceed to step 3. Use the cover to protect the lens! It is especially important in this step!
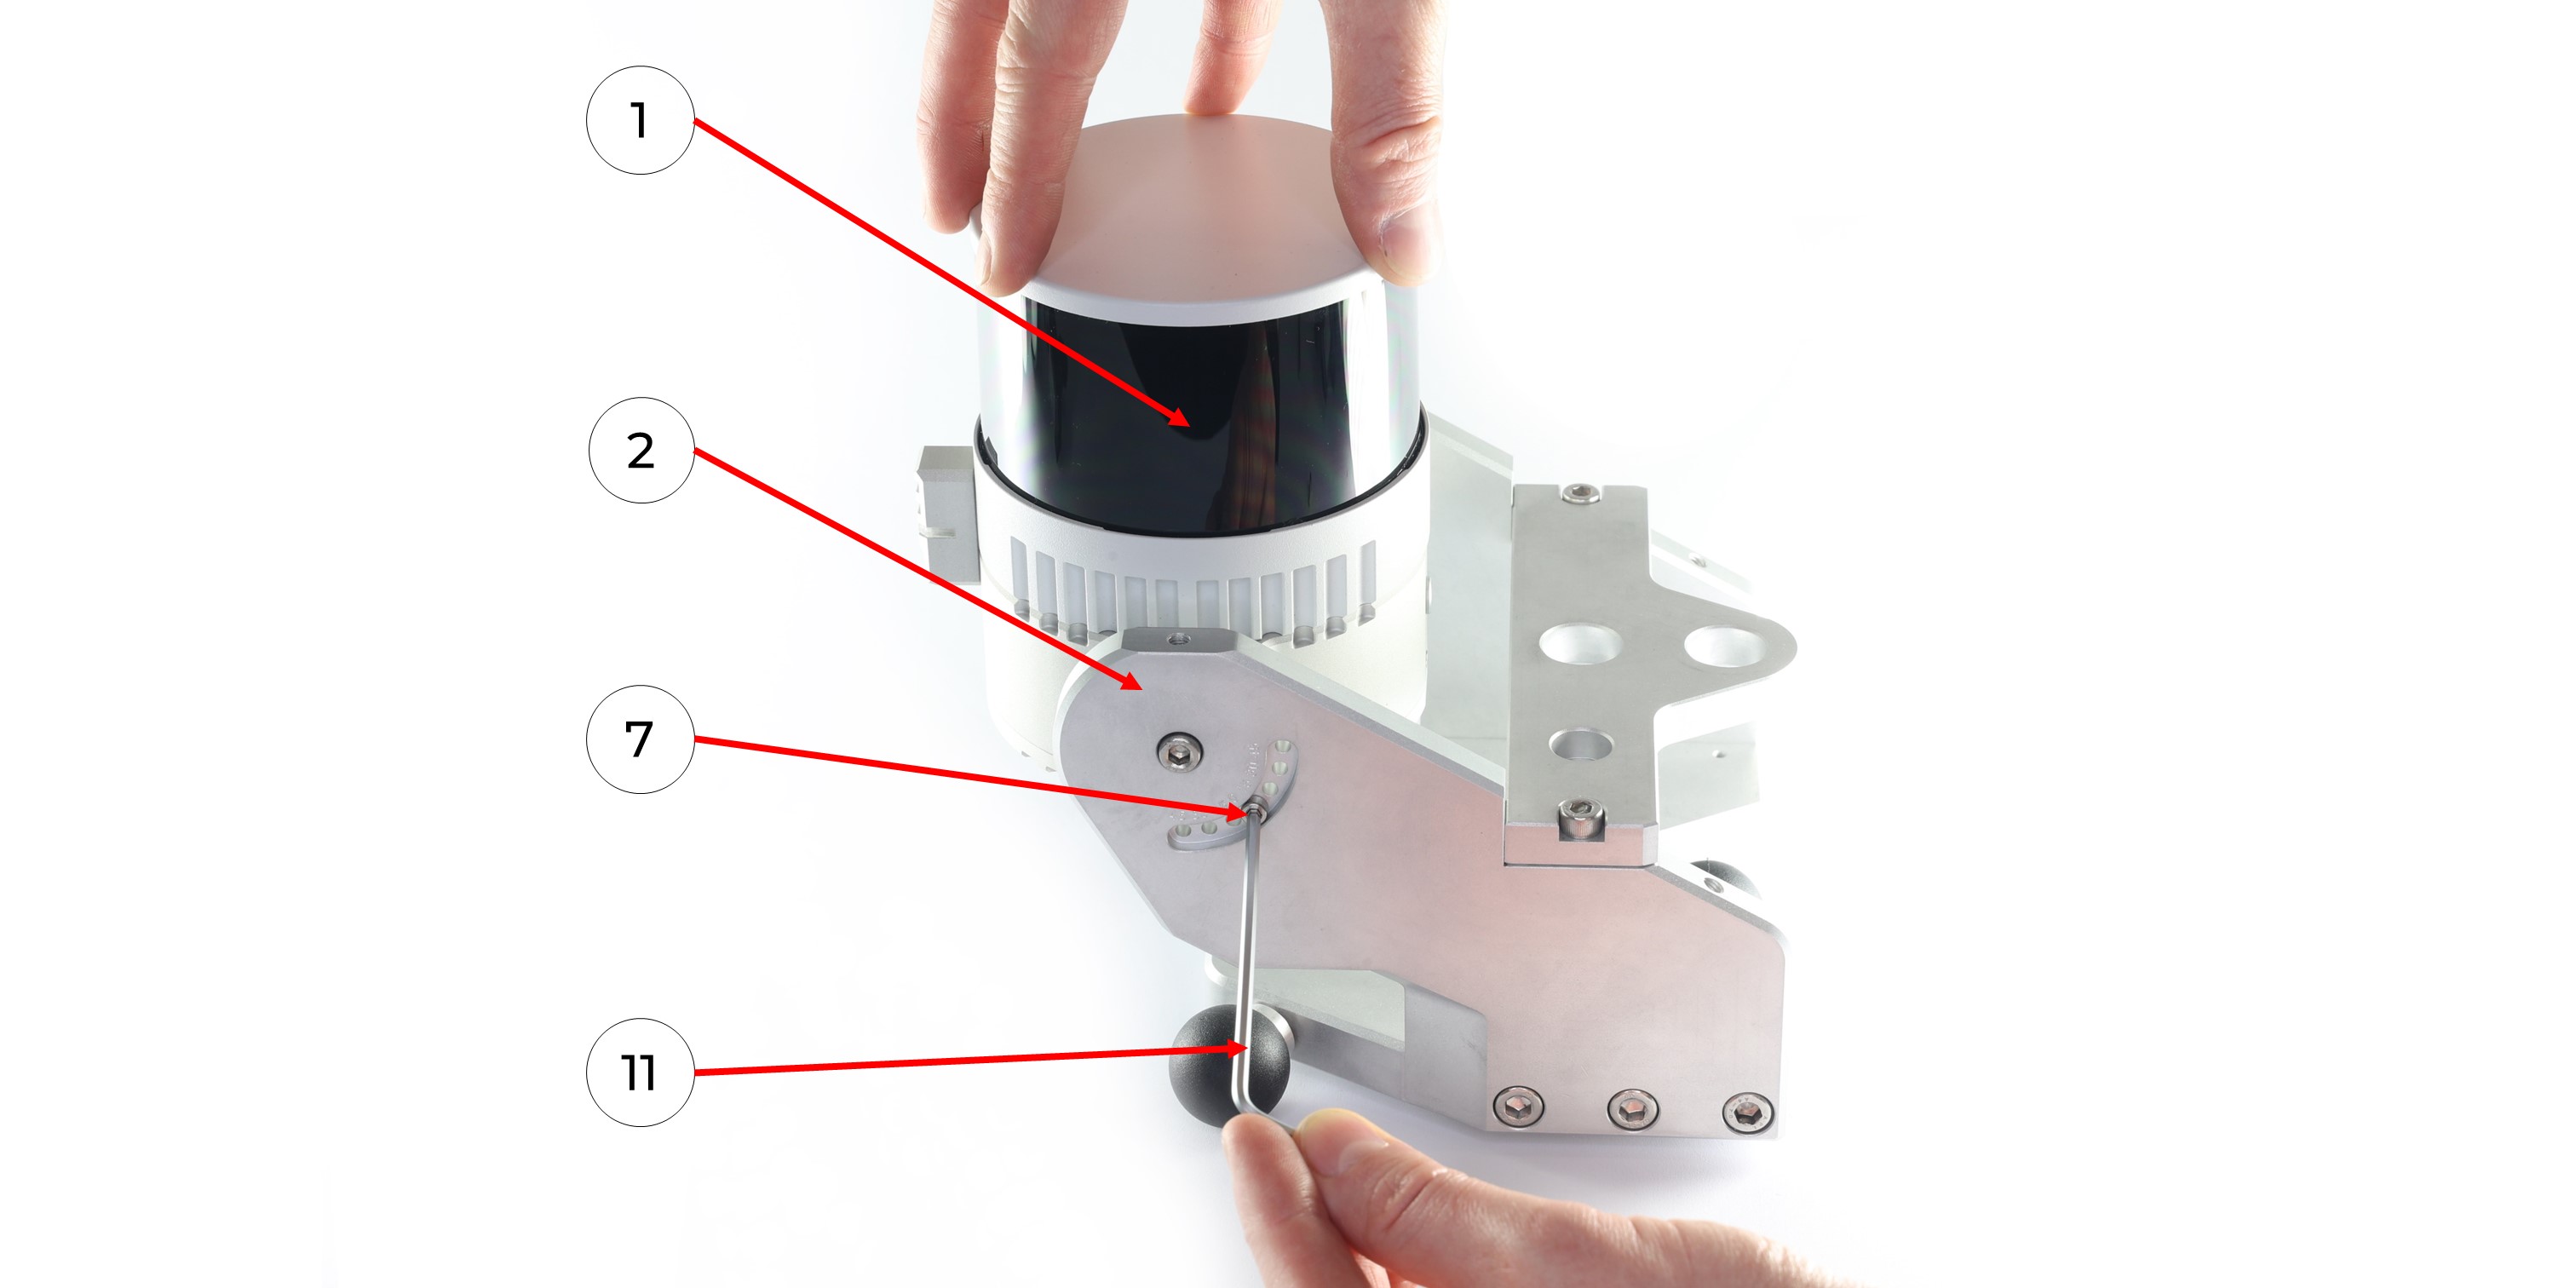
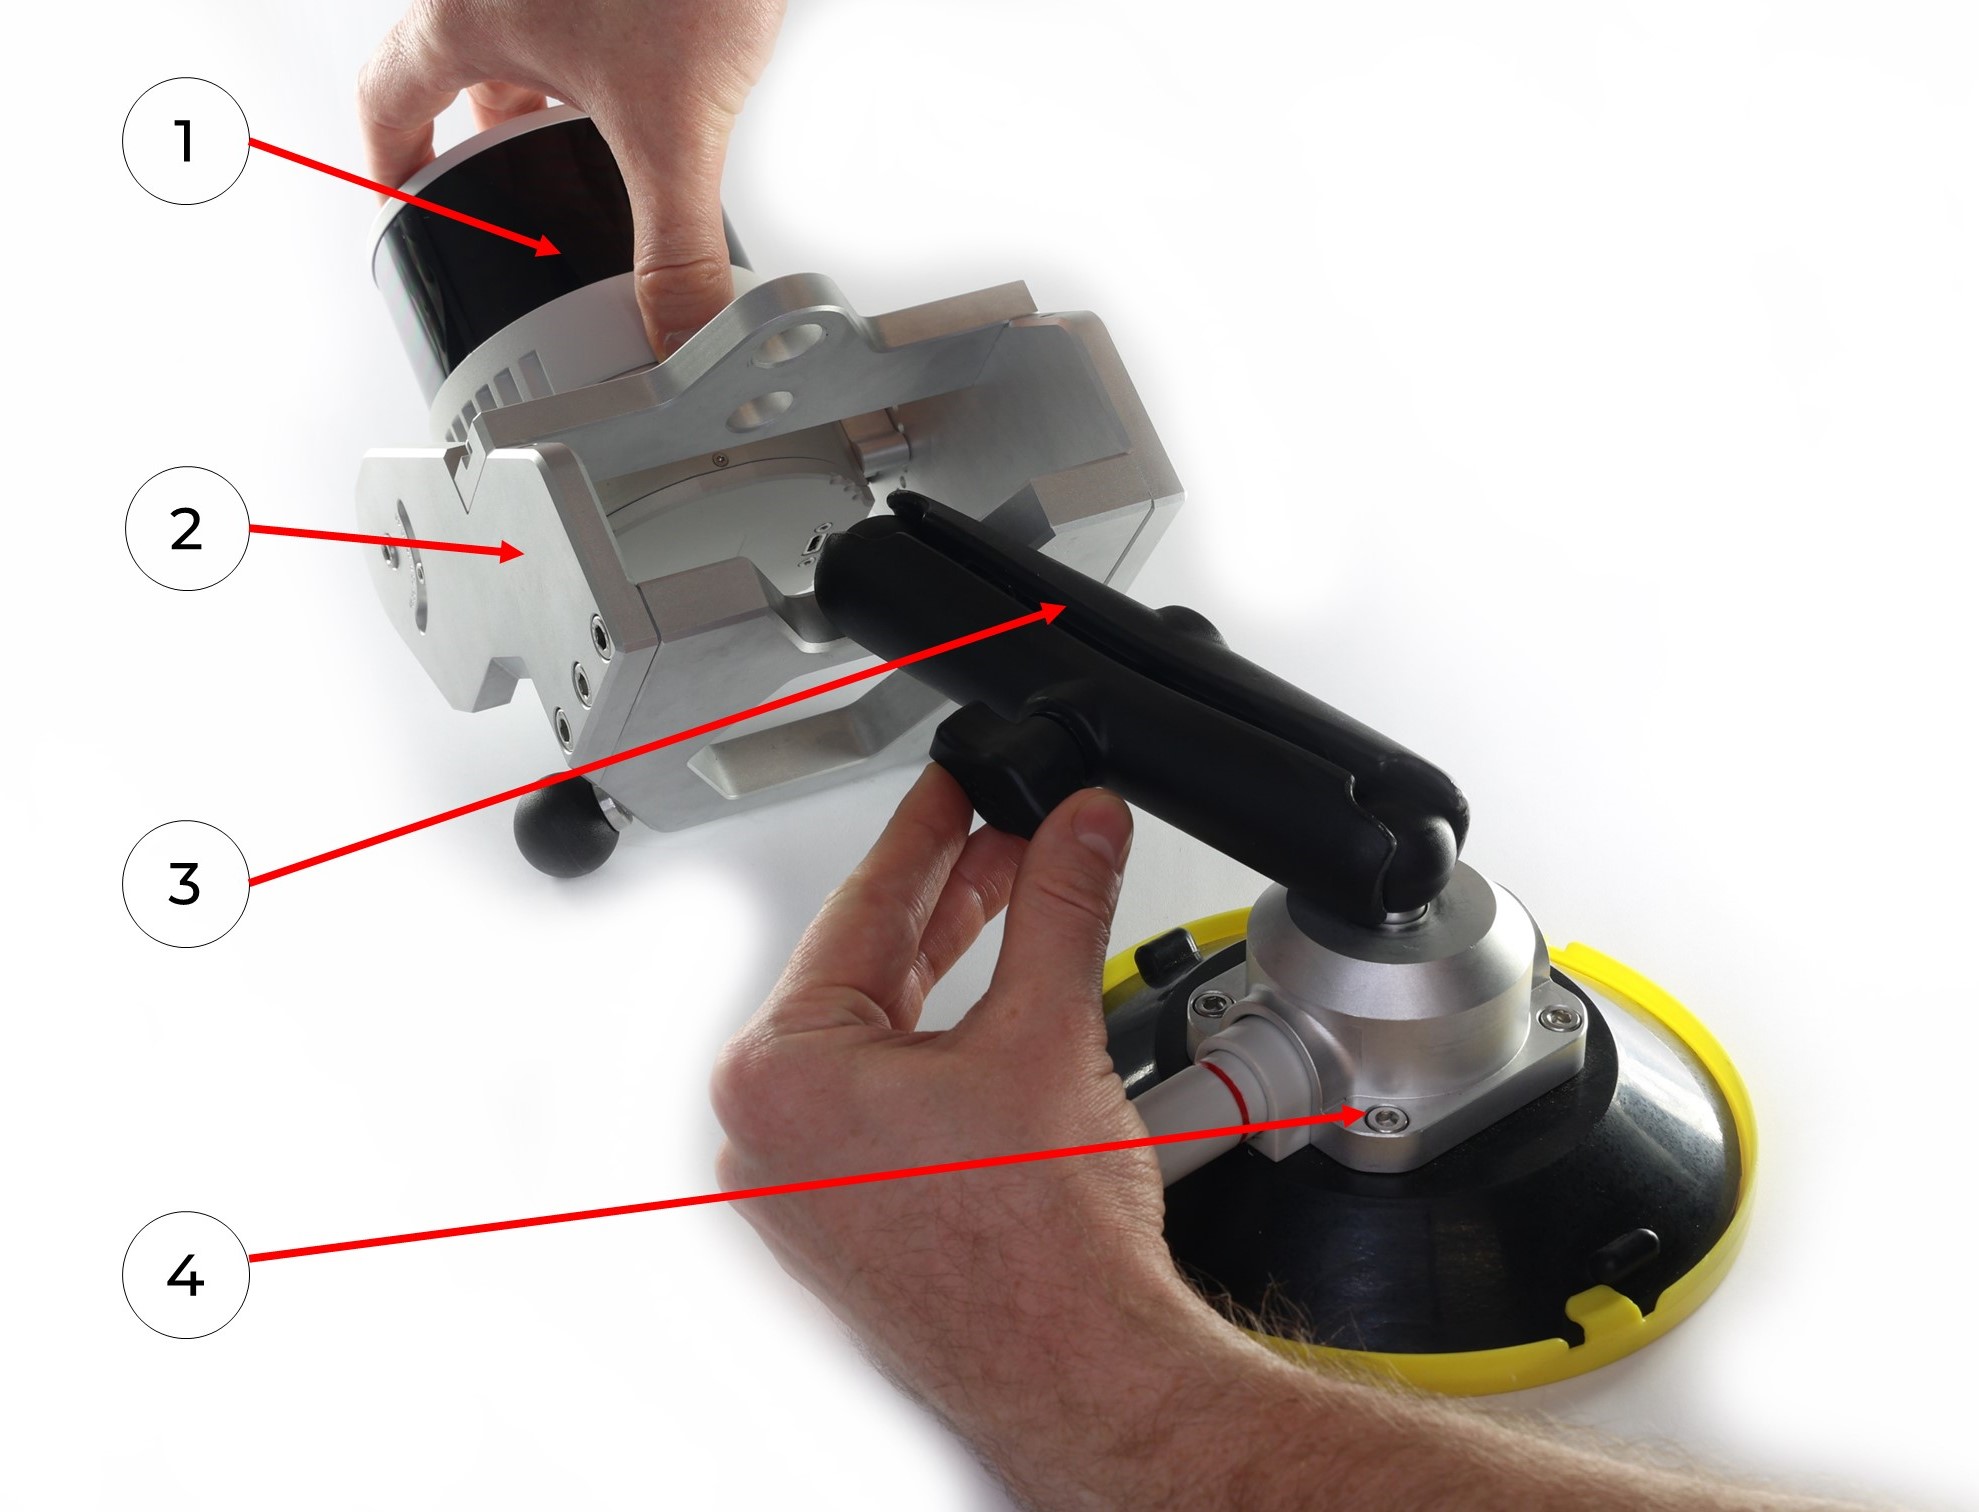
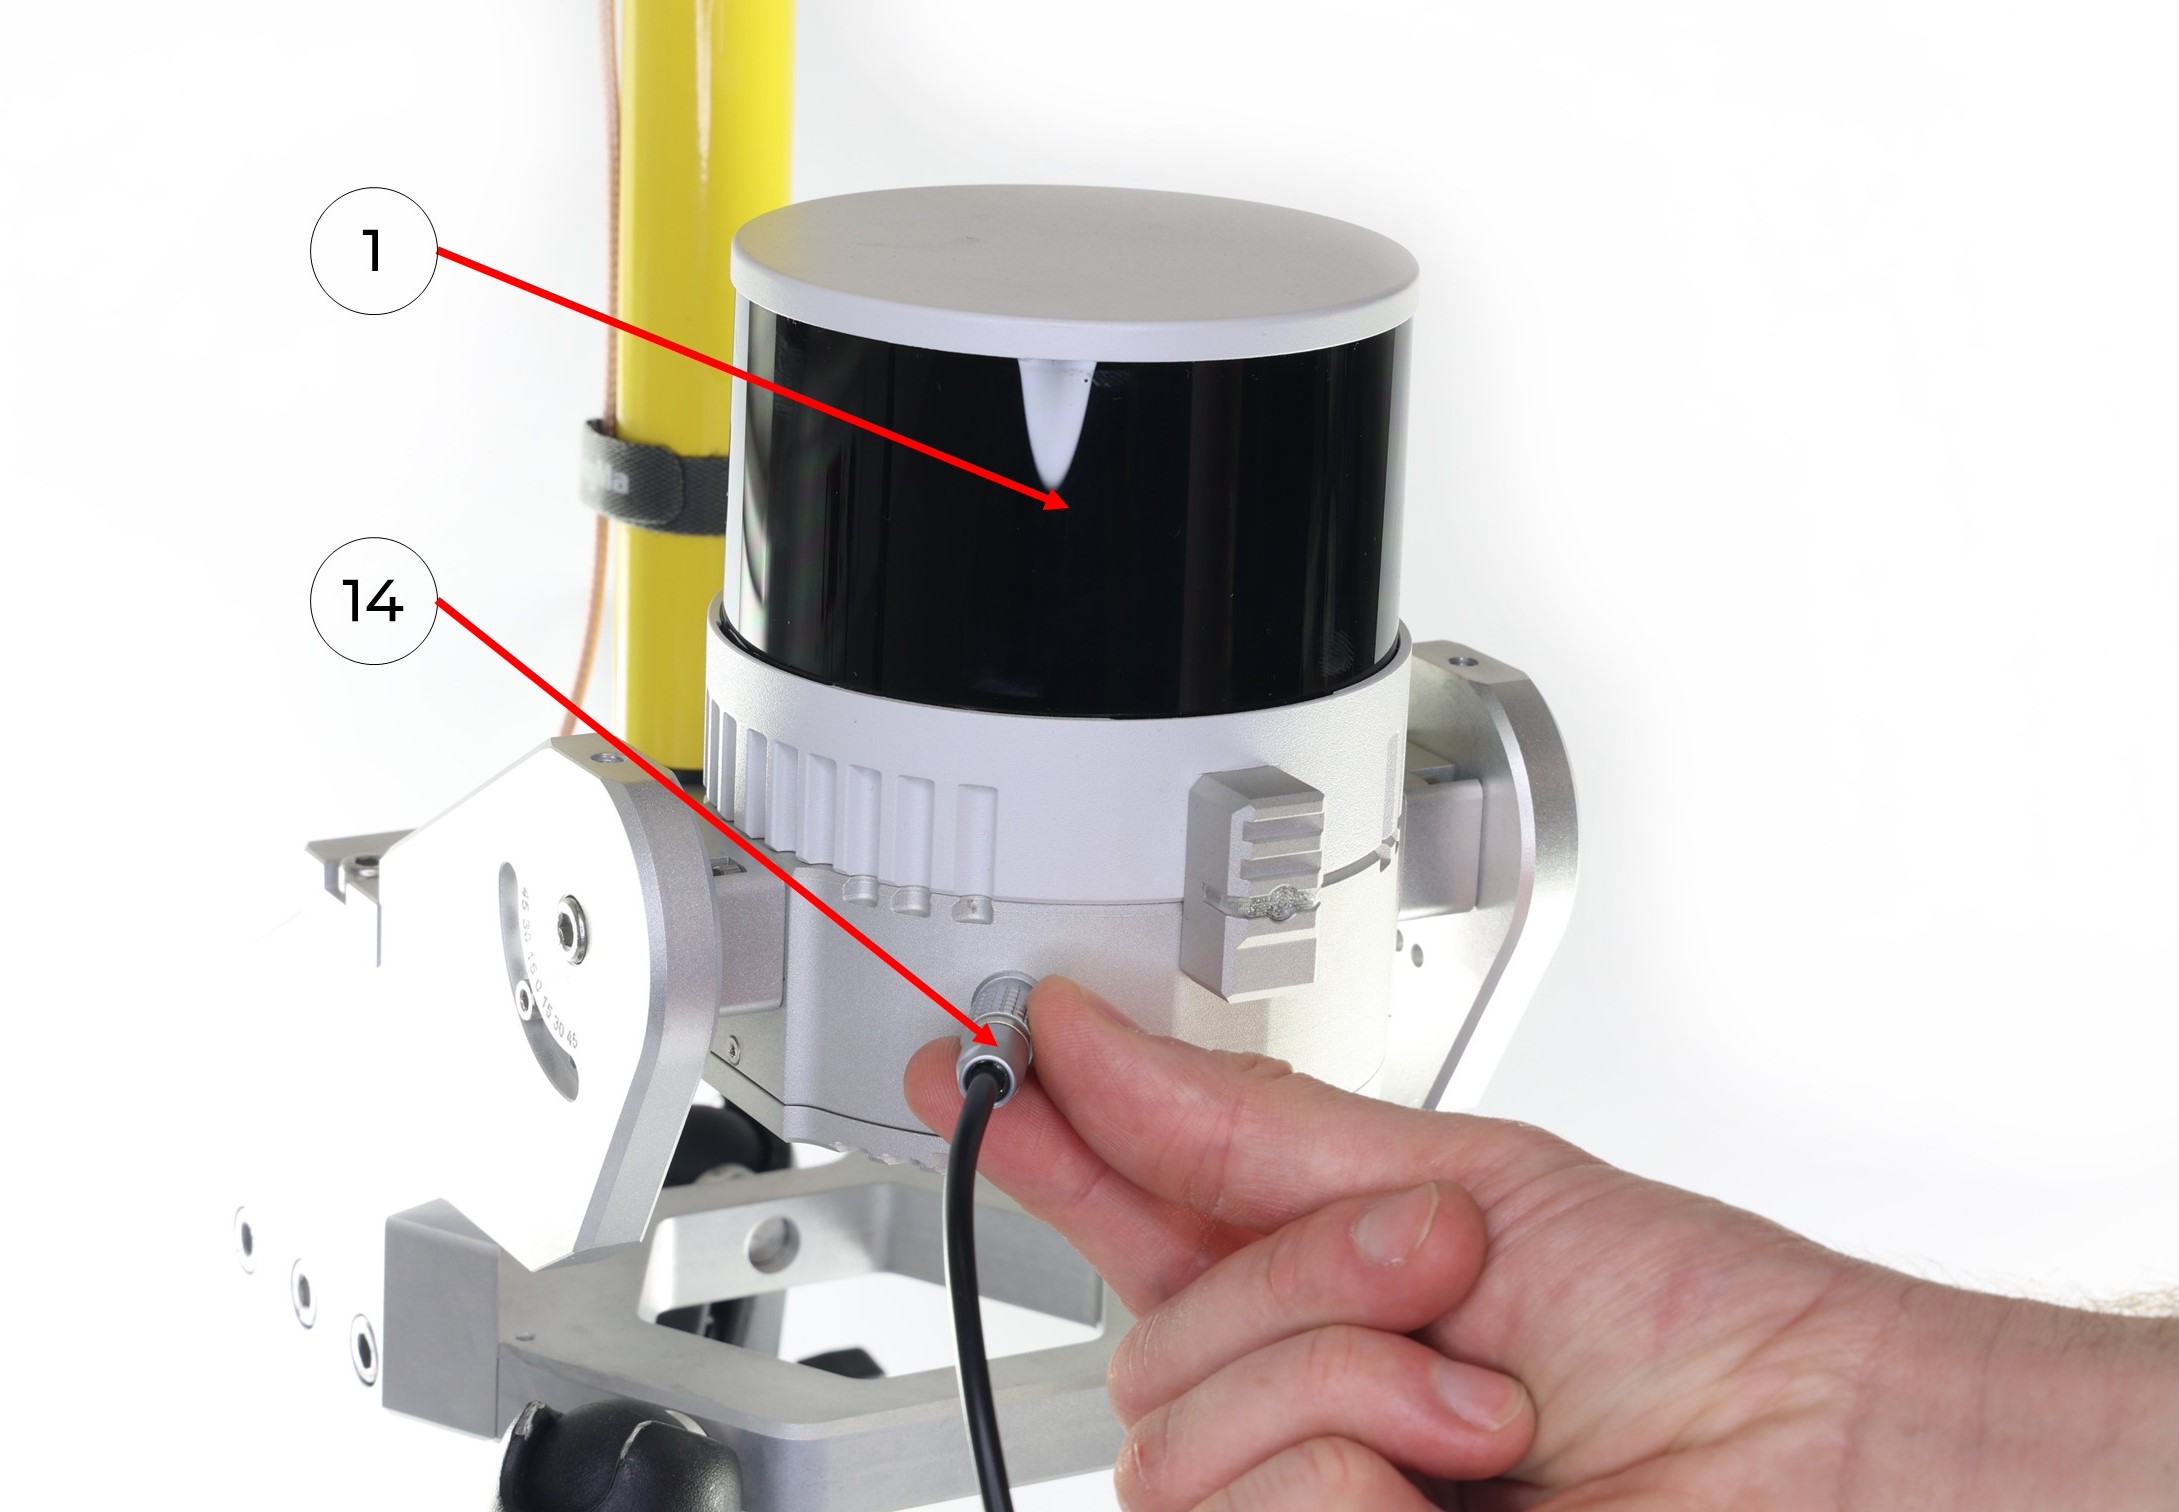
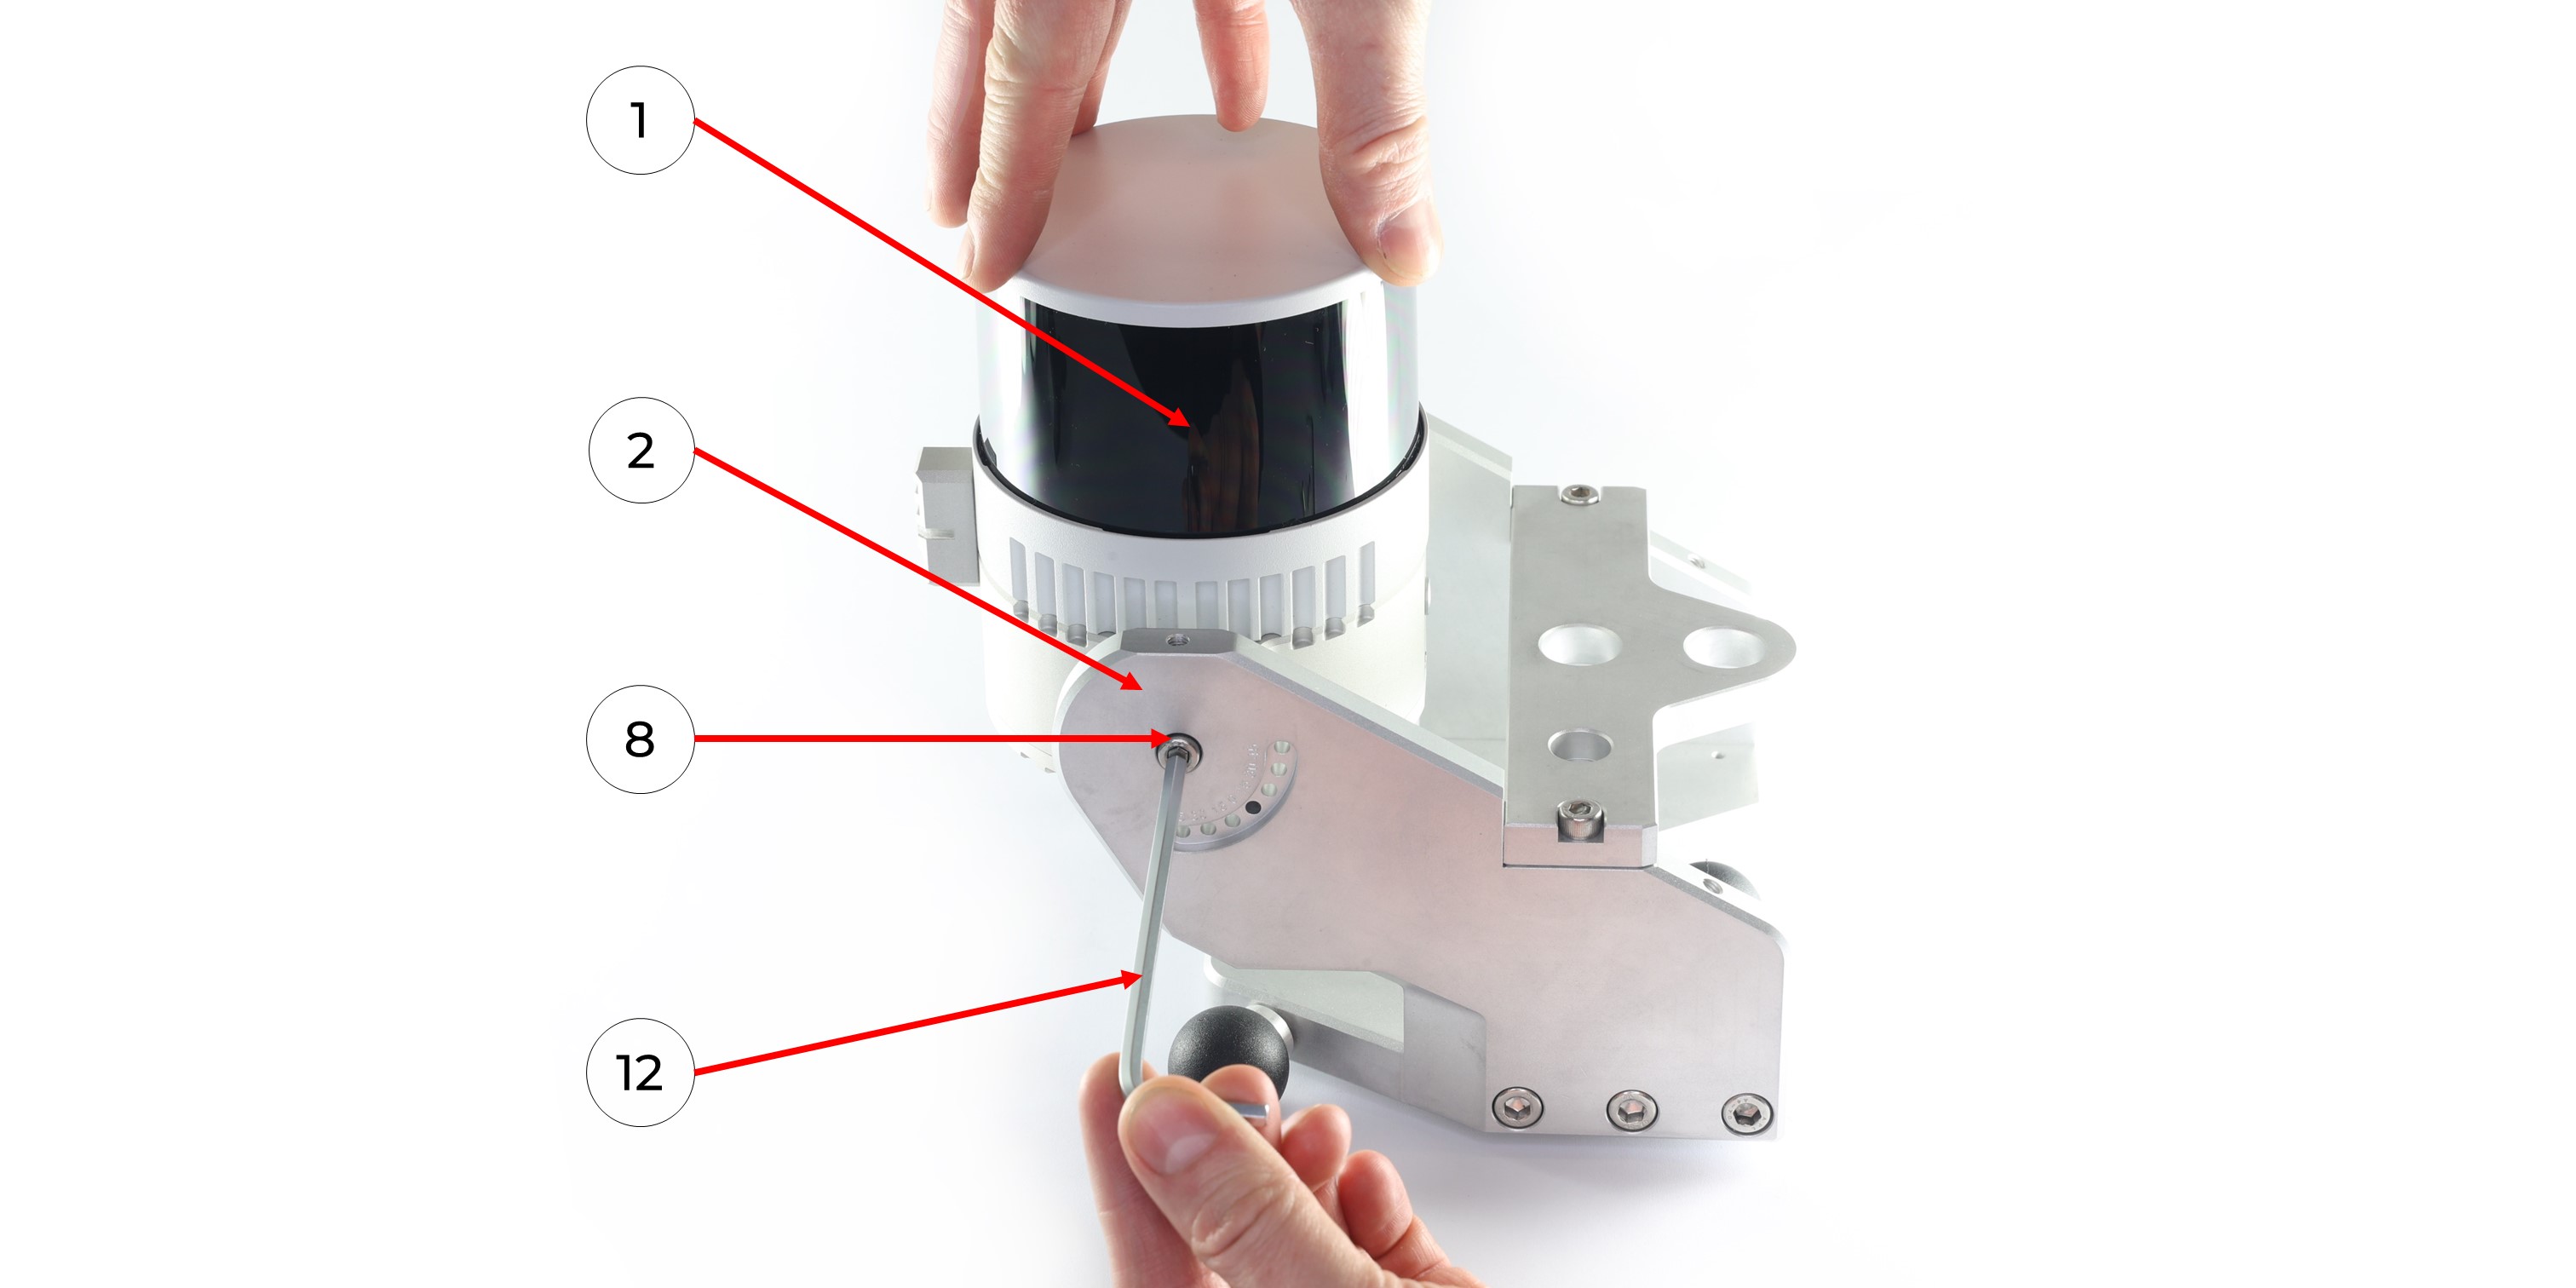 3. Set the TOPODRONE laser scanner (1) at the required angle on the main part of the mobile mount (2) and fix the position with two M3x10 screws (7) using a Hex 2.5 screwdriver (11).
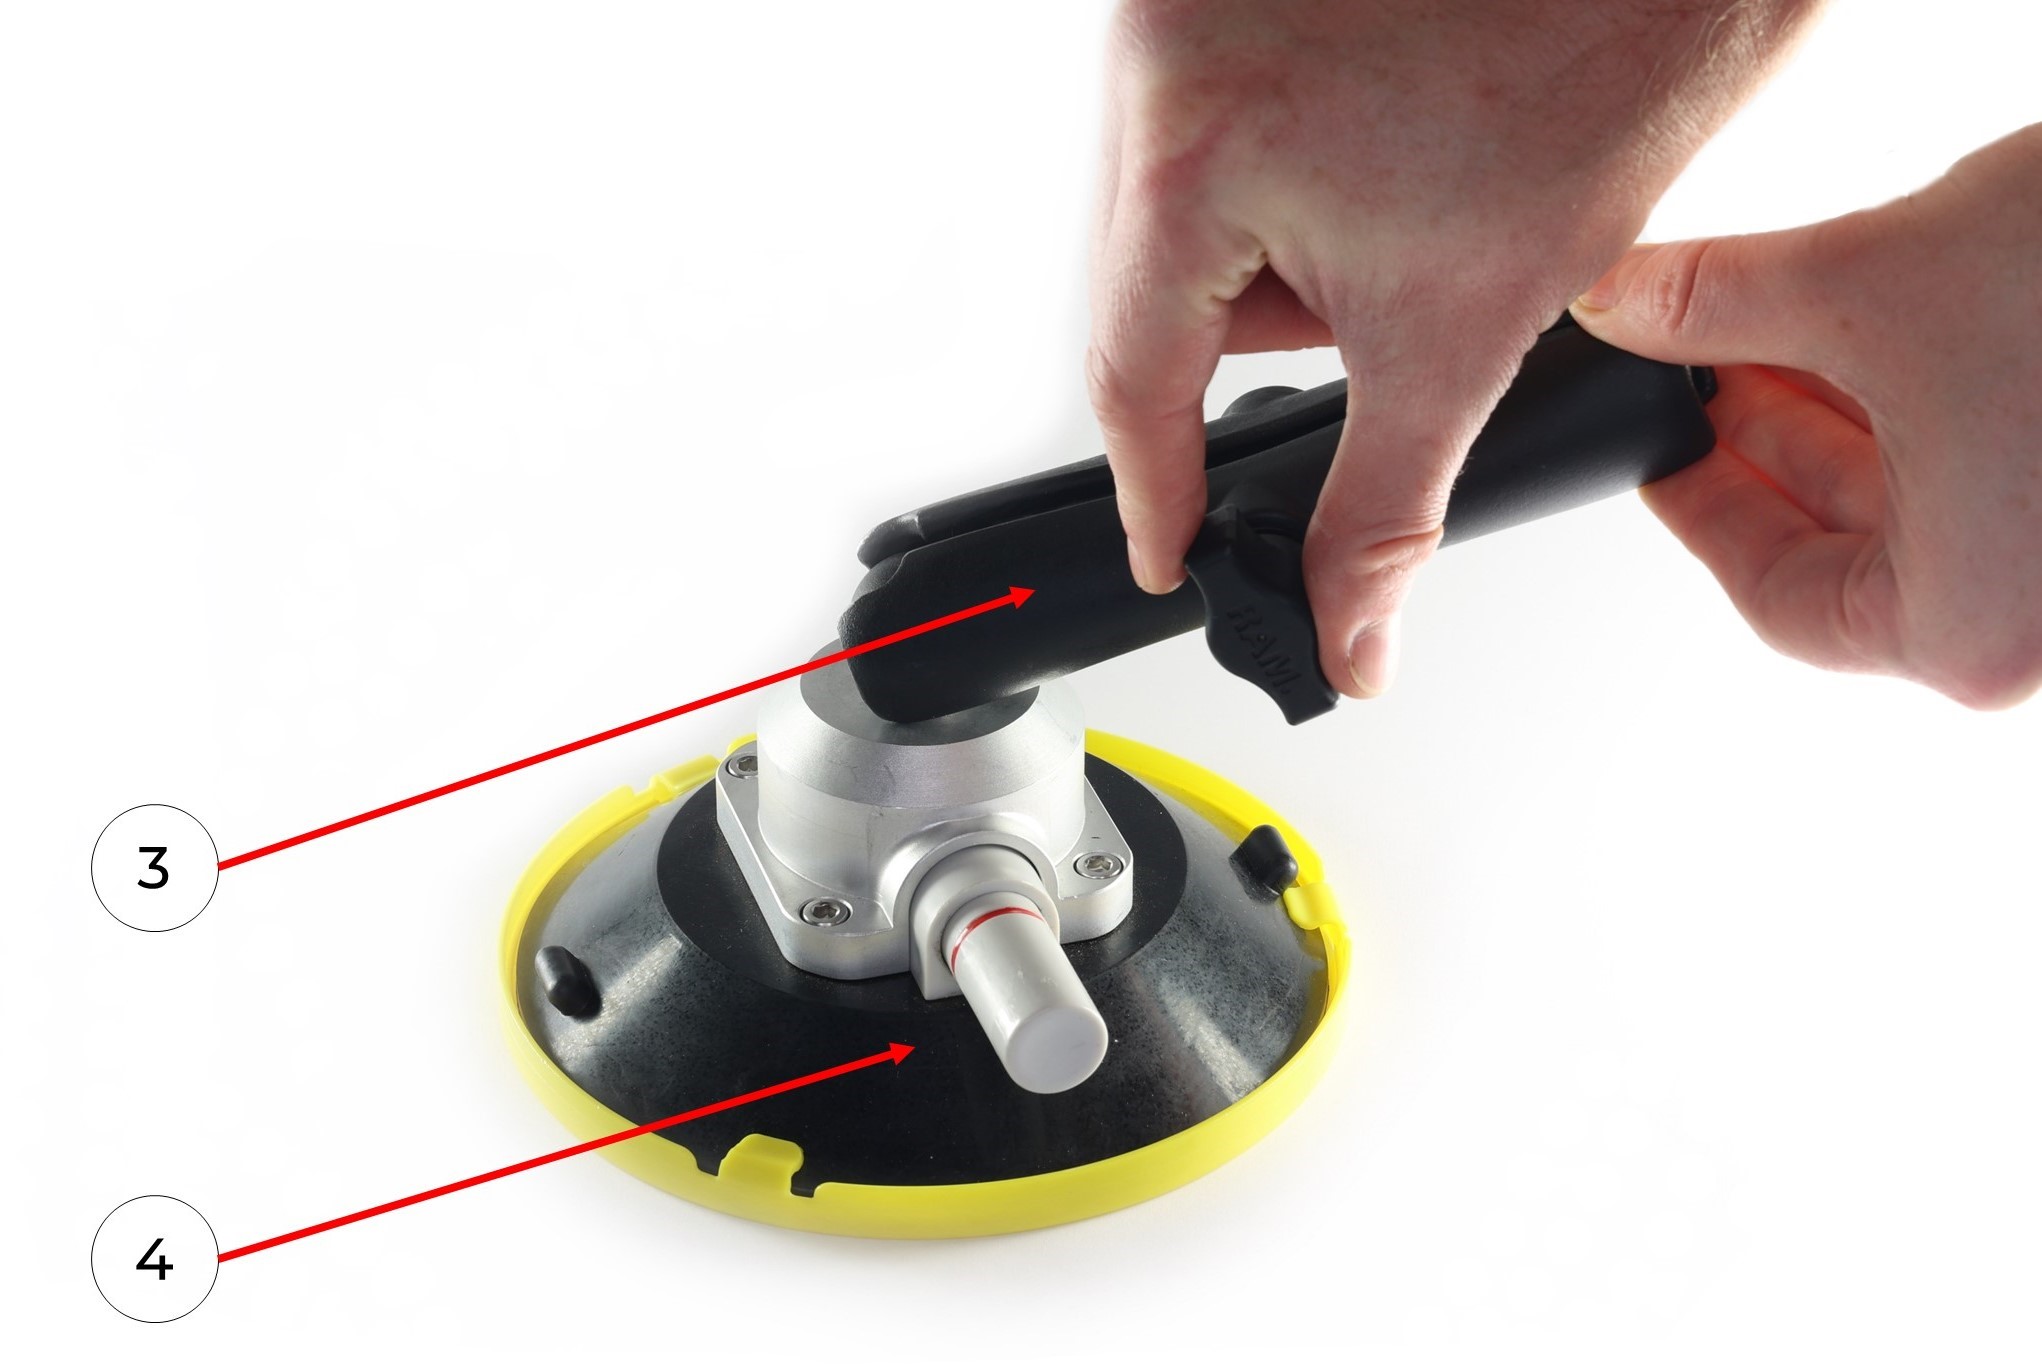
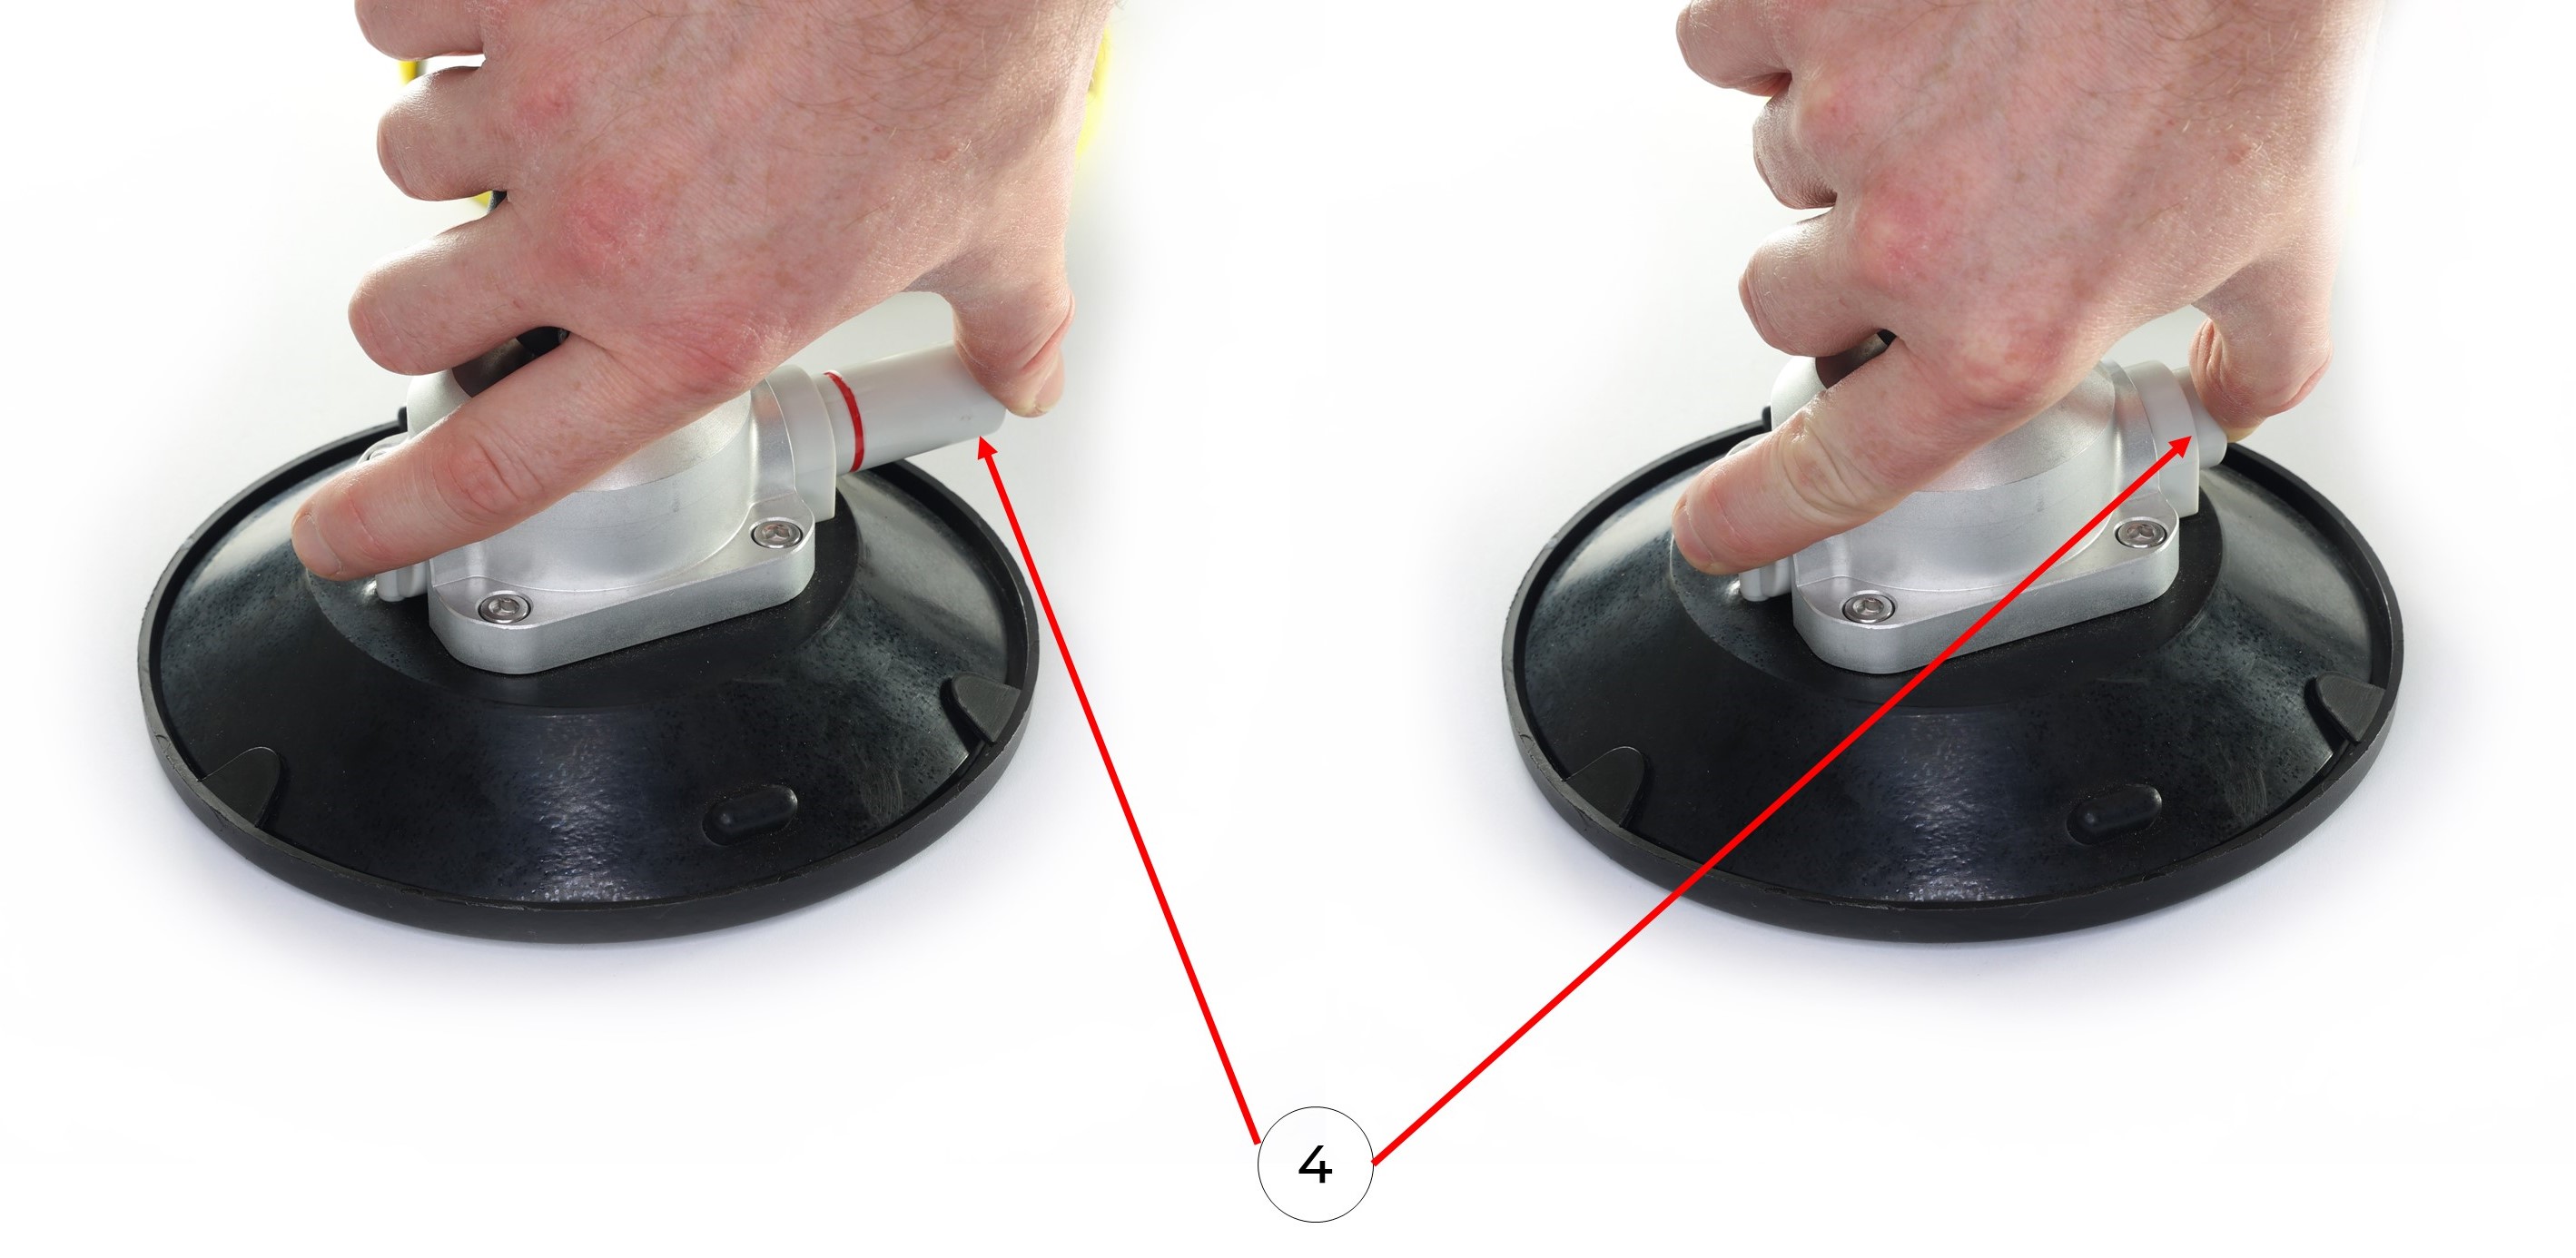
4. Connect the mobile mount beam to the suction cup swivel mechanism, repeat with all parts.
5. Connect the mobile mount beam with the other side to the hinge mechanism of the mobile mount main attachment. If necessary, manually loosen or tighten the thumbscrew. Once the hinge mechanisms are in alignment, manually tighten the thumbscrew.
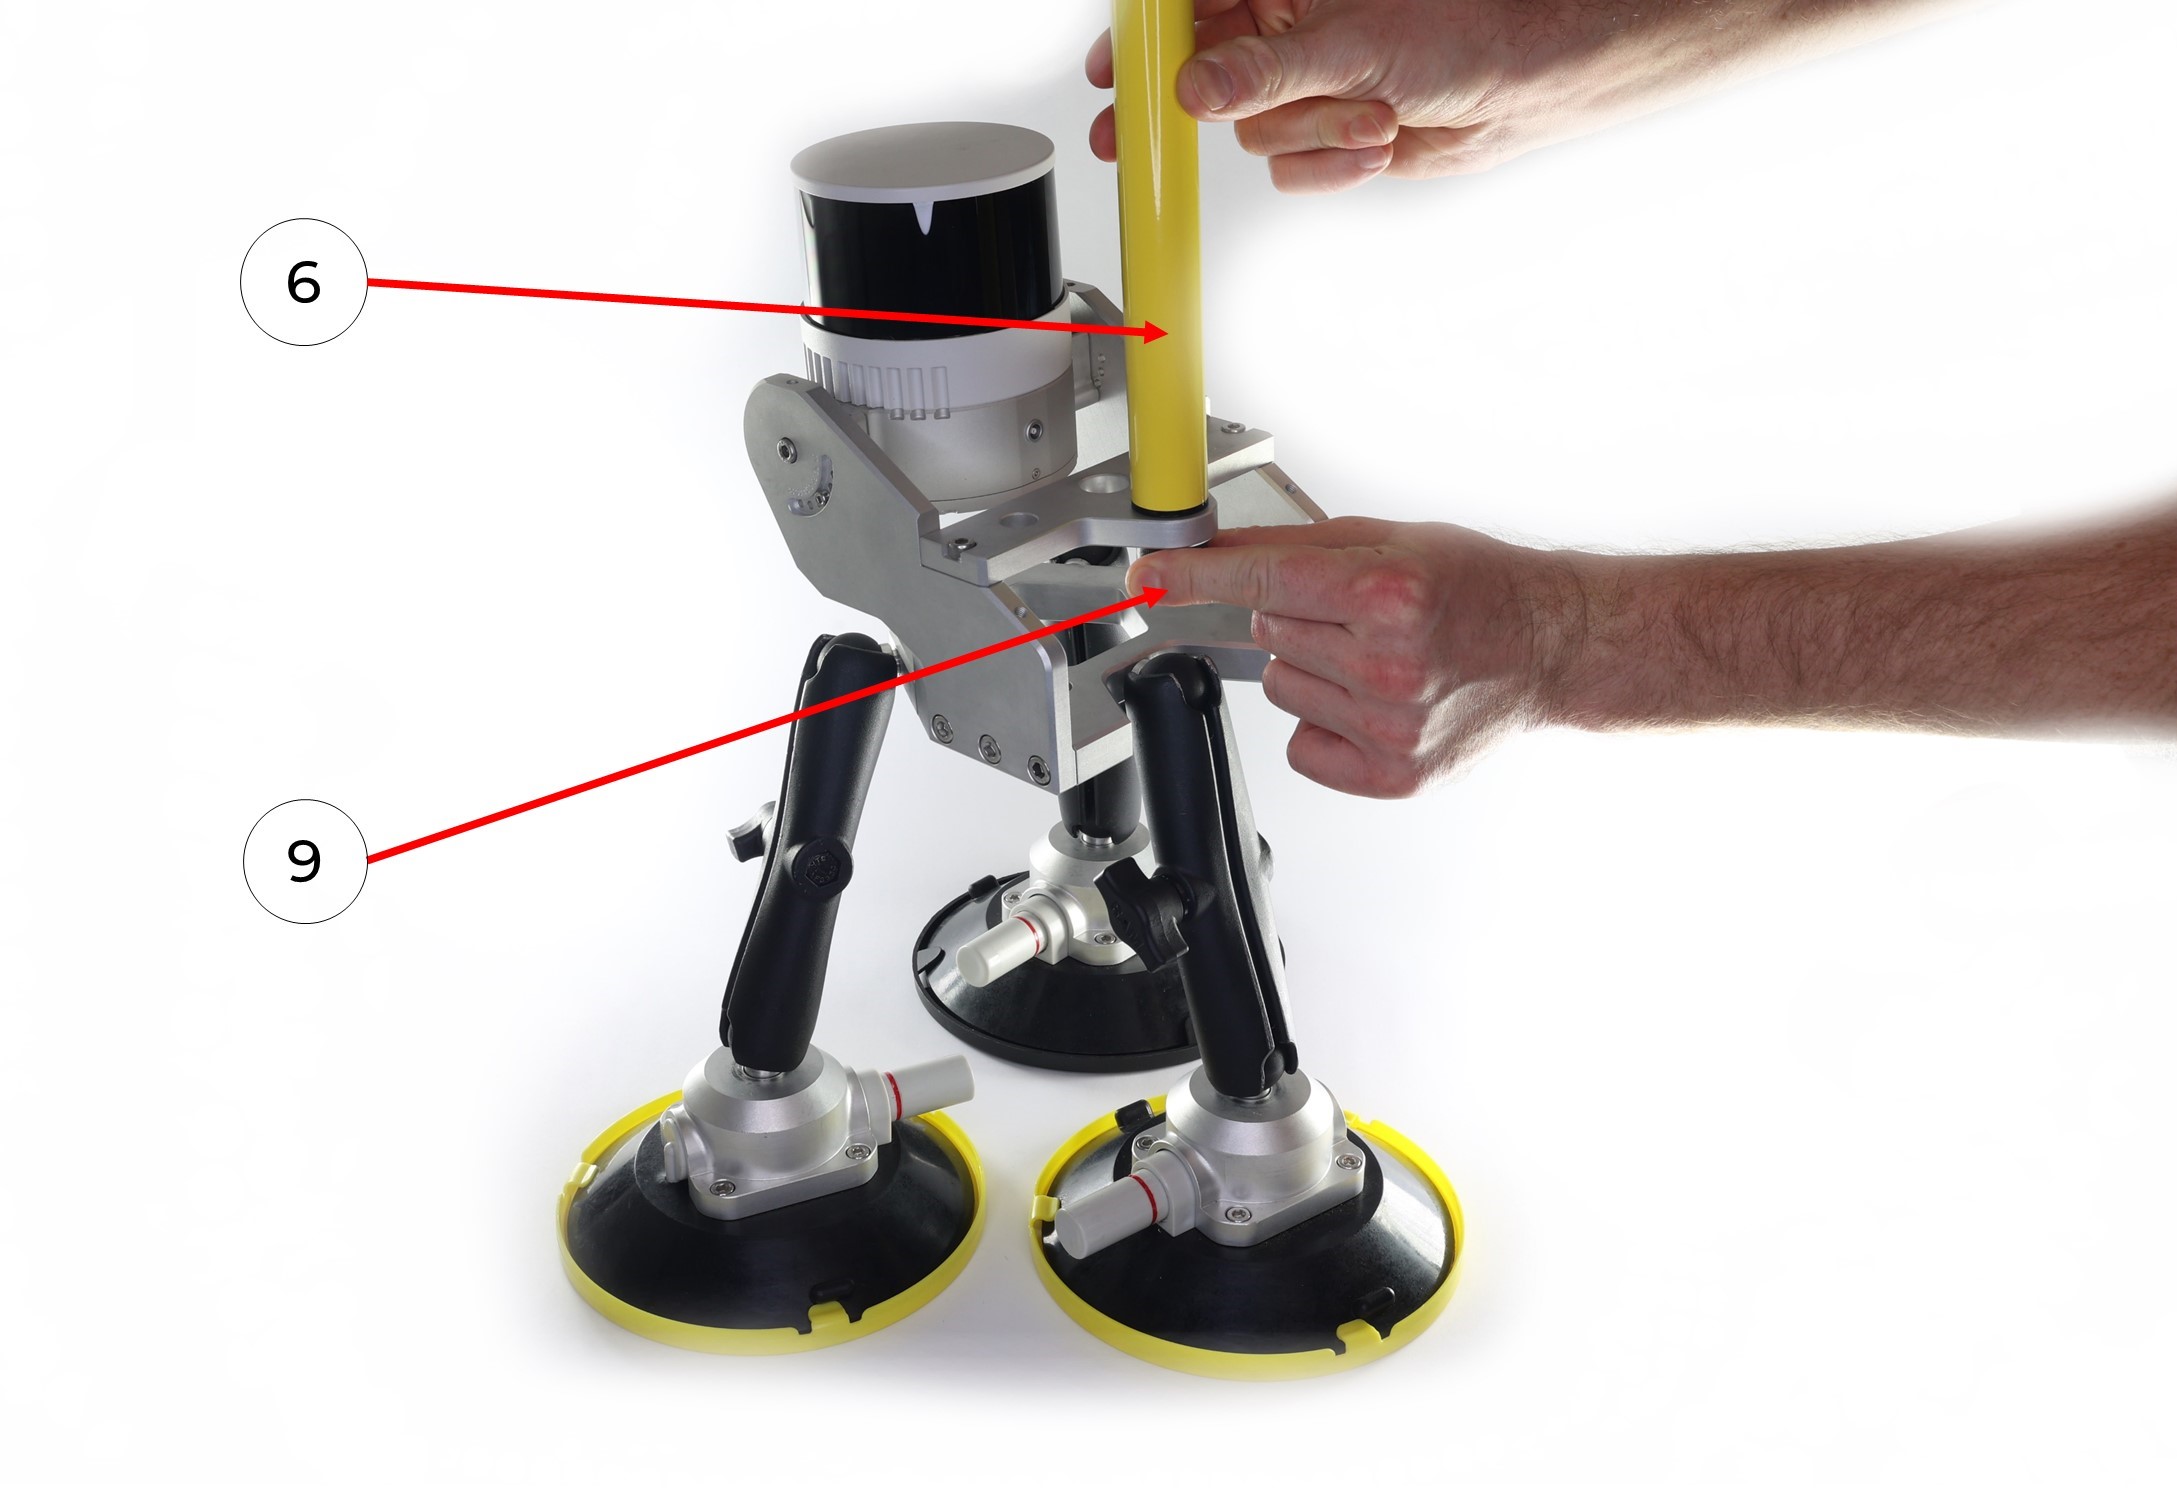
6. Firmly install the milestone using the screw in the outermost compartment of the main part of the mobile mount.
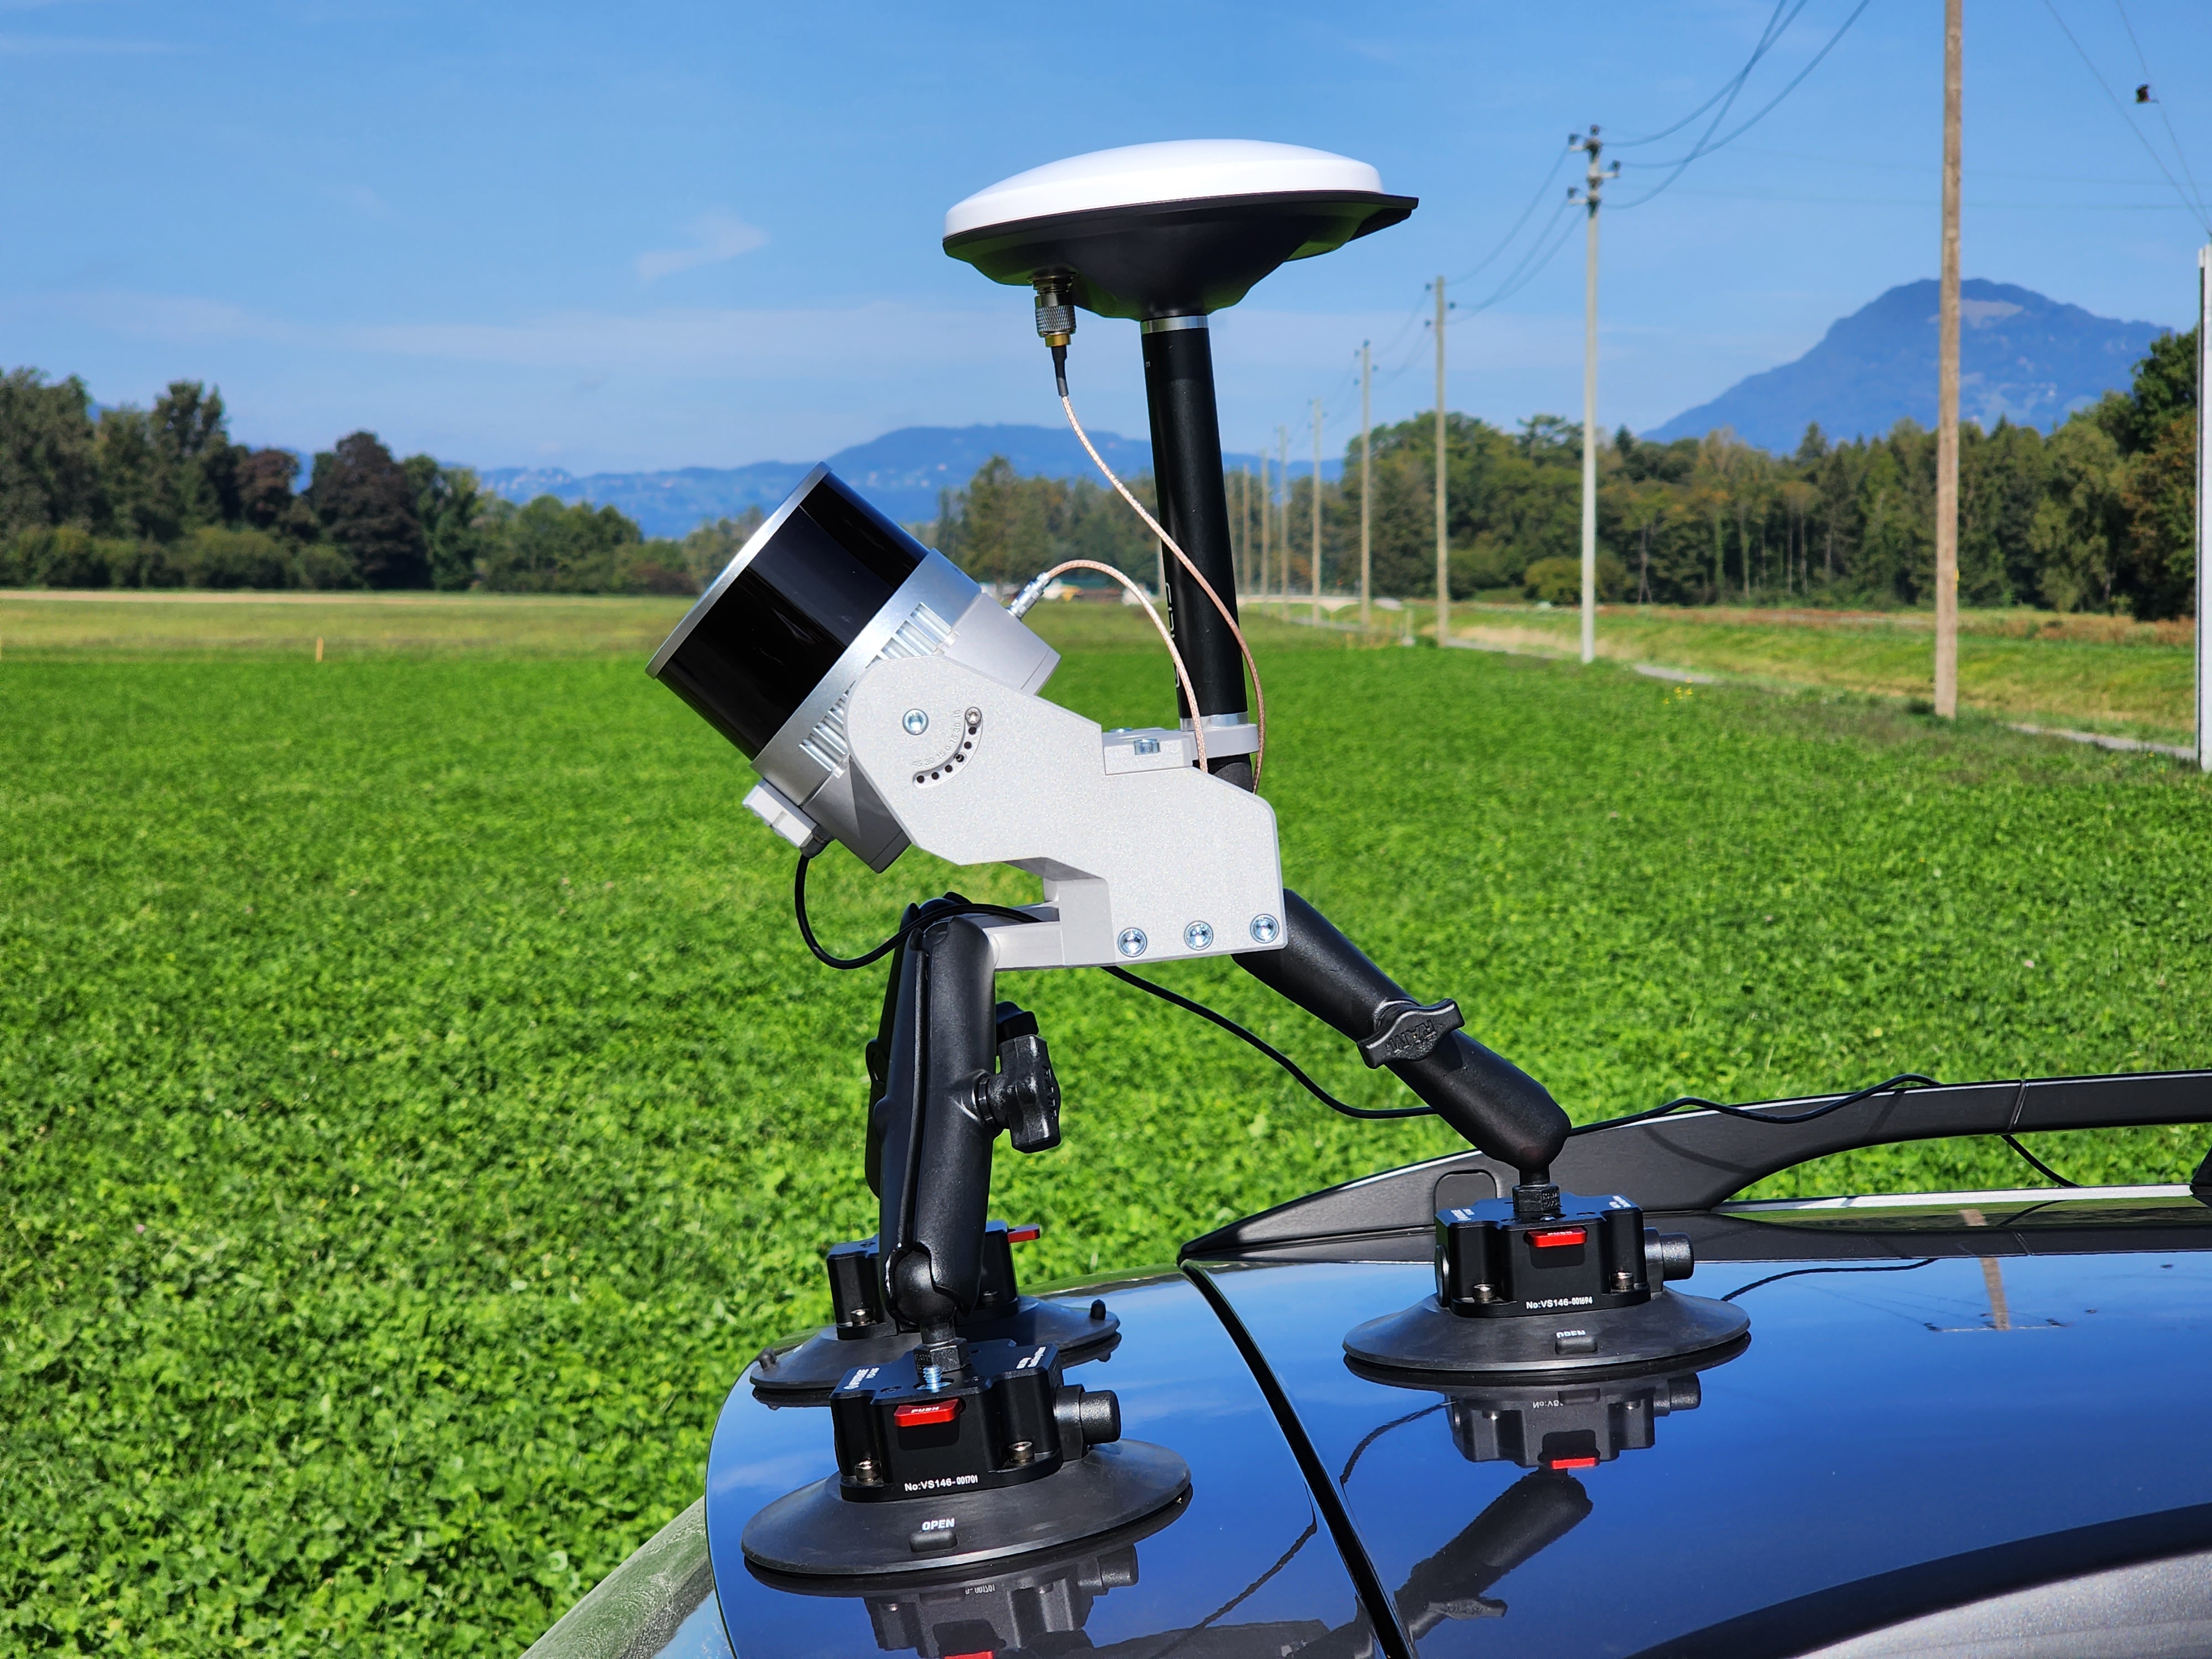
7. Screw the GNSS antenna (5) onto the pole (6).
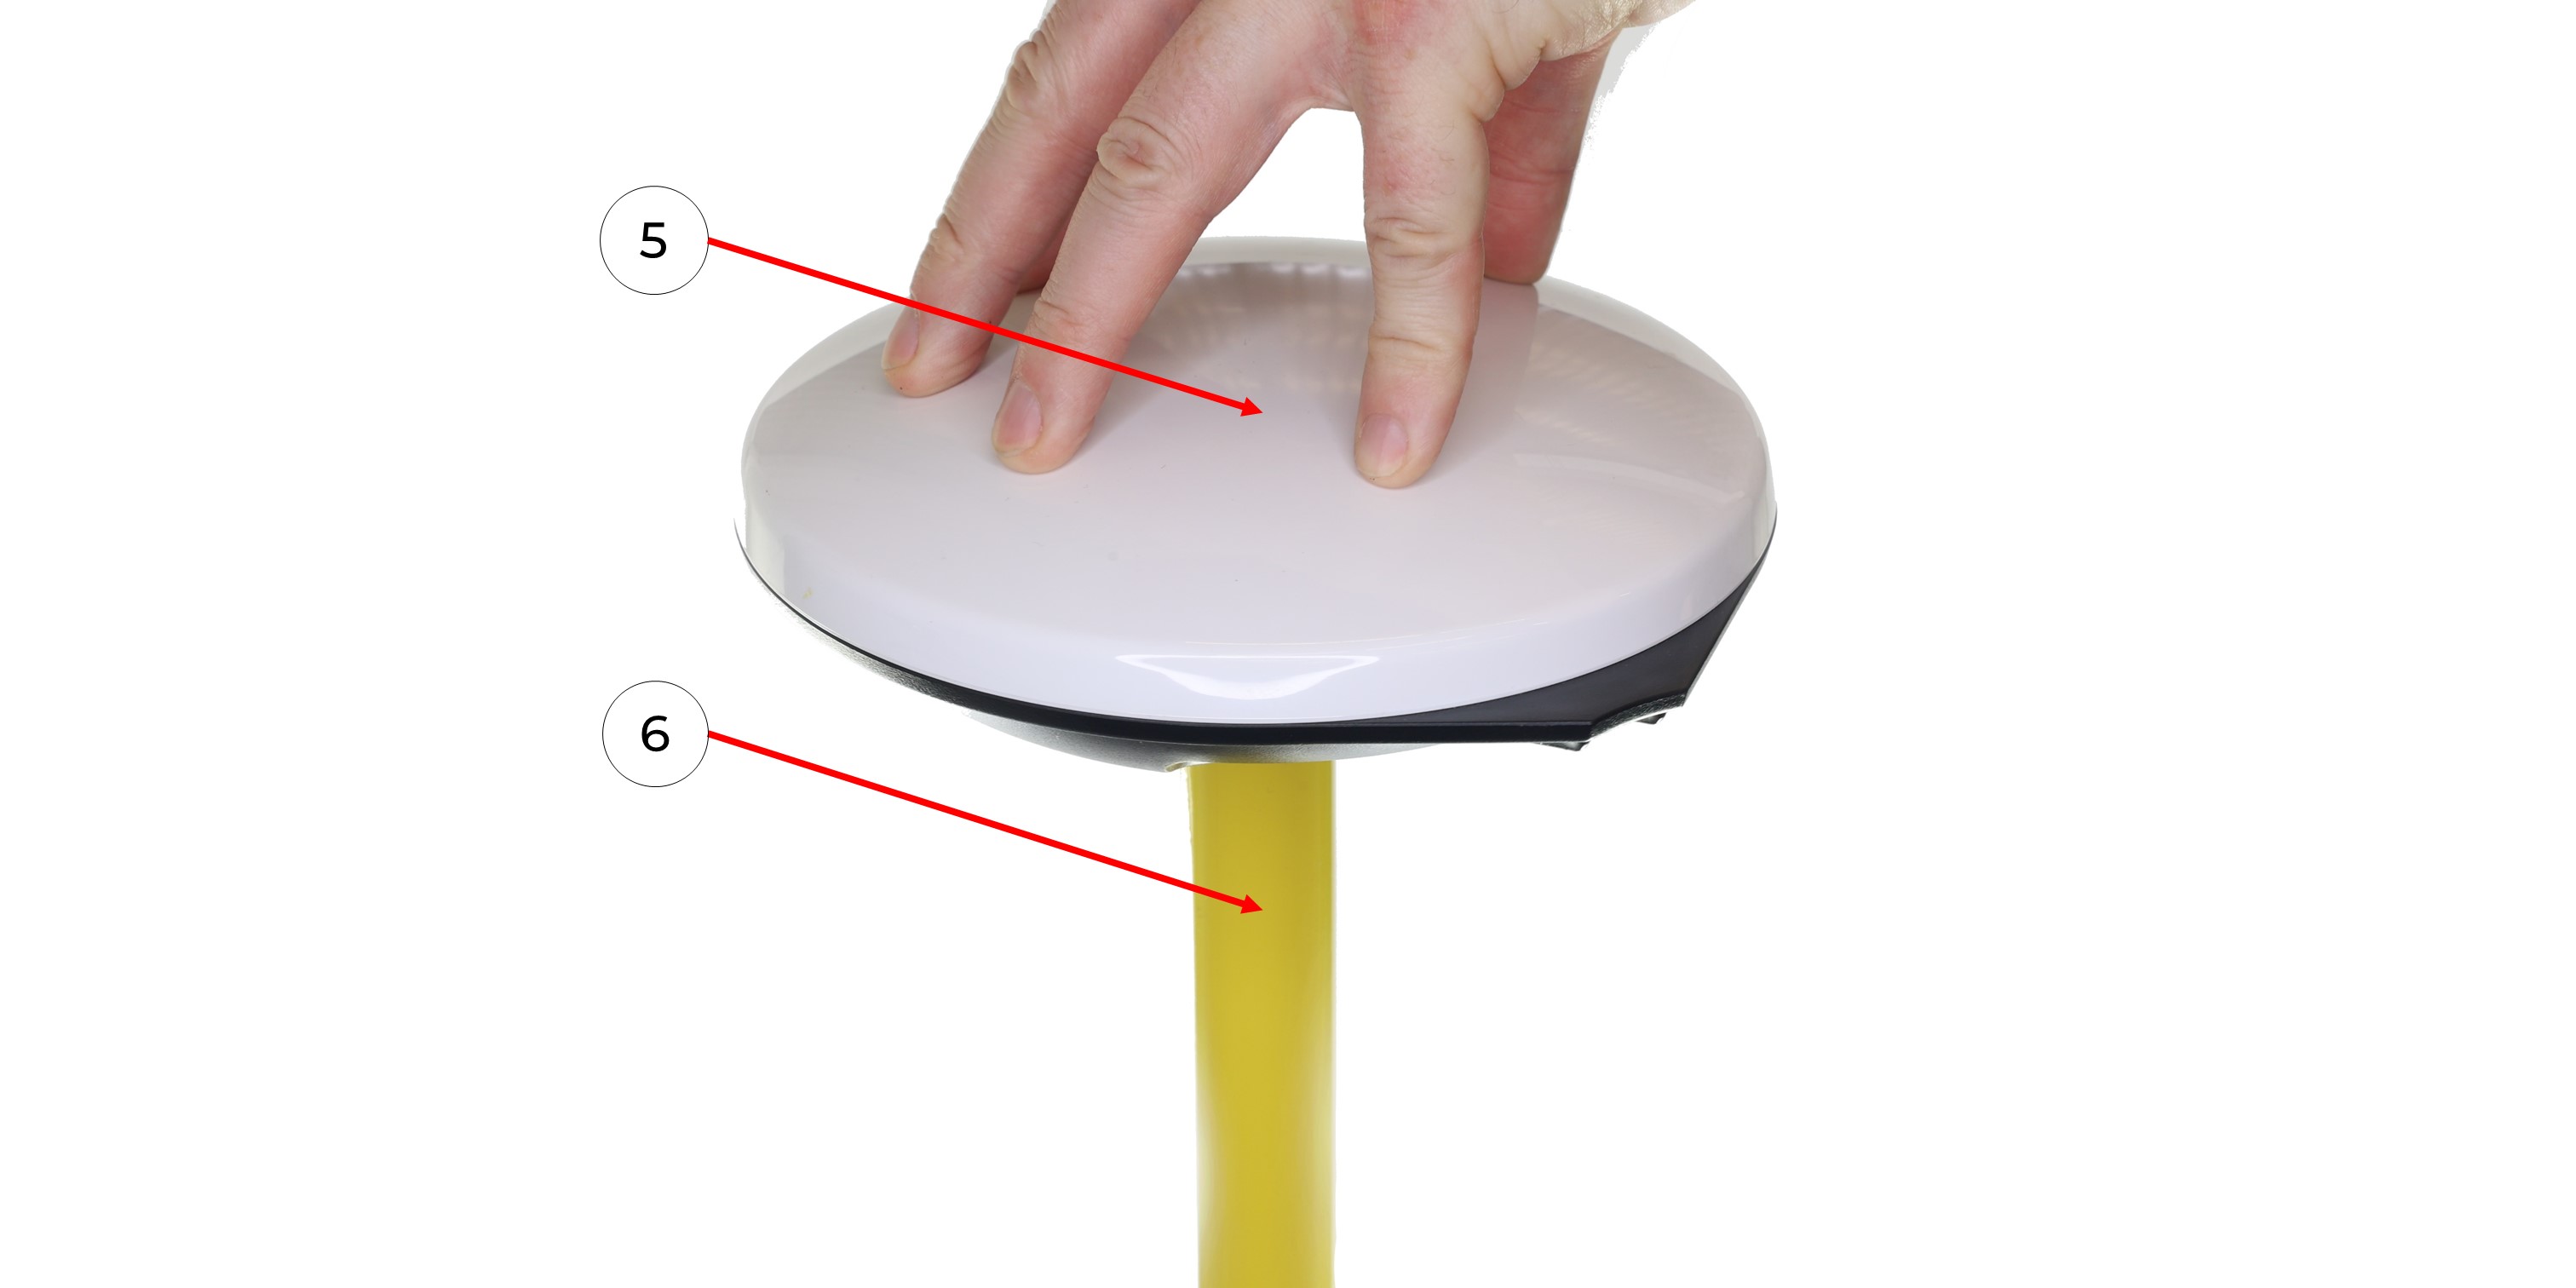
8. Connect the GNSS cable (13) to the GNSS antenna (5), taking care not to bend it.
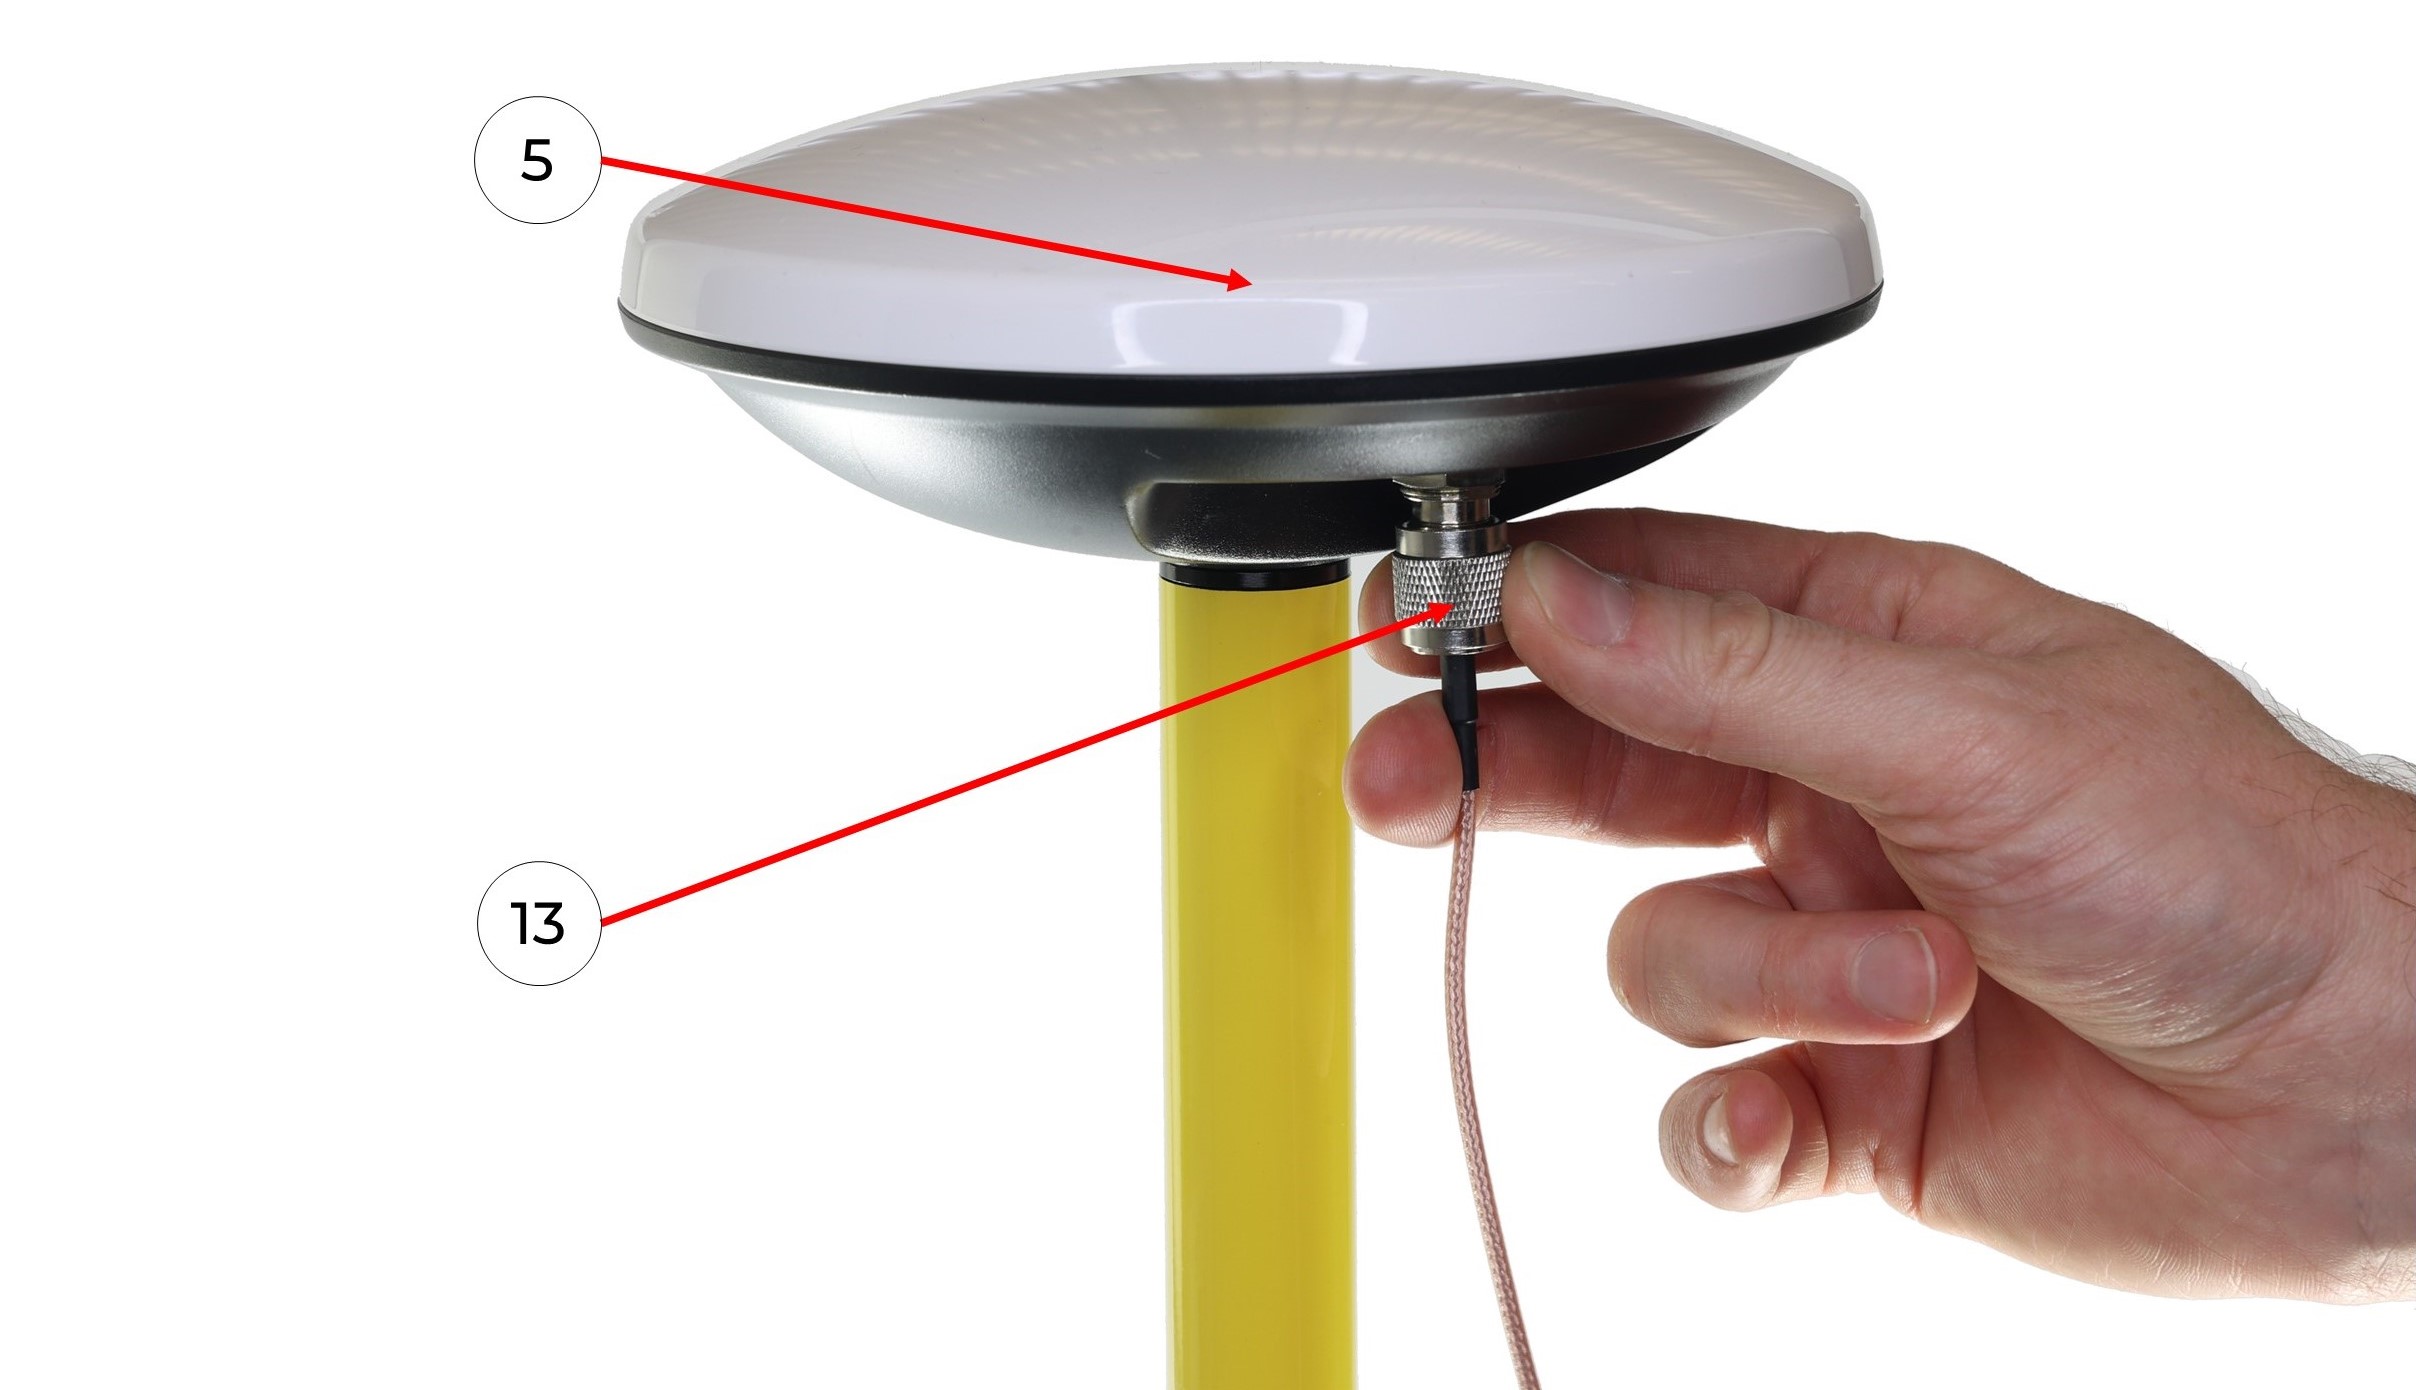
9. Connect the antenna cable with the LEMO connector (13) to the TOPODRONE LiDAR (1) it clicks into place.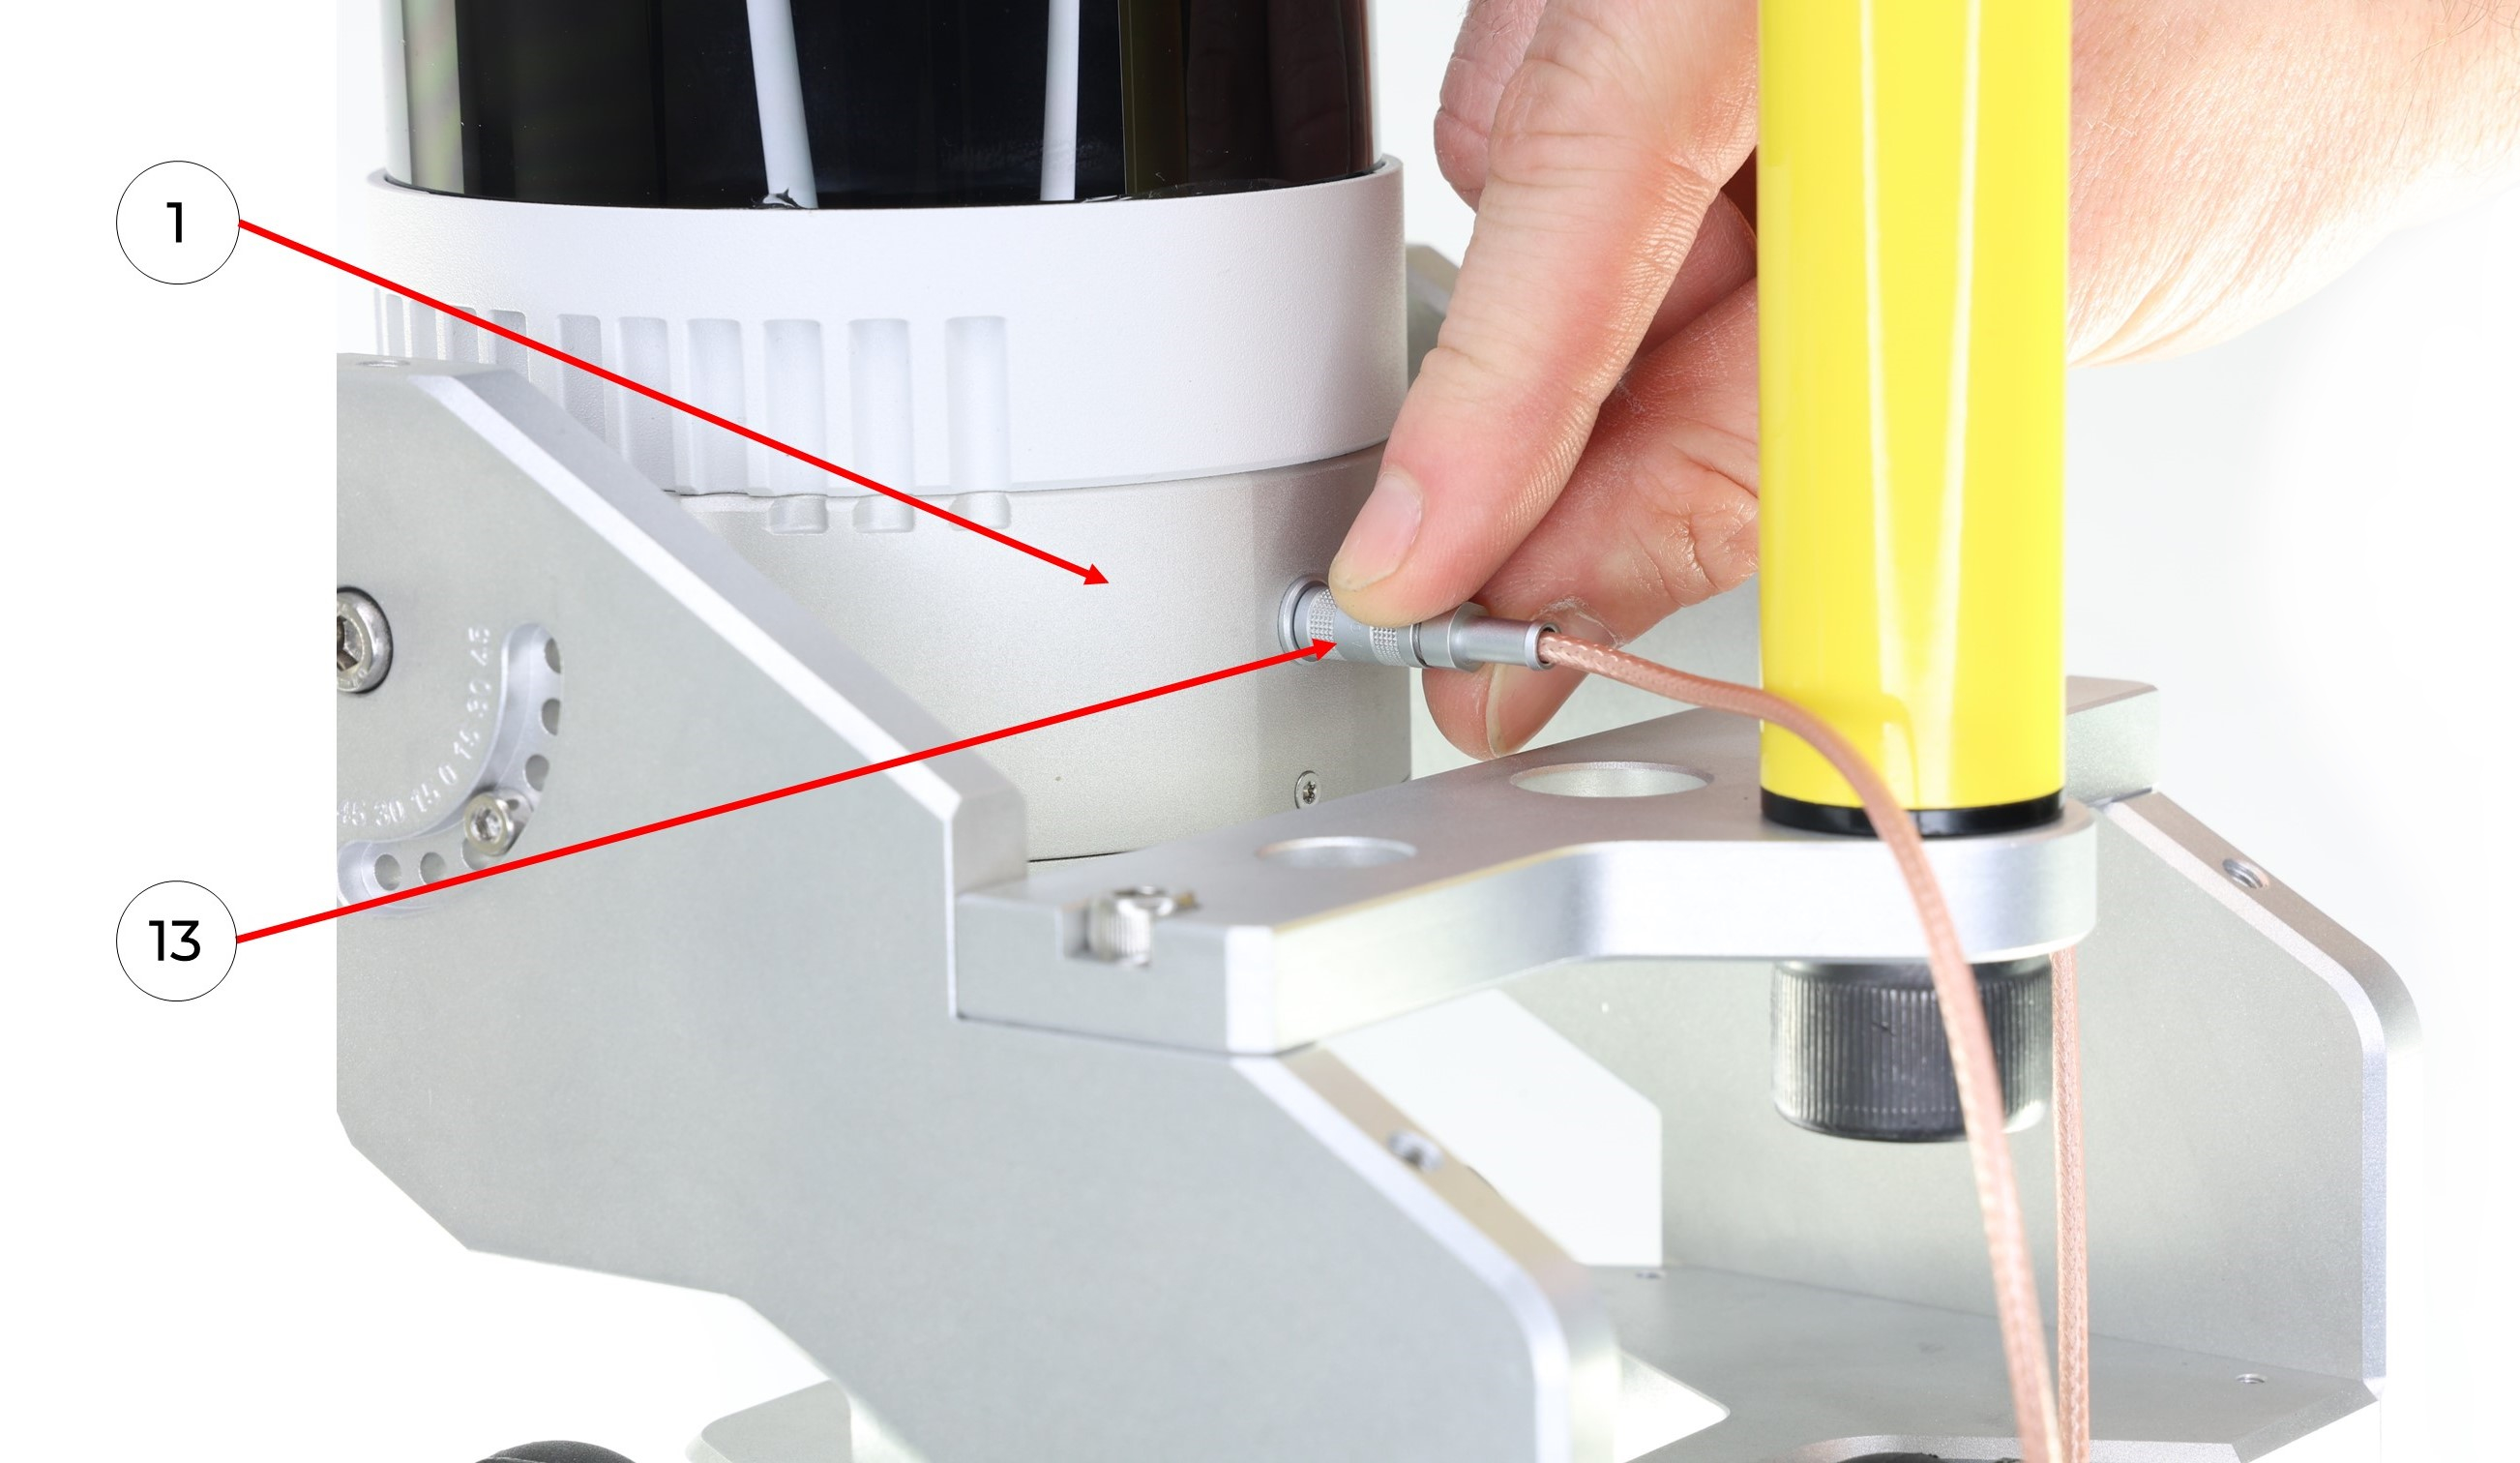
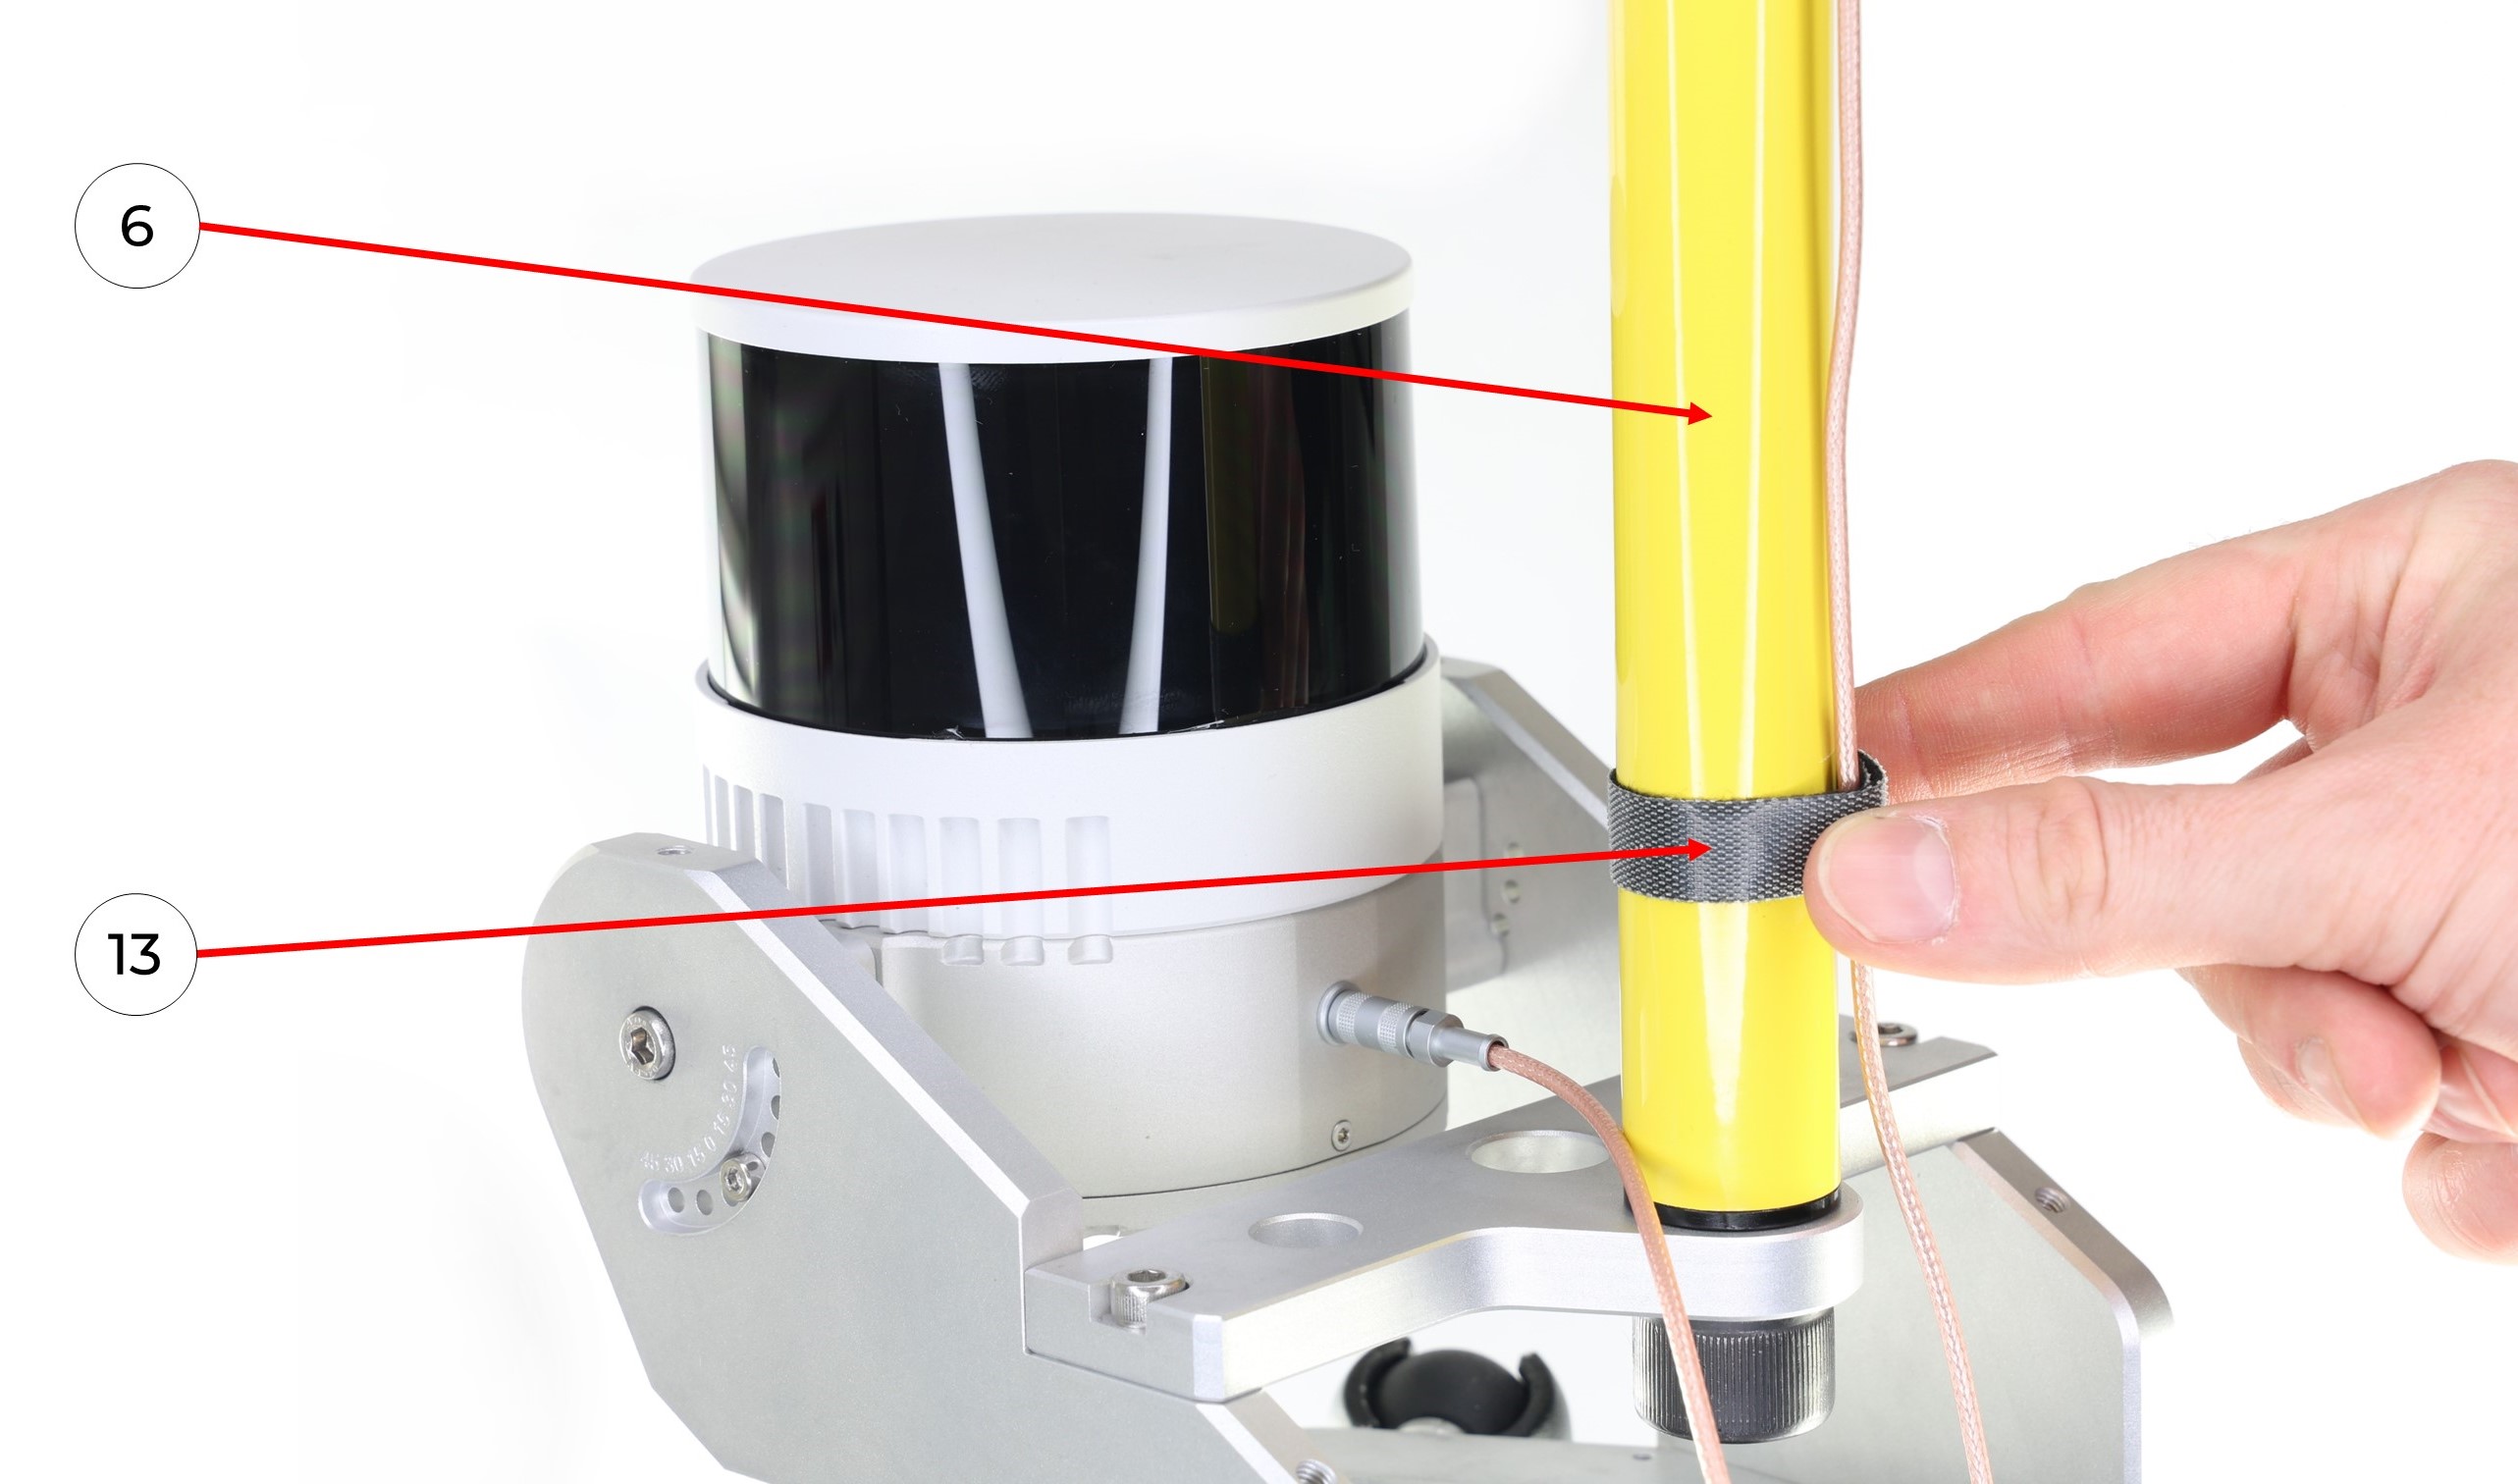
10. It is recommended to fix the antenna cable in the area of the pole (6) with a GNSS cable velcro (13) as shown in the photo.
10. Протрите поверхность автомобиля влажными и сухими салфетками. Снимите с присосок защитные колпаки. Установите мобильное крепление на автомобиль при помощи присосок при помощи помпы. Важно! Нельзя устанавливать присоски на загрязнённые пыльные поверхности, а так же на стыки плоскостей и деталей, где есть швы и зазоры. На приведённых фотографиях ниже показан процесс откачки воздуха из присосок, колпаки присосок не сняты.
 11. Подсоедините кабель питания LEMO к лазерному сканеру до лёгкого щелчка.
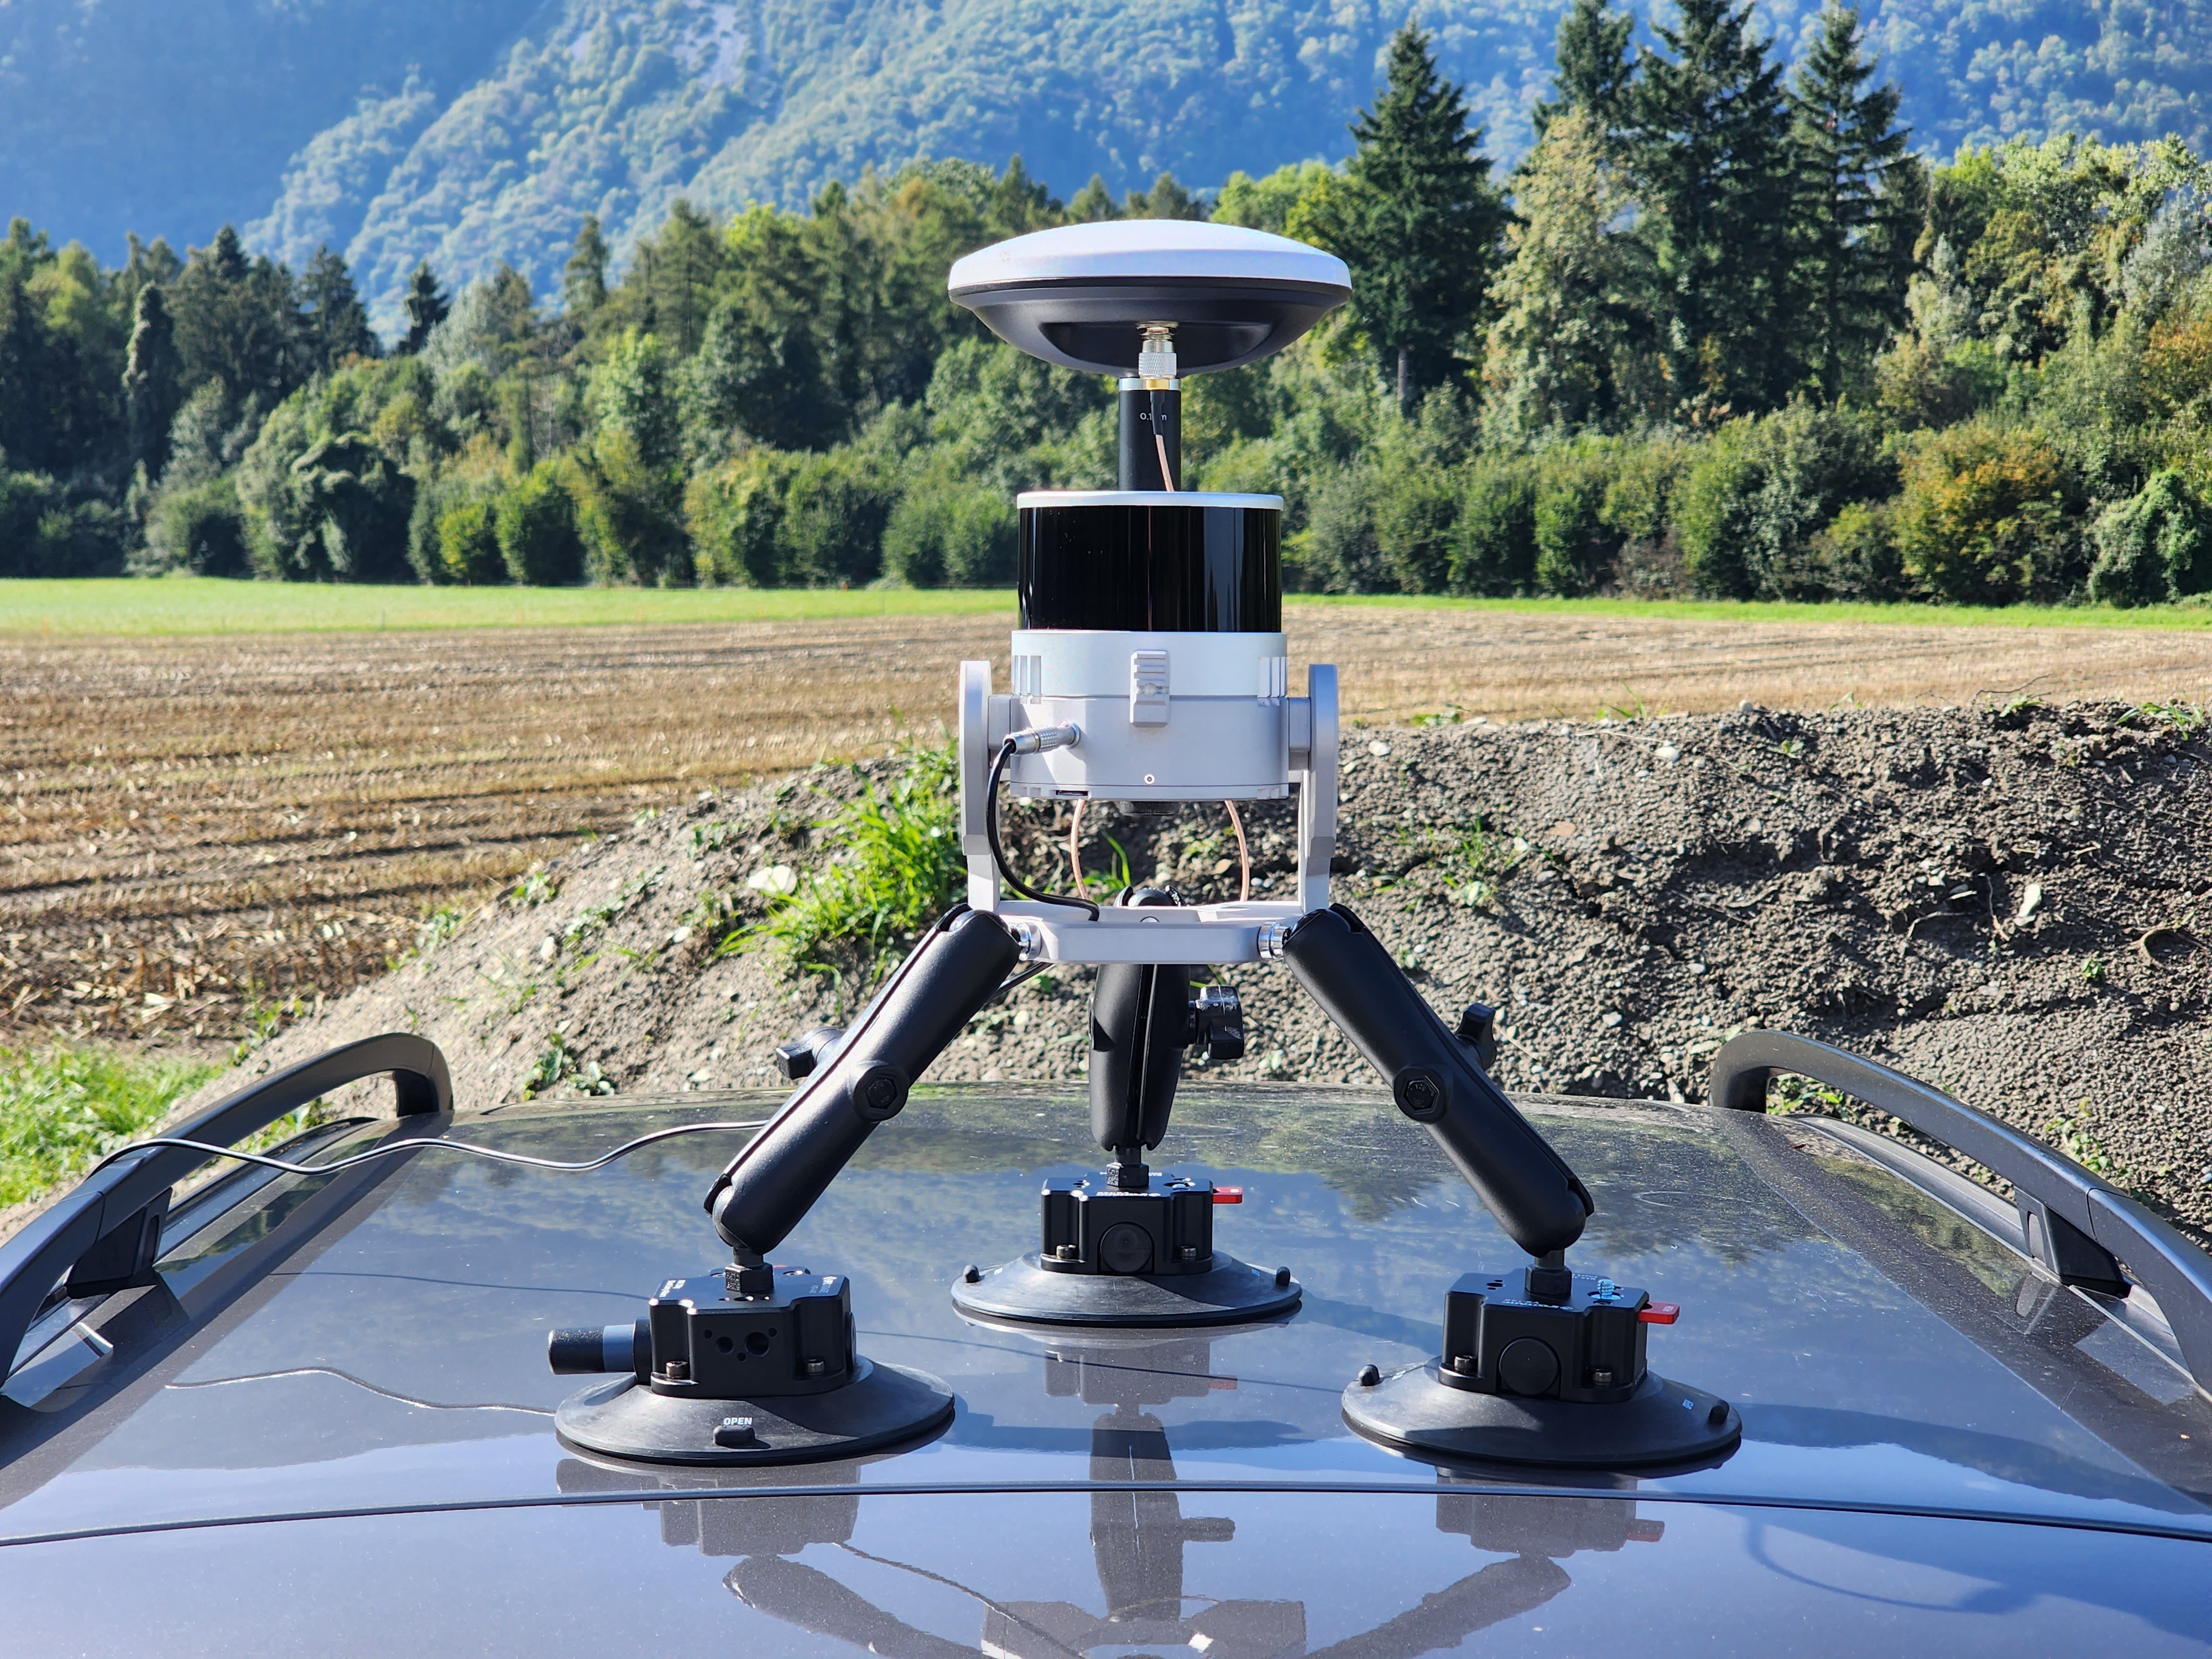
12. При необходимости, используя барашки лучей, отрегулируйте положение мобильного крепления на автомобиле, что бы оно стояло ровно. На фотографиях, приведенных ниже показаны варианты установки лазерного сканера TOPODRONE 100+ на автомобиль под углами 30 и 0 градусов соответственно.
Примечание: на приведённых фотографиях использована нестандартная веха длинной 20 см, отличная от поставляемой в комплекте поставки.
 |
|
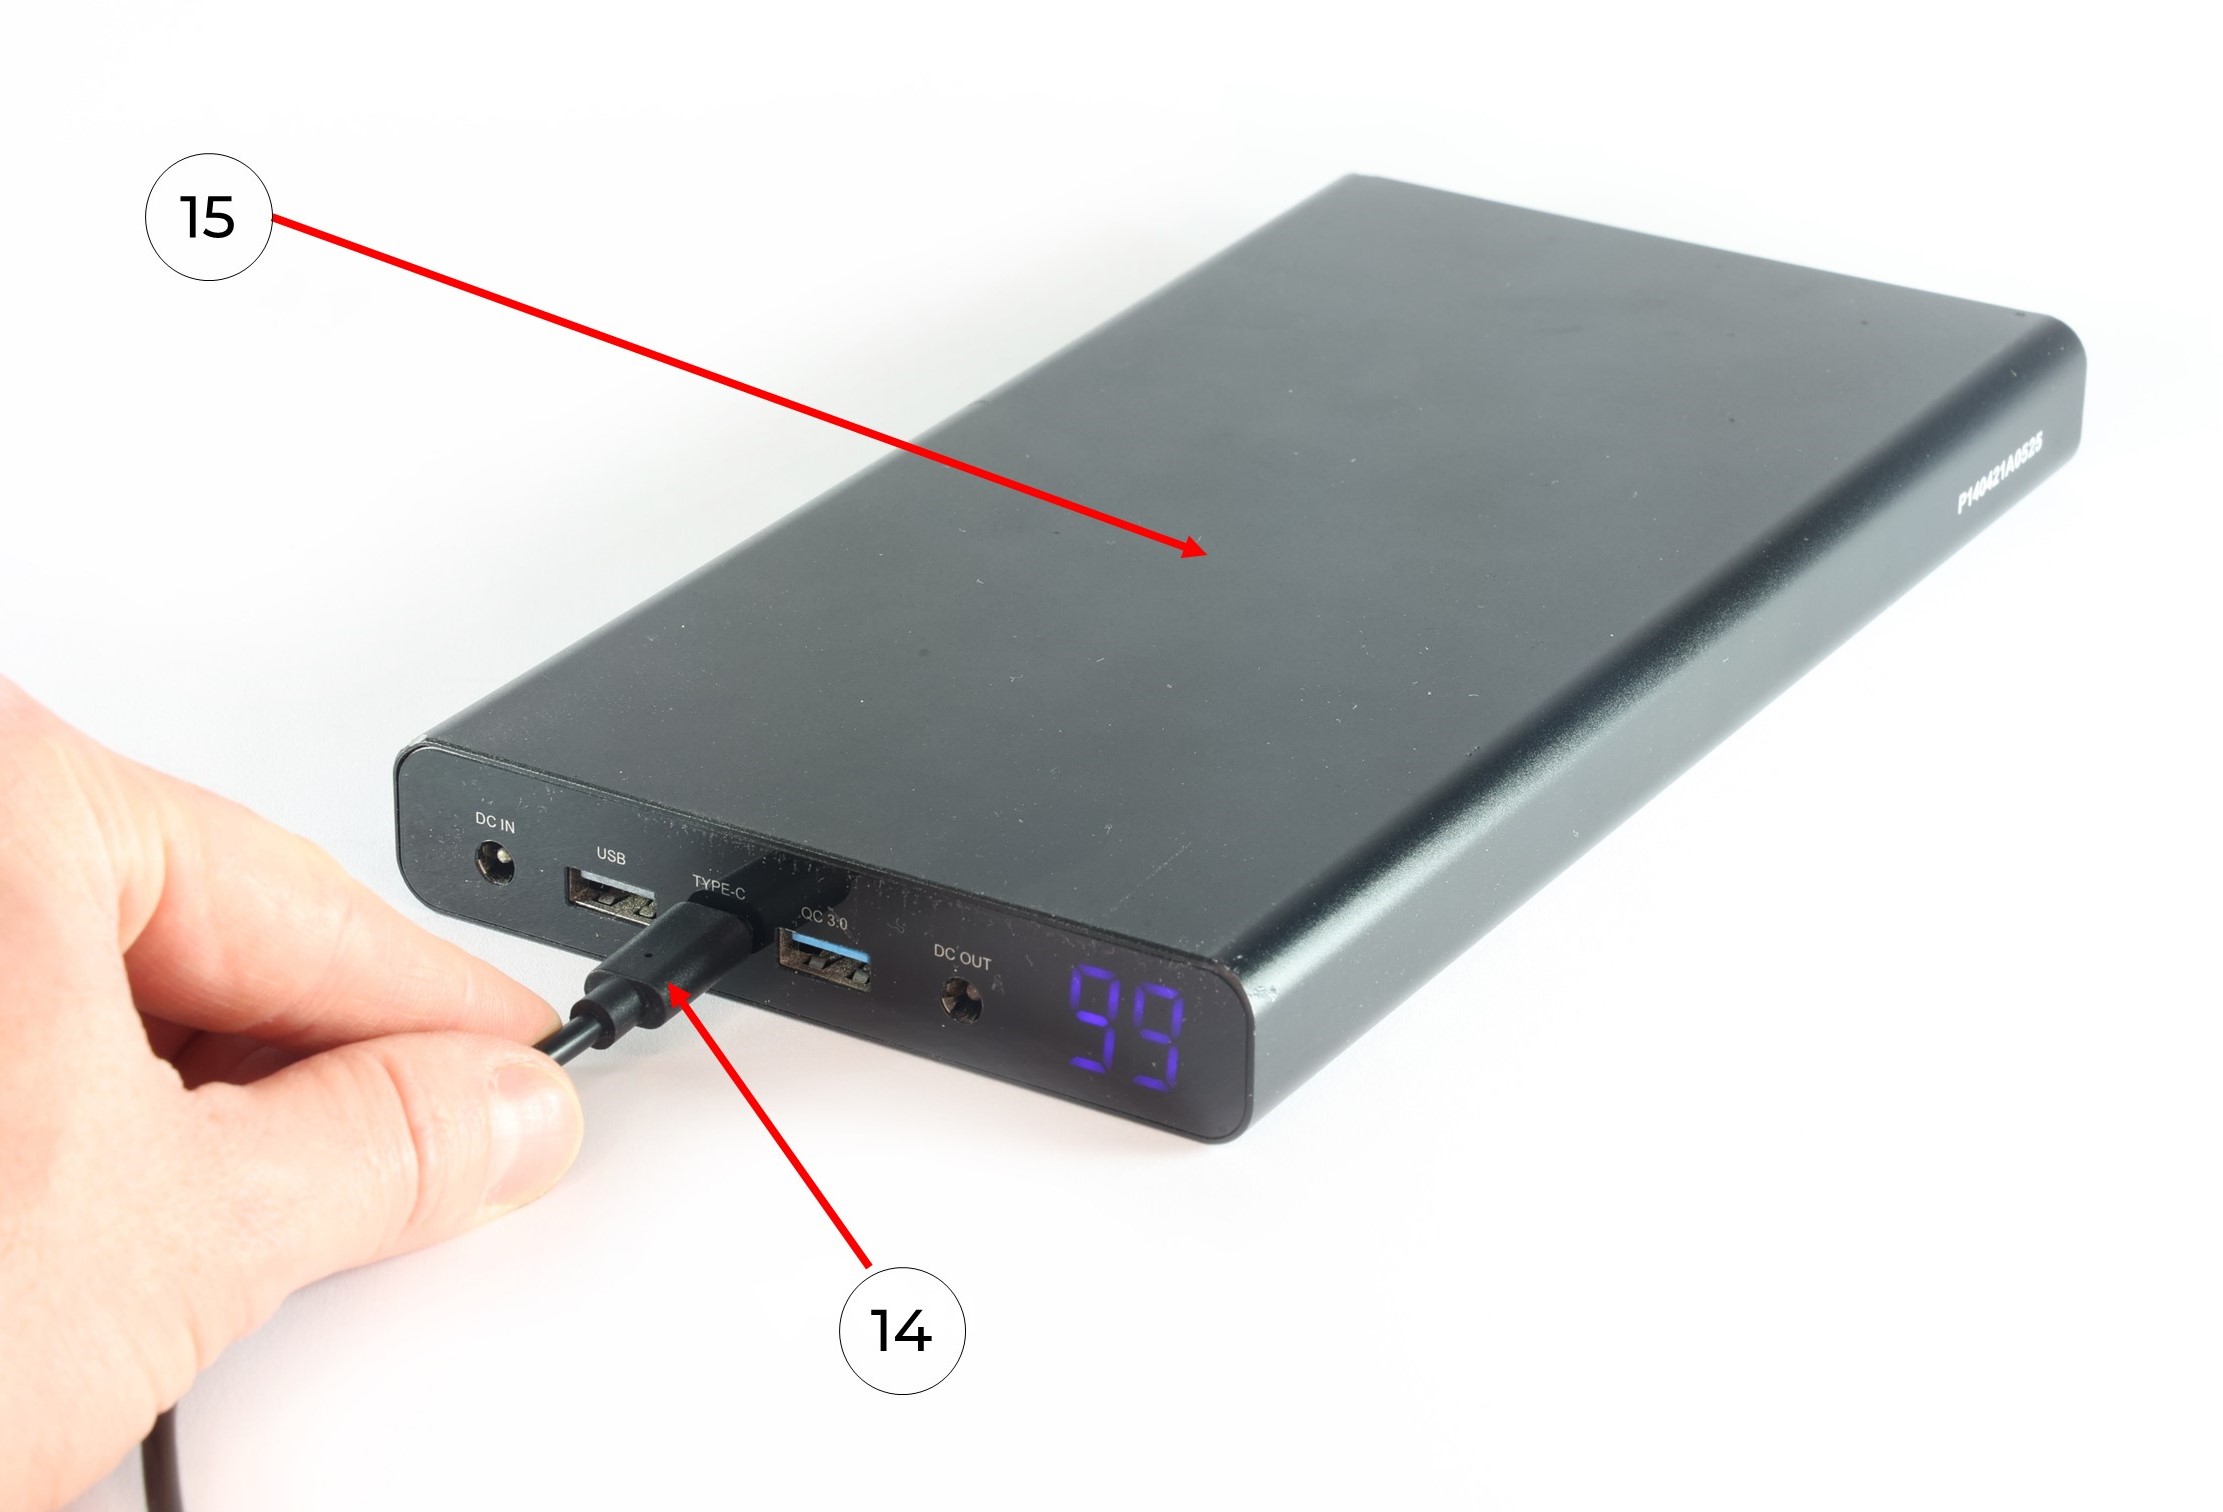
12. Подсоедините кабель к Power Bank и подайте питание. Дождитесь инициализации лазерного сканера TOPODRONE.
Рекомендуется проверять надежность сцепления присок с поверхностью автомобиля каждый час, особенно при отрицательных температурах воздуха!