
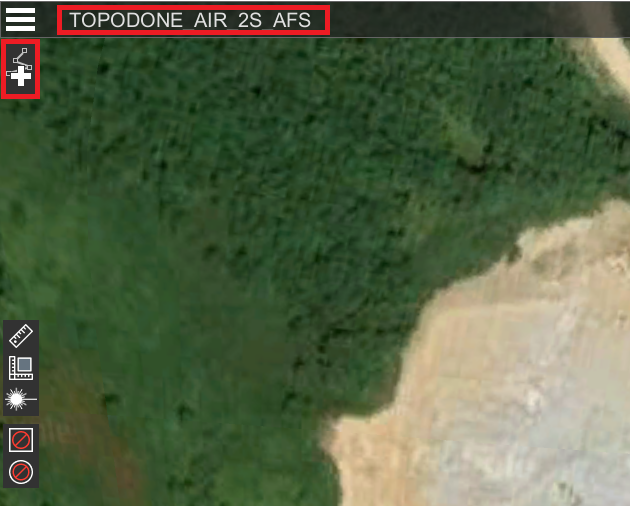
Route Planning for TOPODRONE DJI Air 2S PPK
Initially, the DJI Air 2S PPK drone does not have the function of flying along the route in automatic mode. However, with the help of third-party software, flight along the route for the AFS is possible using the technology of "virtual sticks". With this technology, during the flight in automatic mode, it is necessary to constantly maintain radio communication between the control panel and the drone. However, with the help of third-party software, flight along the route for aerial photography is possible using the technology of "virtual sticks". With this technology, during the flight in automatic mode, it is necessary to constantly maintain radio communication between the control panel and the drone.
For planning and executing routes for aerial photography, including terrain bending, the most convenient solution is to use UgCS Pro software for route planning and Litchi for DJI software for their direct execution.
After passing all the above stages, it is possible to fly along routes for aerial photography, including with terrain circumference in the absence of an Internet connection at the facility. However, an internet connection is required to make changes to the route.
| 1. DJI FLY software* | 2. UgCS Pro software | 3. flylitchi.com/hub | 4. Litchi for DJI** software |
|
|
|
|
Route Planning for TOPODRONE DJI Air 2S PPK in UgCS Pro Software
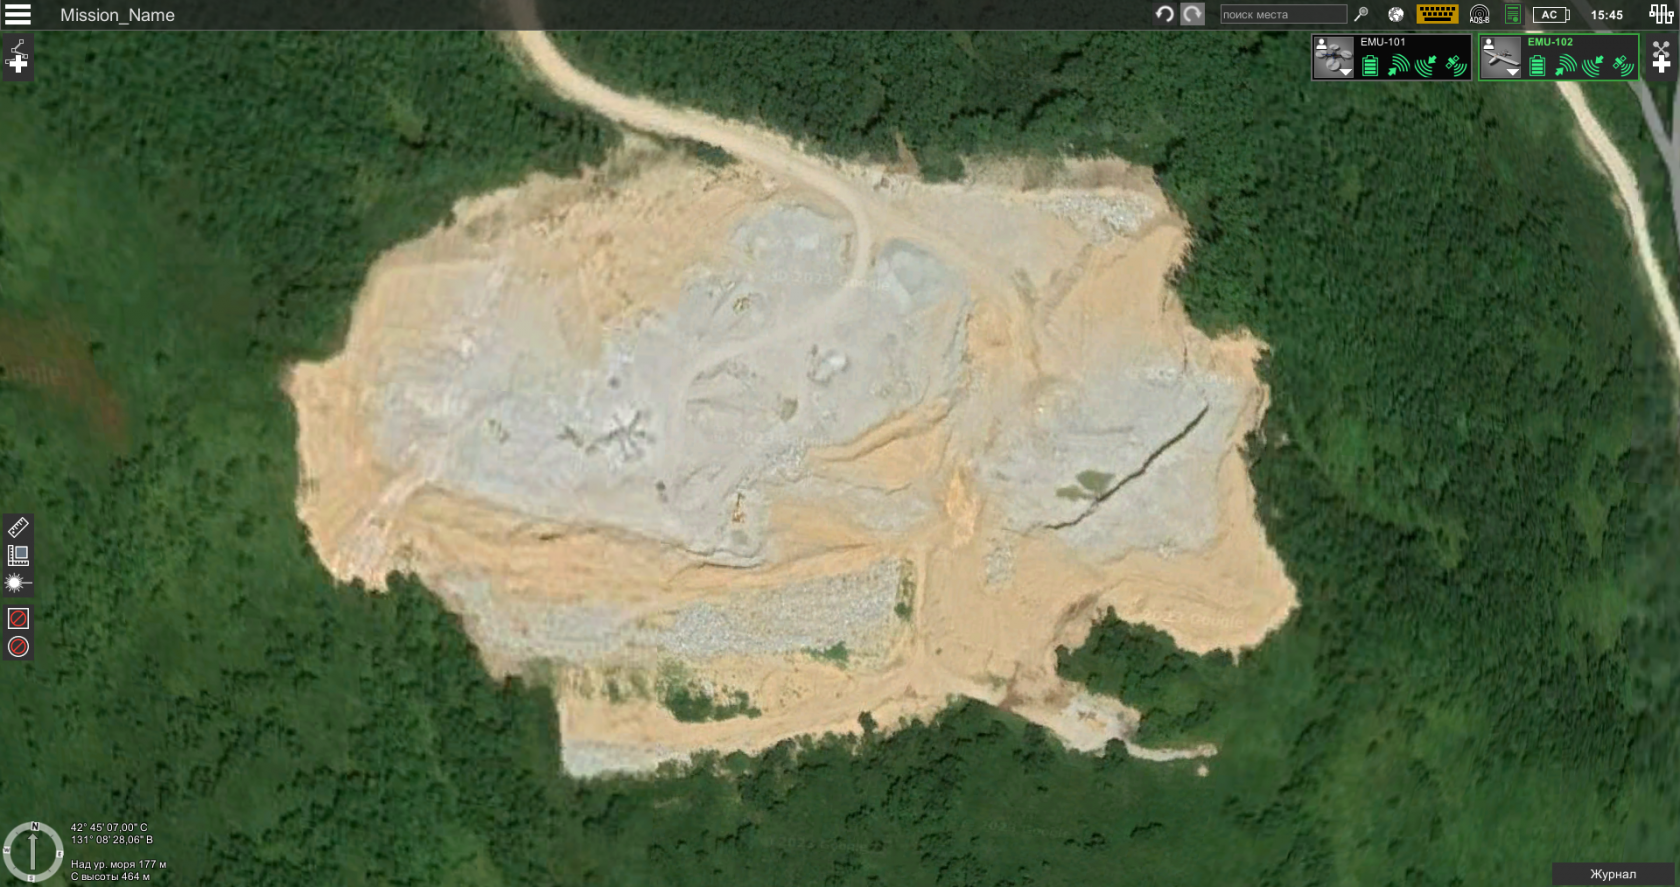
- Run UgCS Pro software. To plan routes for aerial photography with terrain circumference, connect an Internet connection.
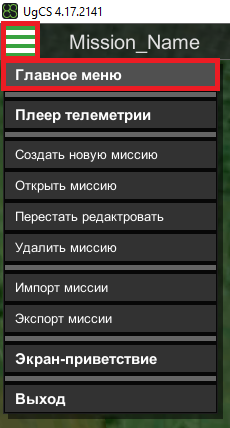
- Click on the icon with three horizontal stripes at the top left. Select the "Main Menu".
- Go to "Loads" / "Create" to create a new camera profile.
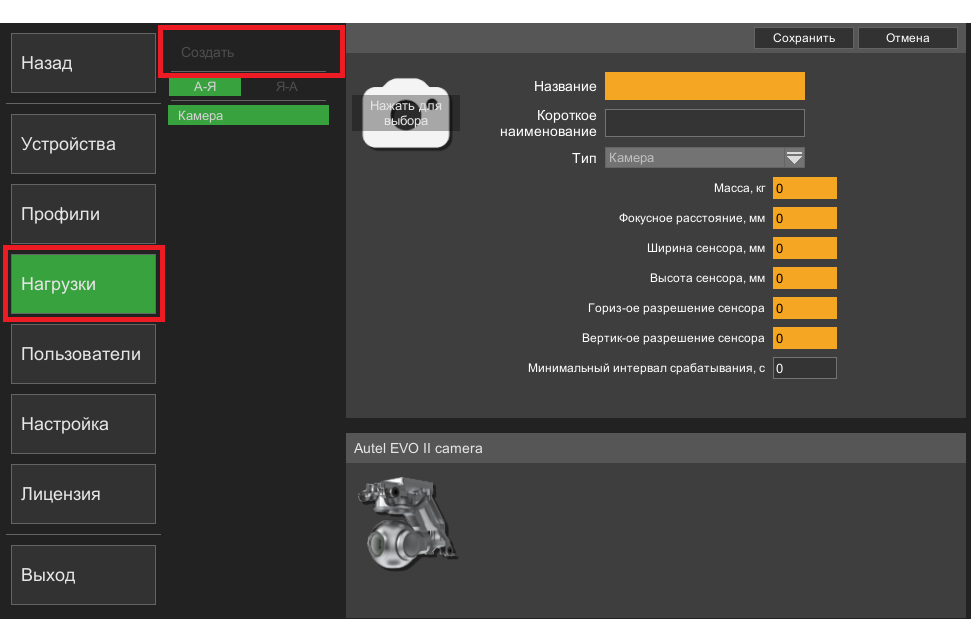
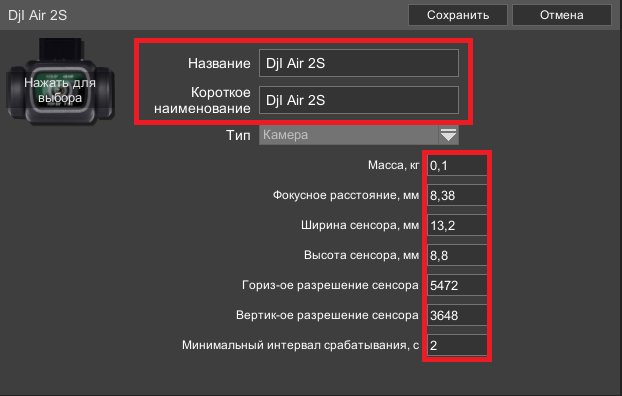
- Enter the following parameters in the fields and click Save.
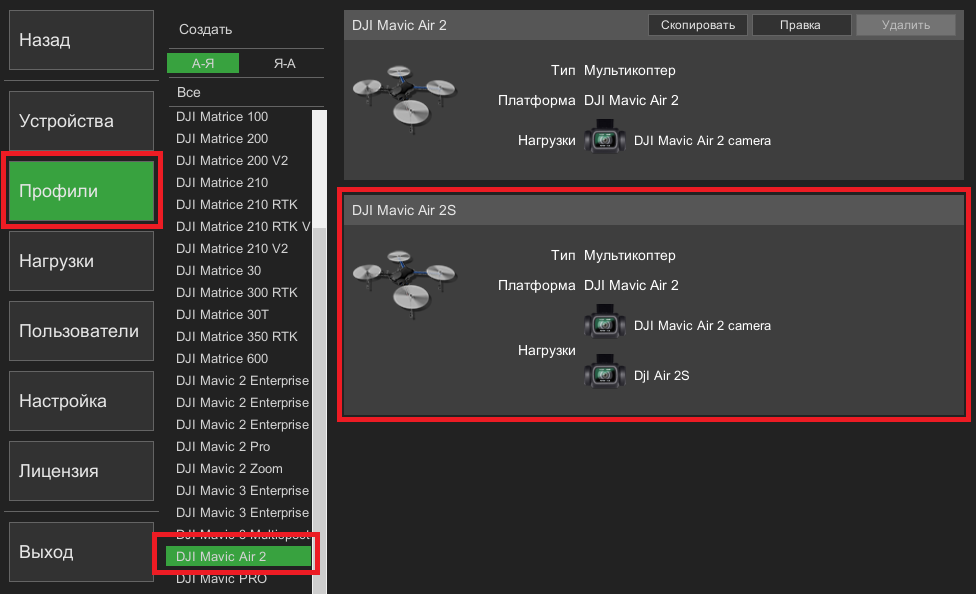
- Next, in the main menu, select "Profiles" / "DJI Mavic Air 2" / "DJI Mavic Air 2S"
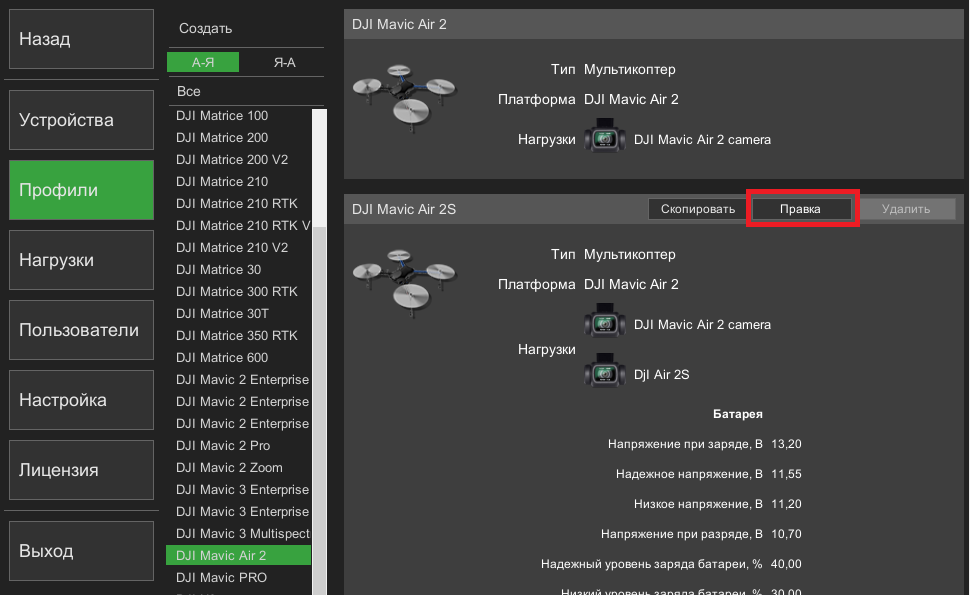
- Click on the "Edit" button
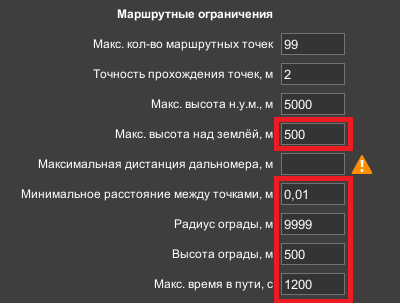
- In the "Route restrictions" section set the following values.
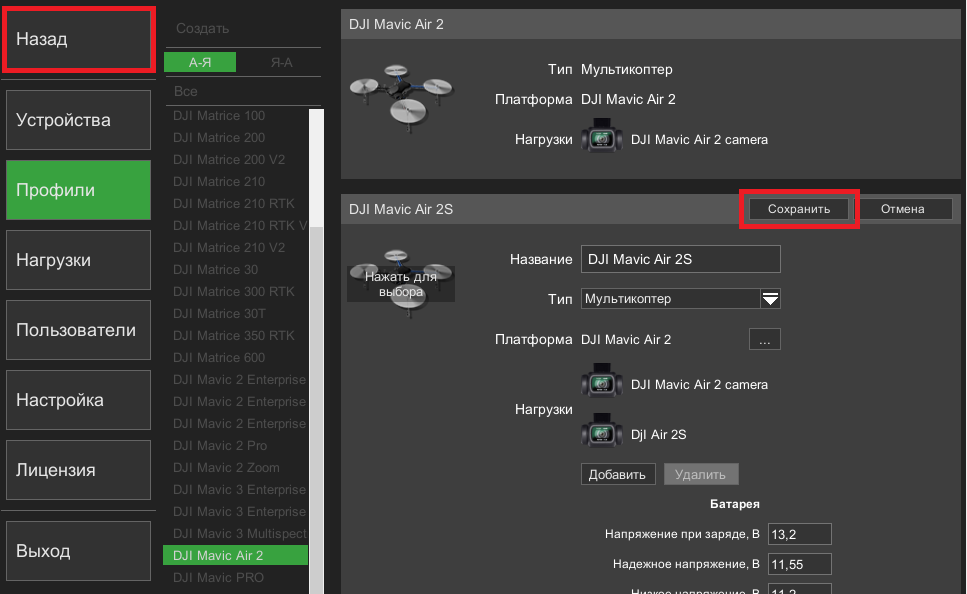
- Scroll up the window and click "Save" and then "Back"
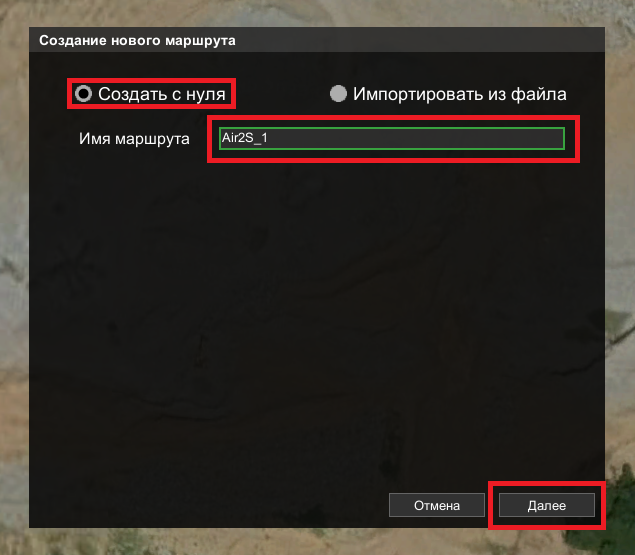
- In the upper-left corner, click on the name of the Mission and enter a name. The mission is a set of routes and then click on the "Add route" button with a plus sign.
- Enter the route name and click Next. To import a previously created route, select "Import from file". Here we consider the "Create from scratch" route.
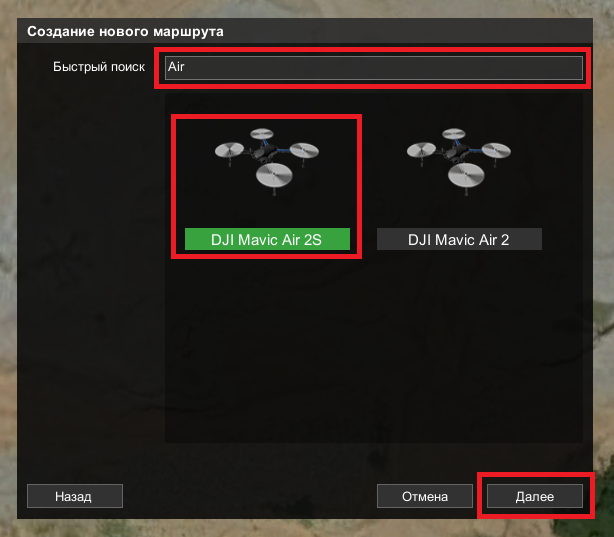
- In the "Quick Search" line, type "Air" and select the profile "DJI Mavic Air 2S". After that, click "Next".
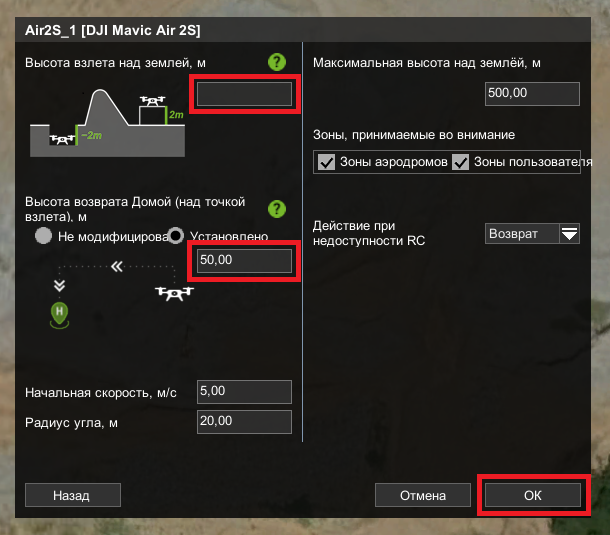
- Leave the "Take-off altitude" field empty! Set the height of the return home. It must be above any obstacles and terrain in the place of flight. Click OK
- Use the map to determine the approximate take-off location. Select the Point tool and double-click on the map to set the planned takeoff location. This point will be the starting point of the route. After launching from any other location, the drone will rise to the height of this point and fly to it in a straight trajectory. If necessary, change the altitude and speed. If the take-off location is unknown, skip this step.

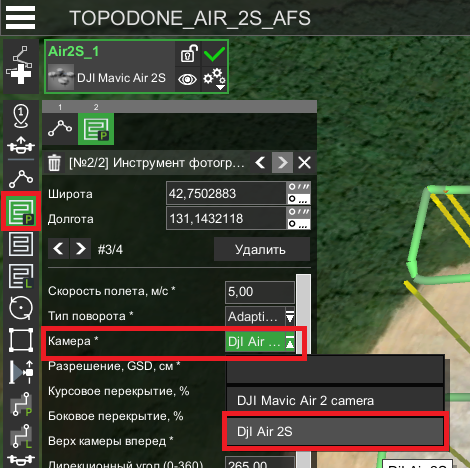
- Select the "Photogrammetry Tool" and double-click the left mouse button on the map to set the boundaries of the route territory. It is recommended to form rectangular routes. However, routes can be a closed polyline of any shape if needed. To close the boundary of the area, hover over the first point and right-click. After that, the boundary of the route area closes.

- When building a route for the first time, select "Camera" - DJI Air2S. Make sure that the rotation type for the photogrammetry tool is also set to "AGL" or "Advanced AGL". It is possible to set the flight speed in the UgCS software, but the flight speed parameter along the route will need to be reinstalled in the Litchi software later. Therefore, you can set the speed only to estimate the duration of the flight mission.
- After a few seconds, green lines of the trajectory of the future flight along the route will appear above the closed area. If necessary, move the vertices of the boundaries of the area so that the green trajectories form U-shaped smooth turns without sharp corners.