
Agisoft Metashape
The process of multispectral data processing in Agisoft Metashape software has much in common with classical photogrammetric processing. Below is a detailed description of this process.
1. Open Agisoft Metashape program and select the folder where the acquired multispectral data are stored.
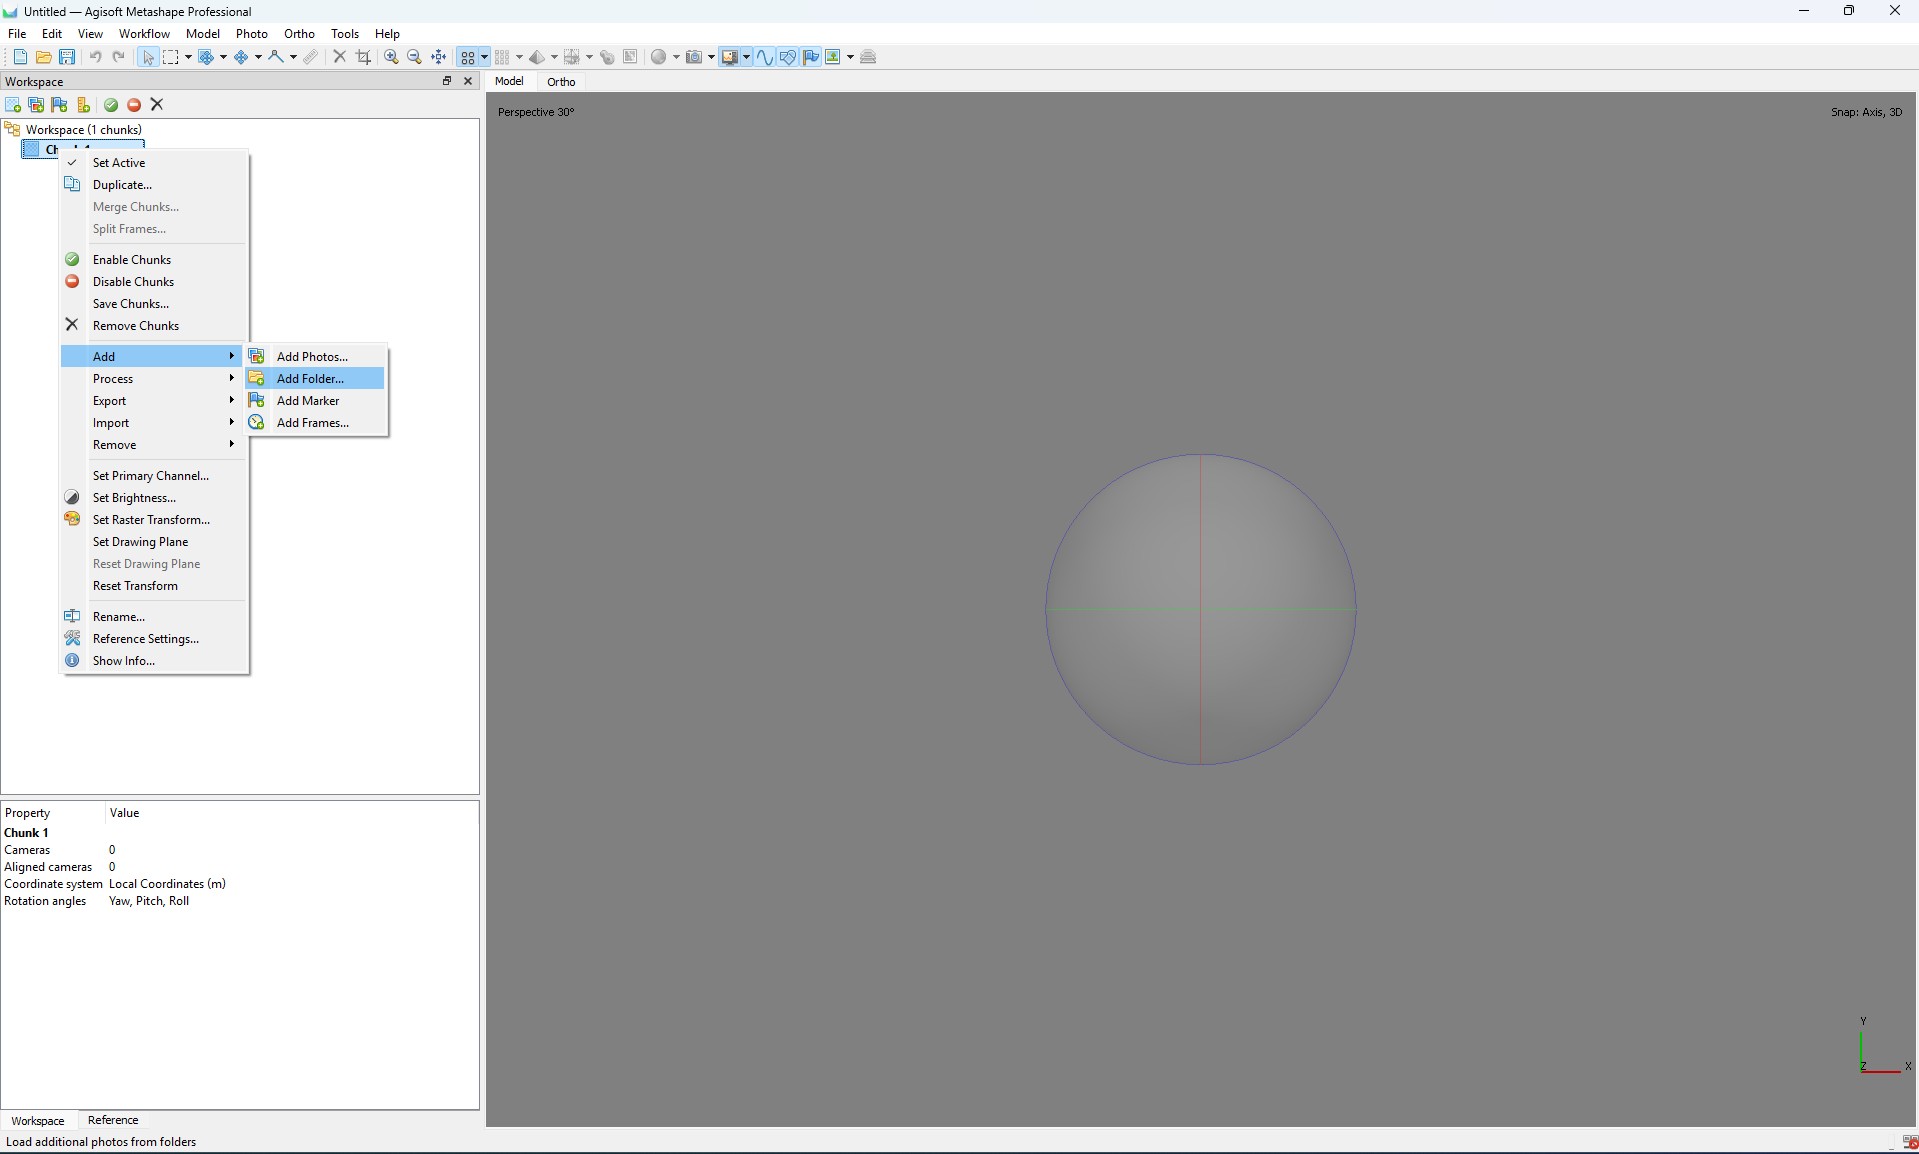
2. In the program interface, select the “Multi-camera system” option for correct data processing.

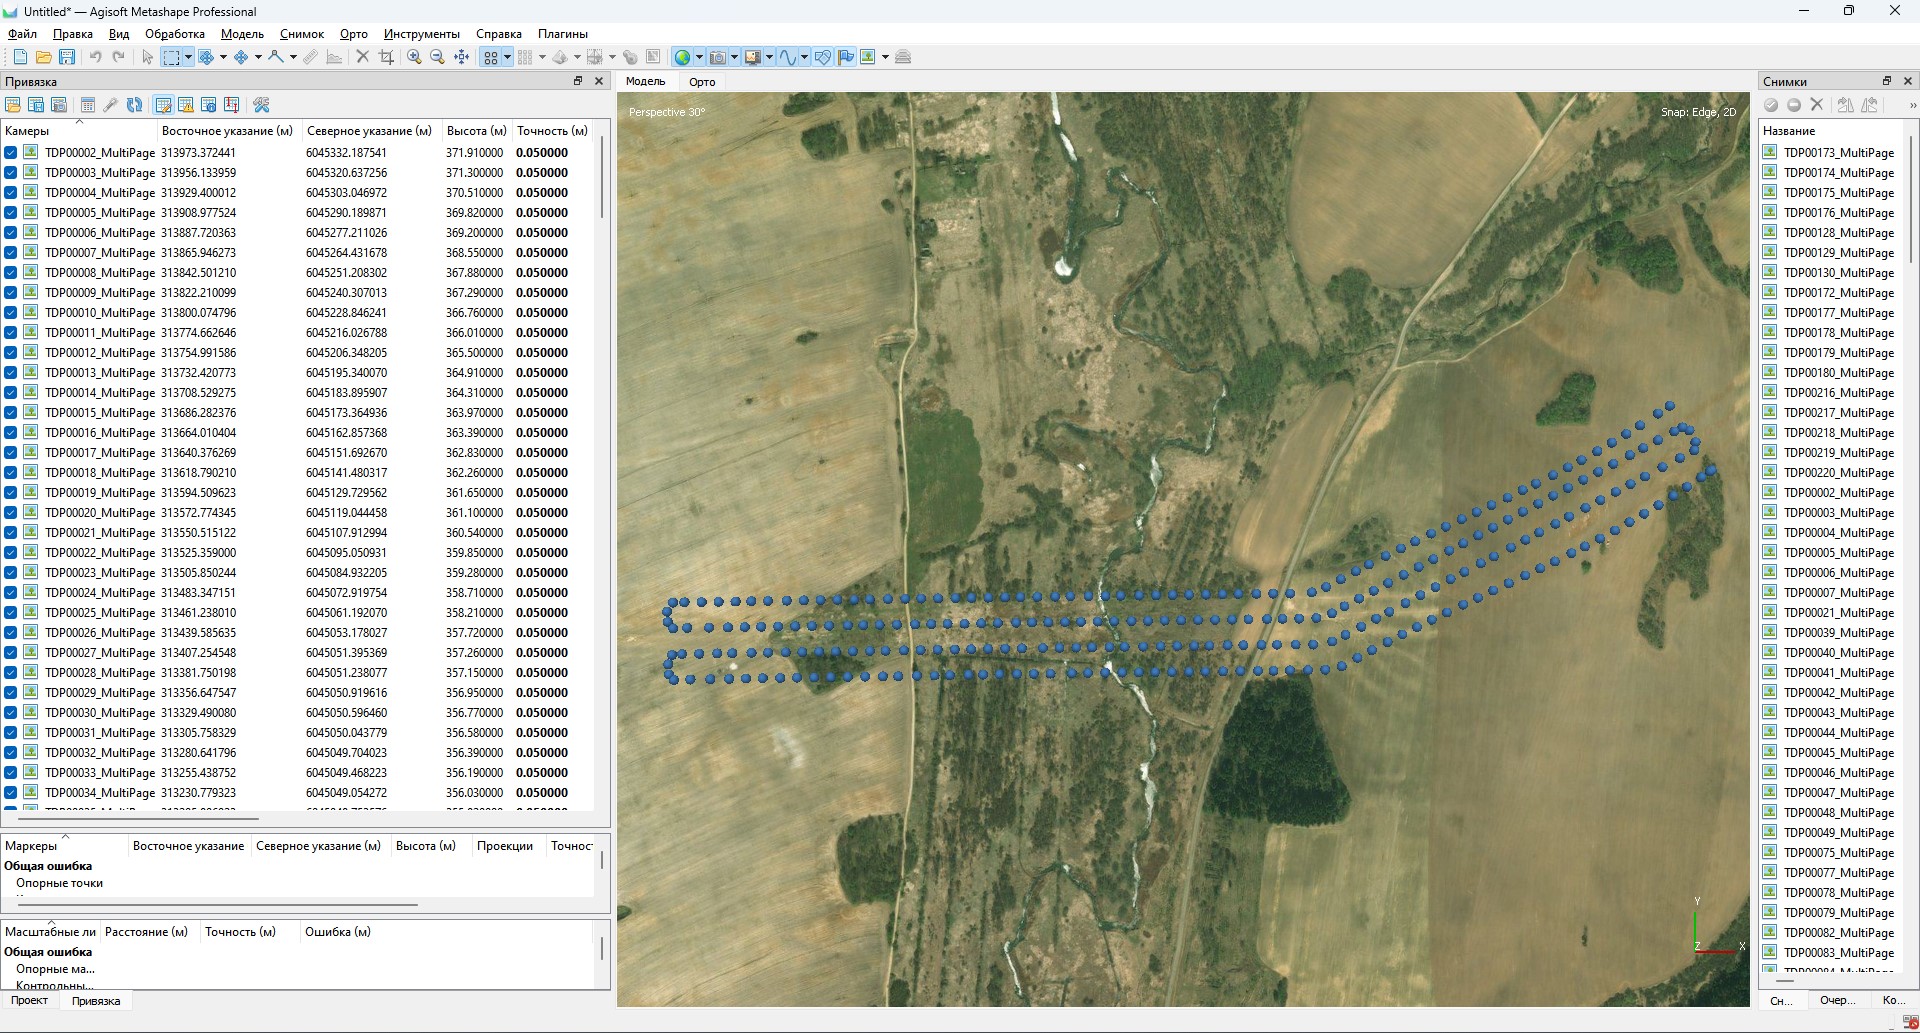
3. Open the Snap window and perform the following steps:
- Convert the photo centers to the local coordinate system;
- Set the coordinate accuracy according to the requirements of your task;
- Make sure that all cameras are correctly georeferenced to the local coordinate system.
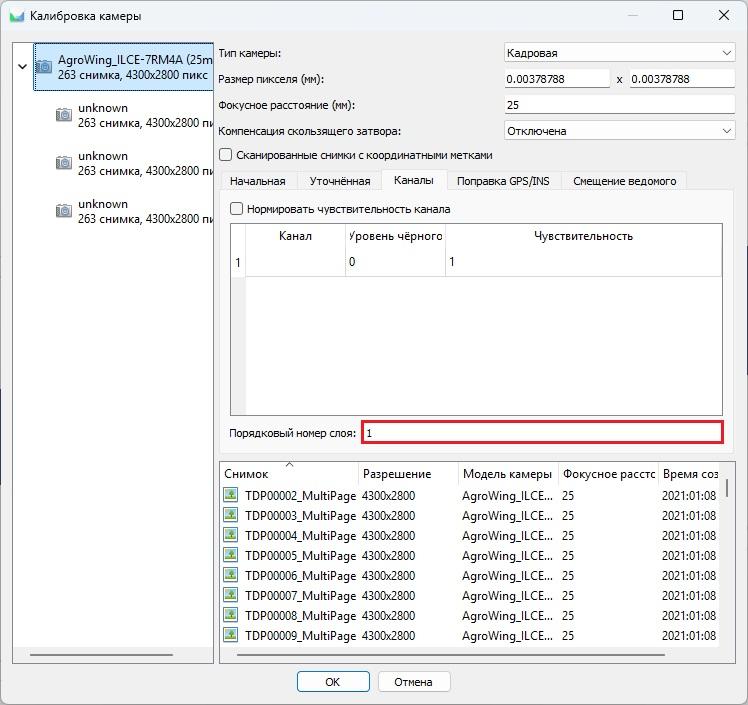
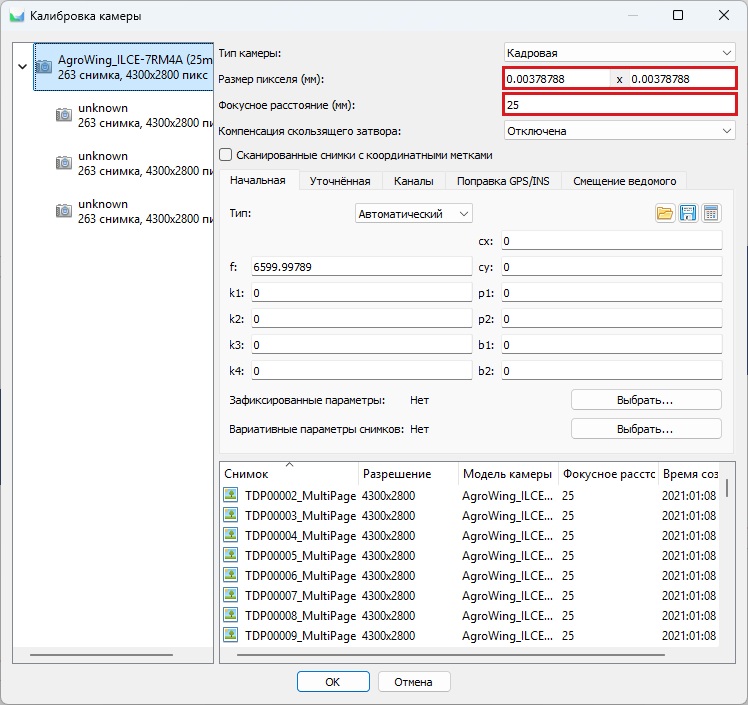
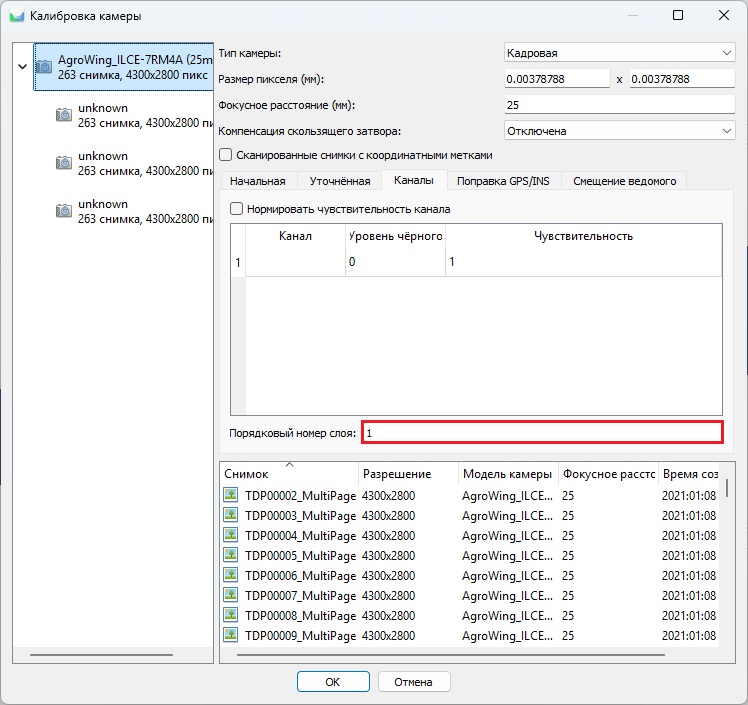
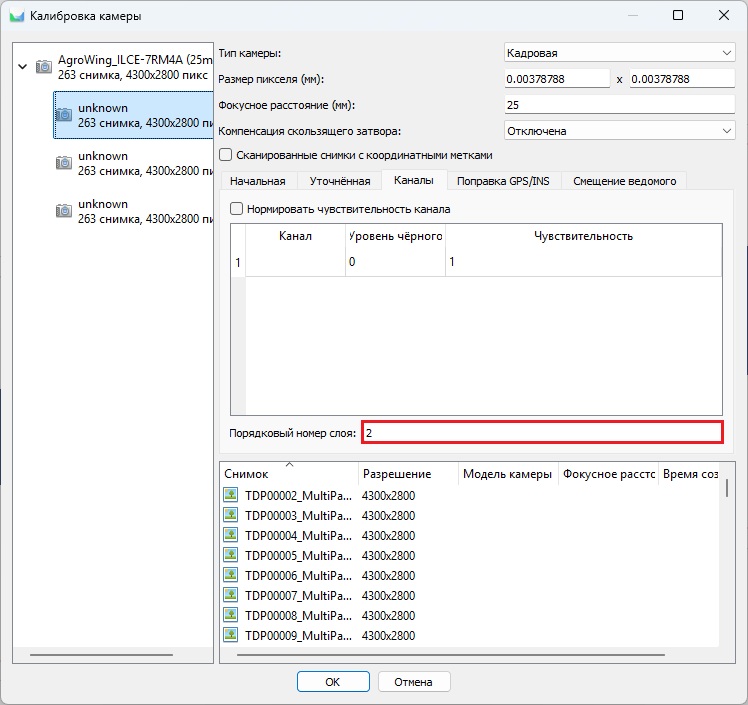
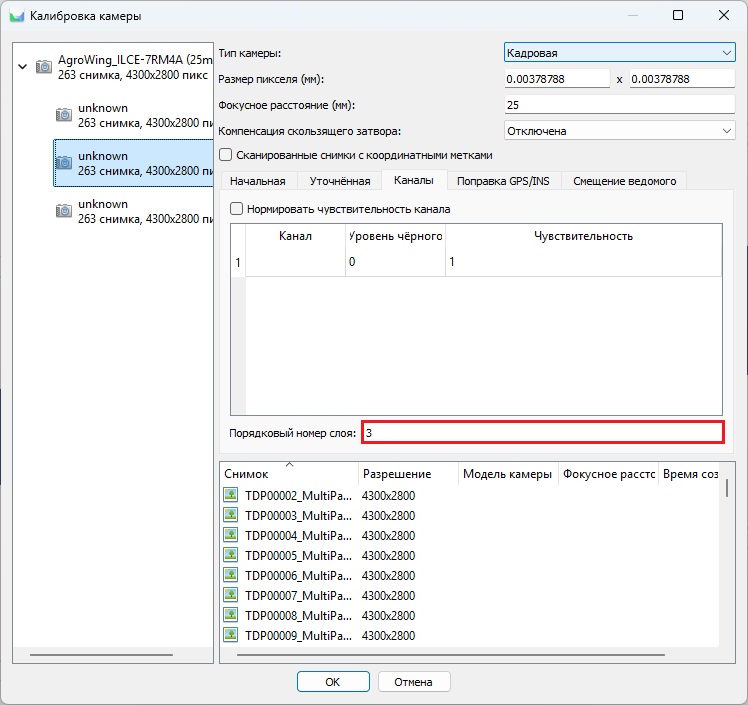
4. Go to “Camera Calibration” and follow the steps below:
- Set the physical pixel size and focal length;
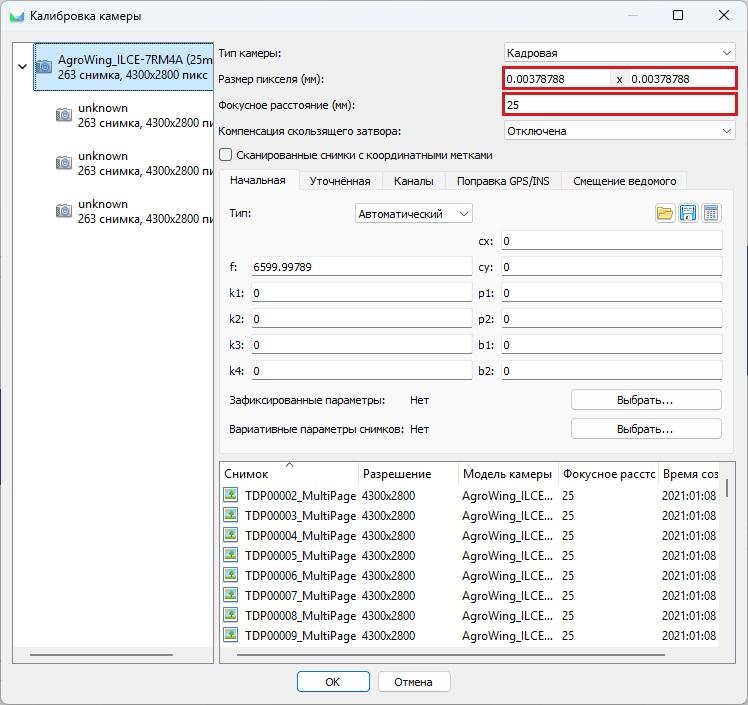
- Set the sequence numbers of all multispectral channels.


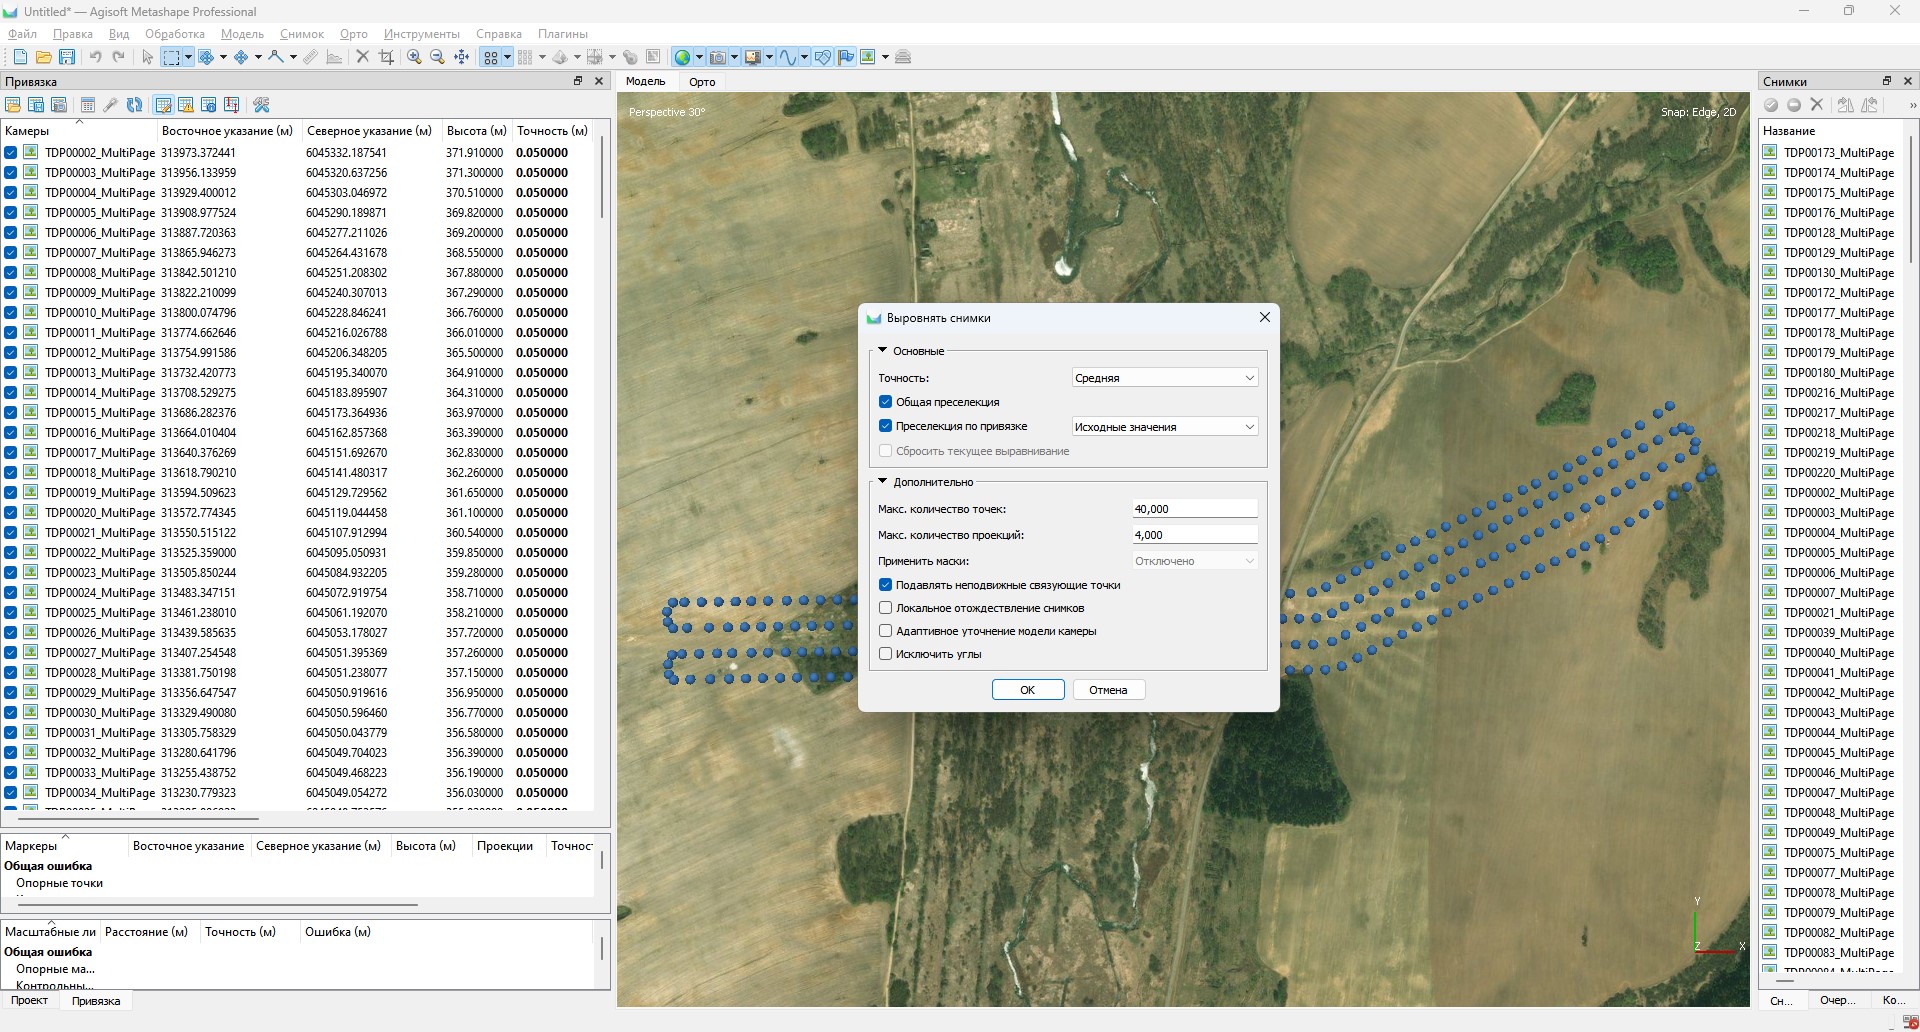
5. When camera calibration is complete, perform the aerotriangulation process. This process includes:
- Create tie points based on the data from the cameras;
- Defining and refining aerotriangulation parameters to improve model accuracy.
After the aerotriangulation stage you can filter points based on the selected parameter using the “Model” tab, “Smooth selection” item.
6. Open the “Bounding” window and perform the following actions:
- Import control points in the project coordinate system;
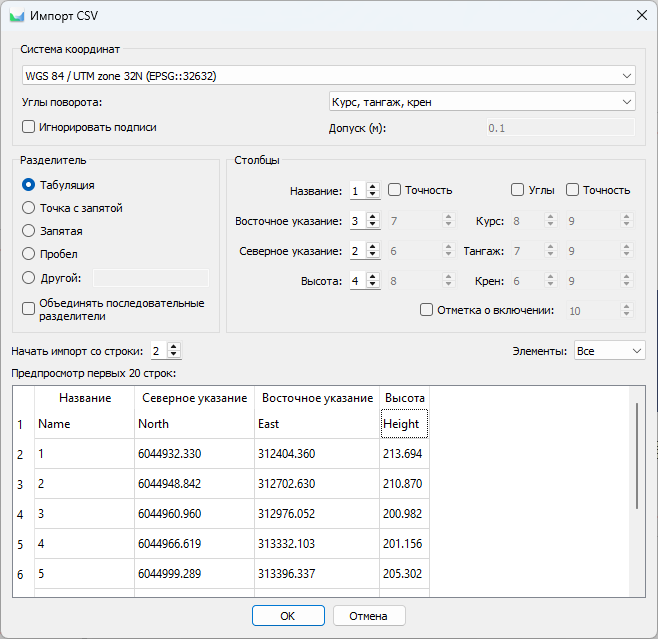
- Perform control point measurements on at least 6-9 images.
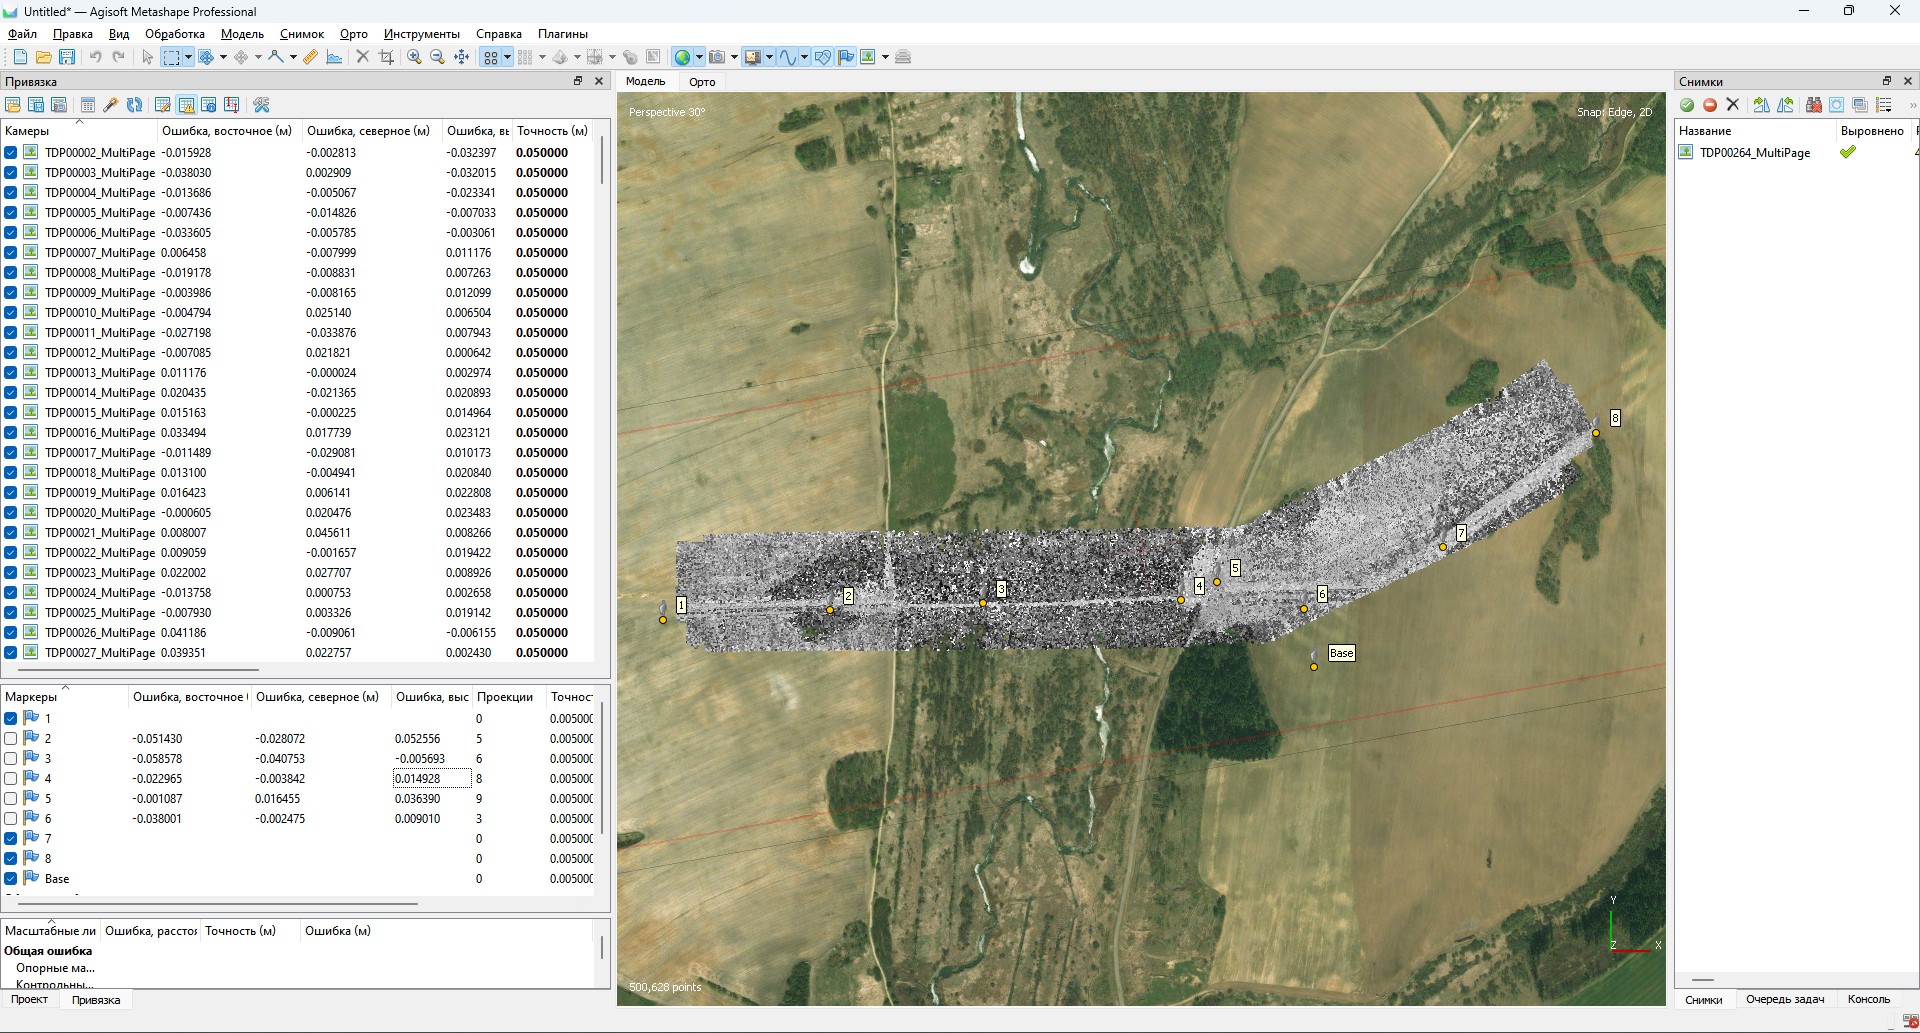
Adjust the focal length if necessary.
If the measurement accuracy meets the specified criteria, proceed to point cloud creation. Otherwise, analyze all steps of the process, from data collection to data processing, to identify and eliminate possible errors.
7. Construct a dense point cloud and digital elevation model.
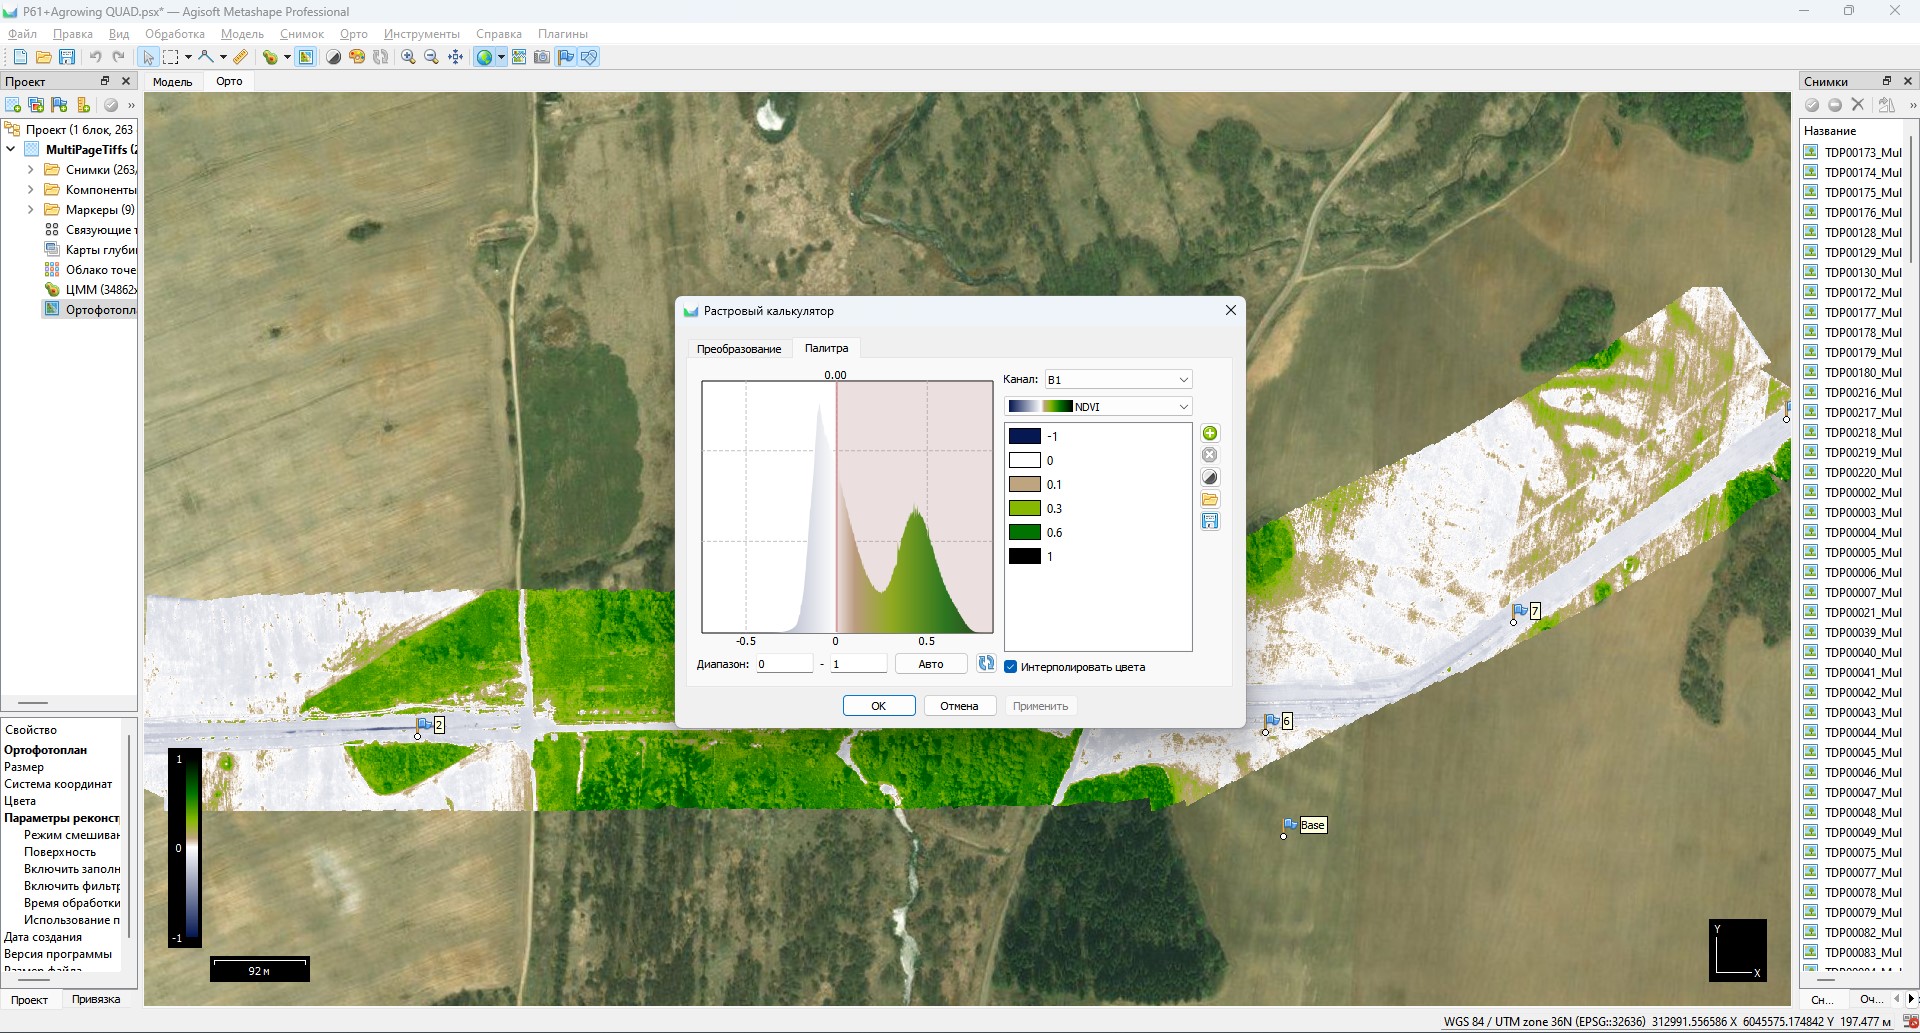
8. Вычислите необходимую информацию об индексе.
- На панели инструментов воспользуйтесь кнопкой "Преобразование растра";

- В растровом калькуляторе введите формулу, по которой будет вычисляться ваш индекс;
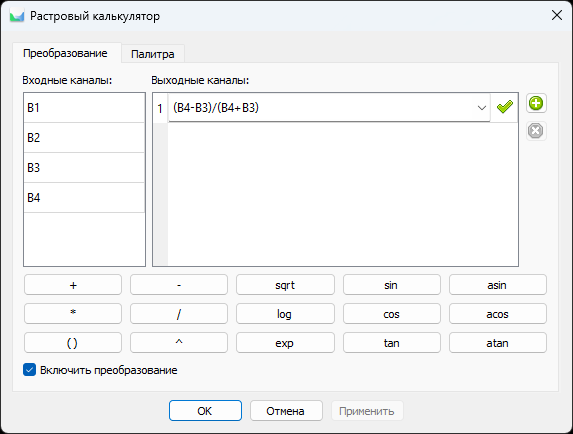
- Перейдите во вкладку "Палитра", установите необходимый диапазон, выберите подходящую палитру и нажмите "OK".
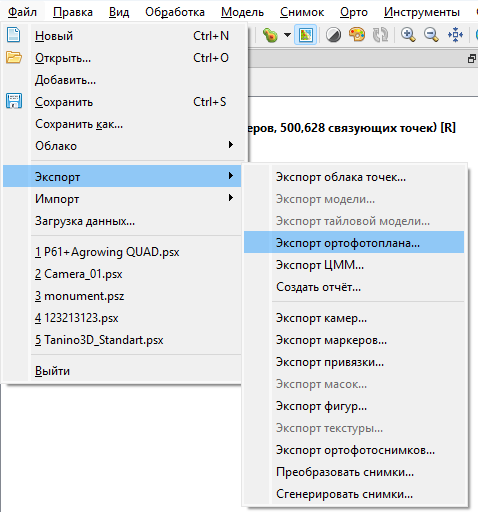
9. Для выполнения экспорта ортофотоплана выполните следующие действия:
- Выберите "Файл" - "Экспорт" - "Экспорт ортофотоплана"
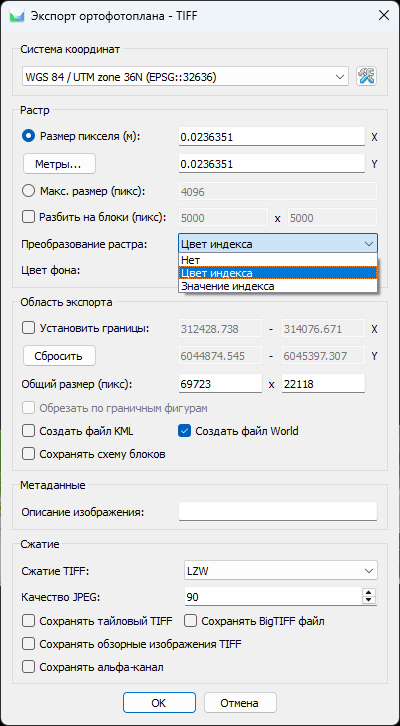
- Укажите путь и имя файла для сохранения ортофотоплана;
- Настройте параметры экспорта, следуя рекомендациям на скриншоте. При необходимости разделите ортофотоплан на блоки для удобства дальнейшего использования.
На этом процесс обработки завершен. Все необходимые материалы могут быть экспортированы таким же способом, как написано в пункте 9.