
Adjusting the camera image
To obtain quality images, you must adjust the camera image. In case of incorrect settings, images from TOPODRONE P61 camera may be unsuitable for further photogrammetric post-processing. The final parameters are always individual, as they depend on the current lighting conditions, speed and altitude of the drone. You can adjust the camera image in the DJI Pilot2 software for Android mobile devices. Install the app on your mobile device from the manufacturer's official website. Next - connect the mobile device to the remote control, turn on the drone and launch the DJI Pilot software by selecting “permanent” (use always for this device) or “one-time” (use only now) for this device.
If you select DJI Pilot software “permanent” to be able to use other software (e.g. UgCS for DJI), you will need to reset the default settings for the applications. To do this, go to the mobile device menu: Menu / Settings / Applications / DJI Pilot / Default Settings / Default Usage / Reset Defaults. After starting DJI Pilot2 software, the drone model and the TOPODRONE camera icon will appear on the screen. After successful connection, the real-time image from the camera will appear.
Below are screenshots of TOPODRONE P61 camera settings.
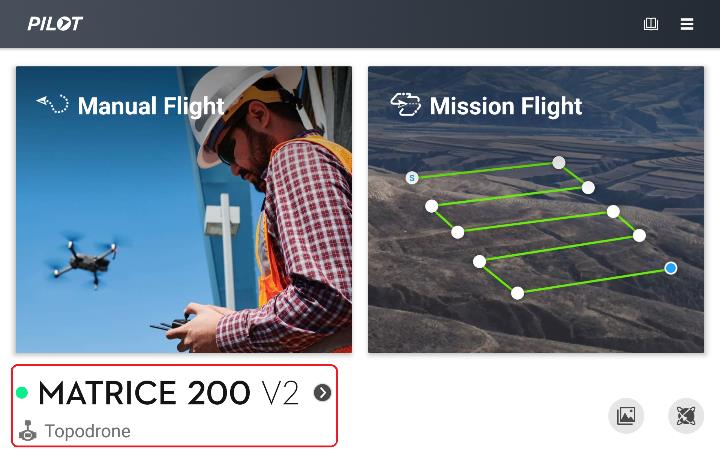 |
Step 1: Launch the DJI Pilot2 software. Make sure the software recognizes the type of drone (example - DJI M300 RTK) and payload (TOPODRONE)
Step 2: Select “Enter Camera View”, then the “Prepare for Flight” window will open, after closing this window, the TOPODRONE P61 camera view will be displayed
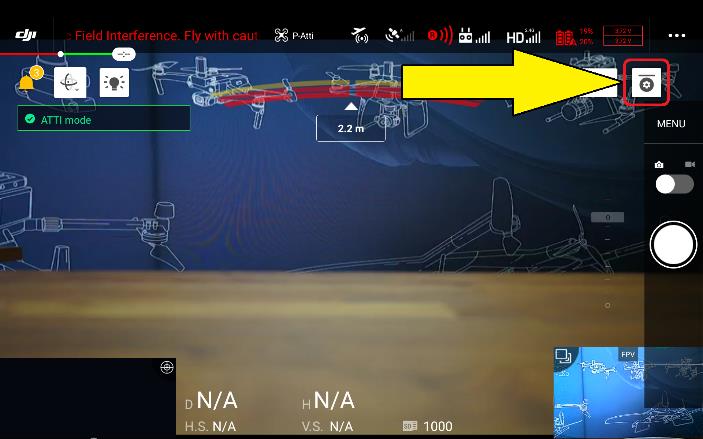
Step 3: Make sure that the camera is streaming video data in real time. |
|
 |
 |
|
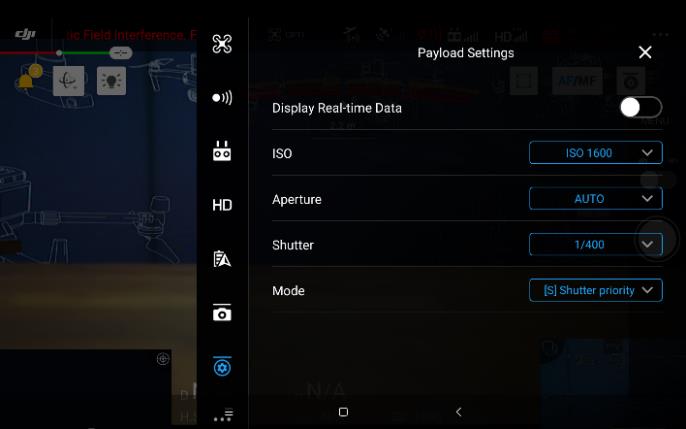
| Step 4. Open the camera settings menu, click on the “Three Dots” button. | Step 5. The TOPODRONE P61 camera payload menu opens | |
 |
 |
|
| Step 5: Adjust the 4 main image parameters: ISO, Aperture, Shatter, Mode. | Step. 6 | |
 |
 |
 |
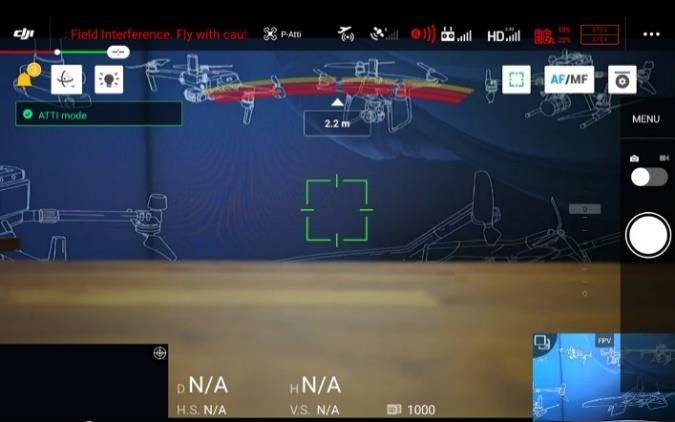
| Step 7: Close the menu and in AF (autofocus) mode, tap in the middle of the screen to focus the image. It is recommended to perform this step while flying on the ground from the mission operating altitude. | Step 8: Change the focus type from AF to MF. In this case all photos made by TOPODRONE P61 will have the same focus value. This is important for correct photogrammetric post-processing | |
Below are recommendations for the various menu items according to the type of lighting for a flight altitude of 120 meters.
| Parameter | Recommended value | Clear weather, good illumination | Even cloudiness, medium illumination |
Clouds, overcast, low light |
| Mode | Sutter Priority (S) | |||
| ISO | 100-800 | 100-200 | 200-400 | 400-800 |
| Aperture | Auto | Auto | Auto | Auto |
| Shutter | 1/2000 – 1/400 | 1/2000 – 1/1250 | 1/1250 – 1/ 800 | 1/800 – 1/400* |
At Shutter values below 1/800, it is recommended to reduce the drone speed so that the drone flies no more than 2 cm during the shutter time. This is easy to calculate if you know the drone's speed in meters per second. For example, for a speed of 8 meters per second (800 cm per second) with a 1/400 second shutter, the displacement of the drone during the shutter operation will be the same 2 cm. Thus, 8 meters per second is the maximum speed for this shutter value.
Setting the Camera Profile in DJI Pilot 2 Software
In order to correctly calculate side and frontal overlaps between images when performing aerial photography, the route planner software needs to know the exact camera parameters. Ч To create a TOPODRONE P61 profile in DJI Pilot2 software, the following steps are required:
1) Make sure the mobile device is connected to the internet.
2) Open the DJI Pilot2 software on the mobile device. It is not necessary to connect the mobile device to the drone.
3) Select the “Mission flight” section.
4) Create a new mission by selecting “Create a mission” with the “Mapping” type.
5) Find any location on the map to shoot by clicking on the screen once.
6) Find the “Camera” field in the right-hand menu of flight settings.
7) Select “Custom Camera” from the drop-down list.
8) Enter the following parameters in the new camera settings menu that appears:
- Name: TOPODRONE Р61
- Sensor Width (mm): 35,7
- Sensor Height (mm): 23,8
- Image Width (Pixels): 9504
- Image Height (Pixels): 6336
- Focal Length (mm): 24
- Min interval time (s): 1
- Press “Save” button
9) Use the created camera profile to design aerial photography missions by setting the appropriate % of front and side overlaps.
10) During the mission, the camera will take photos on command from the drone according to the % frontal overlap value. The camera shutter control during area and line missions is automatic.
Configuring TOPODRONE Camera 61 PPK profile in UgCS Expert software
| UgCS Expert software, among other unique features, enables terrain envelope flight and allows you to display multiple routes on a single workspace. These advantages make this software indispensable when performing a large amount of work or when planning flights in difficult conditions. For correct operation of the UgCS Expert software, it is recommended to configure drone profile parameters and payload parameters. 1. Press “Menu” / “Main Menu” / “Profiles” / “Drone Model Name” / “Edit” 2. In the “Route Limits” section, change the highlighted parameters to the values shown in the figure: |
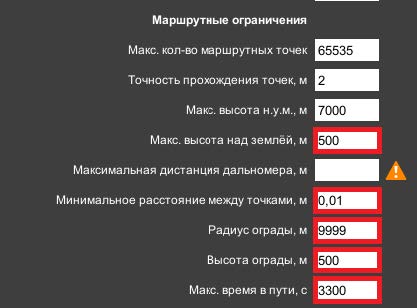 |
 |
3. Click the “Save” button. 4. Go to the “Loads” section. 5. Next, find any camera, for example Sony A7R4 (24 mm), select it and click “edit”. 6. Change the highlighted parameters to the values shown in the figure: |
Camera image adjustment is only possible in DJI Pilot2 software, it is recommended to use the software in the following order:
1) DJI Pilot2 for camera image adjustment and focusing
2) UgCS for DJI to download the route to the drone and launch it
3) DJI Pilot2 for further flight control and image adjustments
You can switch between these software according to the capabilities and settings of the mobile phone you are using. On some models, to switch from one application to another, it is recommended to close all applications with a quick command and reconnect the cable connecting it to the remote control. To exit an application on the DJI Smart Controller, simply press 2 times on the mechanical “Back” button located on the top left of the display.