|

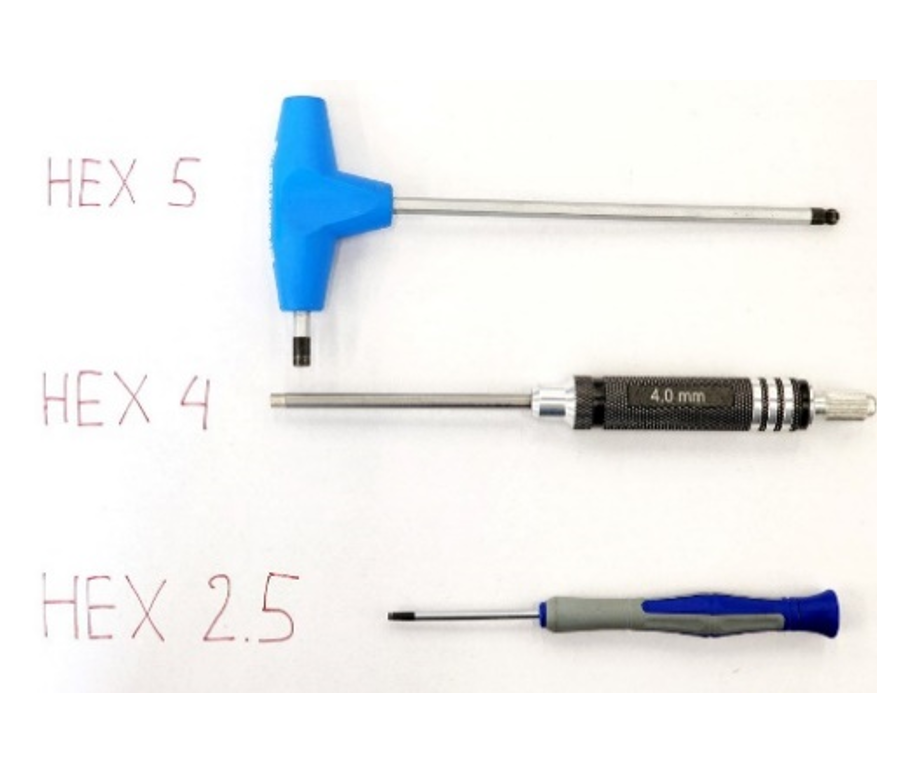
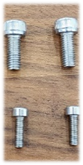
Step 1: Prepare Hex 2.5, Hex 4, Hex 5 screwdrivers for further assembly (not included)
|
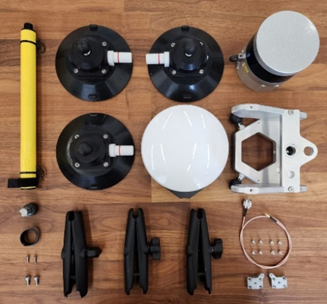
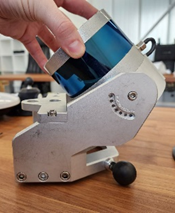
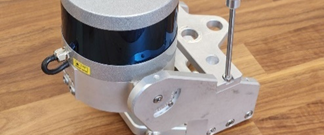
Step 2: Prepare the TOPODRONE laser scanner and all other accessories
|
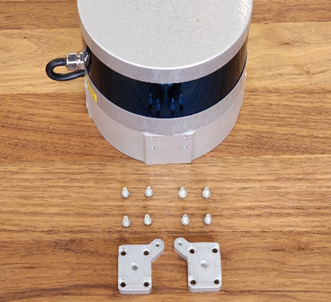
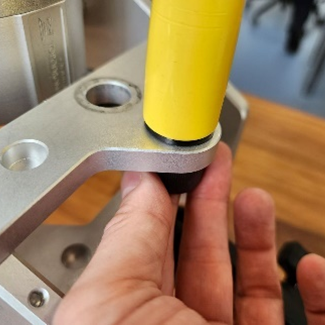
Step 3. Take the LiDAR, two metal fasteners, 8 M3x8 screws
|
|
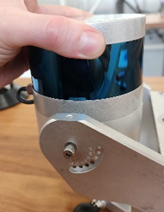
Step 4: Using a Hex 2.5 screwdriver, install the metal fasteners on both sides of the laser scanner
|
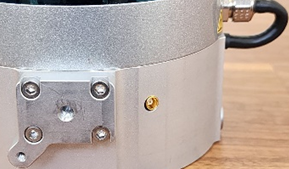
Position the metal fasteners as shown in the illustration
|
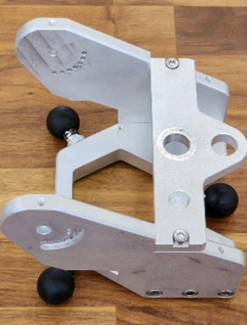 
Step 5: Prepare the laser scanner mounting bracket and M5x10 M3x10 screws
|
|
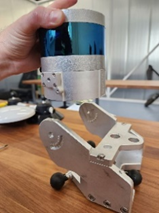 
ШагStep 6.6: АккуратноCarefully установитеplace лазерныйthe сканерlaser сверхуscanner наon основнуюtop детальof МАКthe mounting bracket
|
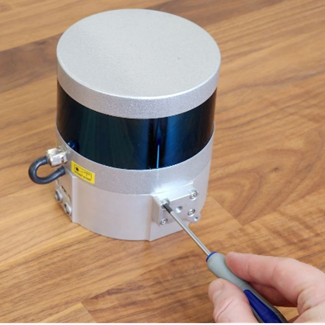
ШагStep 7.7. ЗавинтитеTighten винтthe М5х10,M5x10 какscrew показаноusing на фото при помощи отверткиa Hex 4 screwdriver as shown in the photo.
|
 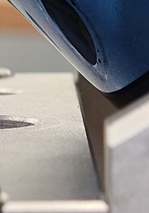
ВАЖНО!IMPORTANT!!! НеHold отпускайтеthe корпусTOPODRONE лазерногоlaser сканераscanner TOPODRONE,body, онit можетmay опрокинутьсяtip иover повредитьand линзу!damage the lens!!!
|
|
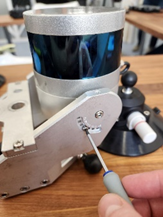 
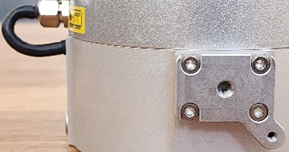
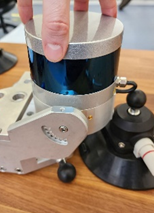
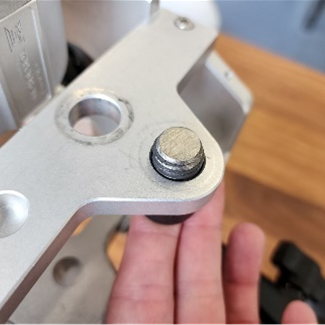
ШагStep 8.8: ЗавинтитеTighten дваthe винтаtwo M3x10 приscrews помощиwith отверткиa Hex 2.5 сscrewdriver двухon сторонboth МАКsides of the bracket.
|
ШагStep 9.9. ПриTighten помощиthe отвертокbracket screws loosened in Step 5 using Hex 4 иand Hex 5 закрутите расслабленные на Шаге 5 винты основной детали МАКscrewdrivers.
|
ШагStep 10.10. ПодготовьтеPrepare вехуthe иpole становойand винт.set screw.
|
|
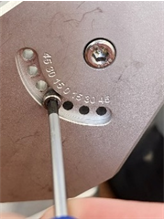
ШагStep 11.11. ПроденьтеThread становойthe винтmachine сквозьscrew дальнееthrough отthe bracket mounting hole farthest away from the LiDAR отверстие основной детали МАК
|
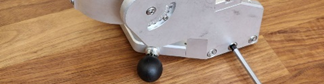
ШагStep 12. Накрутите веху на становой винт12. РасположитеScrew петлиthe сpole обратнойonto стороныthe отInstallation screw. Position the hinges on the opposite side of the LiDAR.
|
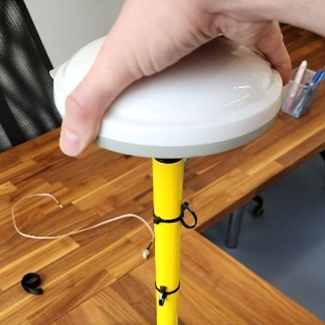
ШагStep 13. Накрутите ГНСС антенну на веху13. ПроверьтеScrew надежностьthe крепленияGNSS антенныantenna иonto становогоthe винтаpole. Check that the antenna and Installation screw are securely fastened together
|
|
ОбратитеNote внимание,that чтоthe антенныйantenna разъемconnector долженshould бытьbe расположенlocated сon обратнойthe стороныopposite отside LiDAR,of какthe наLiDAR фотоas in the photo
|
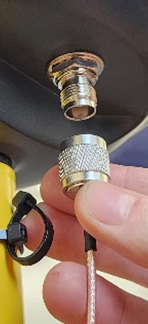 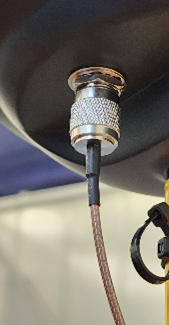
ШагStep 14. ВставьтеInsert разъемthe антенногоantenna кабеляcable вconnector ГНССinto антеннуthe иGNSS плотноantenna завинтитеand его,screw какit показаноtightly наas фото.shown in the photo.
|
НеDo допускайтеnot перегибаbend антенногоthe кабеля!antenna cable!
|
|
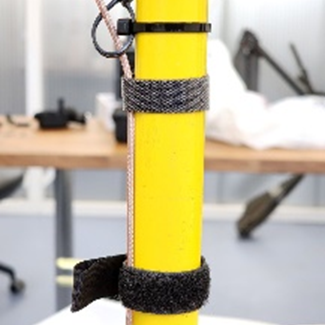
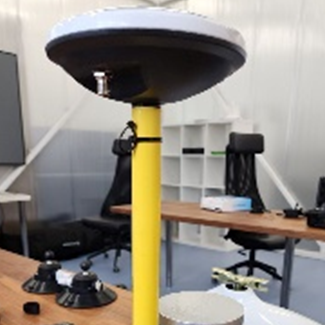
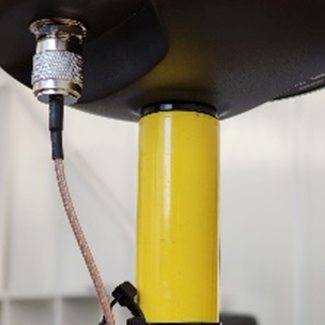
ОсновнаяSecure the antenna cable to the back of the защдачаe –as зафиксироватьshown антенныйin кабельthe по обратной стороне вехи. При необходимости, воспользуйтесь лентами-липучками.photo
|
 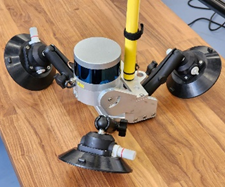
ШагStep 15.15: ЕслиSecure шаровыеthem кулакиwith не
ввинченыwing в присоски – ввинтите их. Присоедините присоски и шаровые крепления, потяните за веху вверх и закрутите три барашкаscrew
|
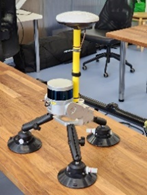
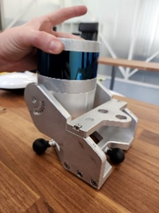
Мобильное крепление для автомобиляThe TOPODRONE готовоmobile car mount is ready for use
|