
Photogrammetric camera TOPODRONE P61 installation
Installing TOPODRONE P61 on DJI drone
TOPODRONE P61 can be installed on DJI Matrice 300/350 RTK drone. To install the TOPODRONE P61 on a drone, install the GNSS antenna and GNSS receiver on the drone body, connect the antenna cable to the receiver, connect the suspension to the camera and connect the modules using a cable.
 |
 |
 |
||
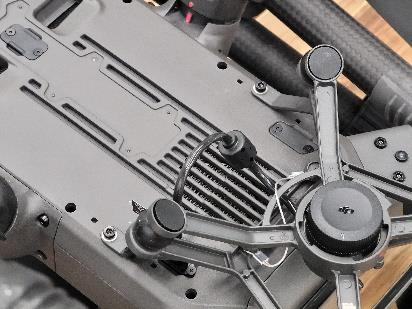
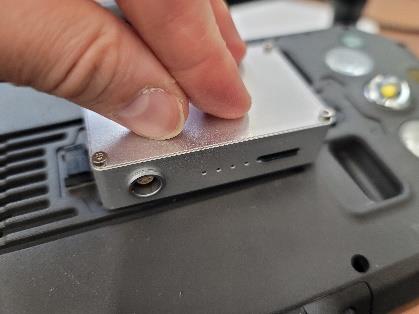
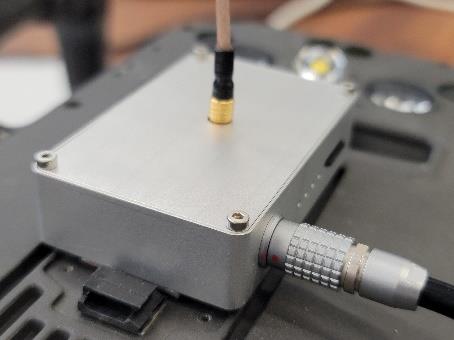
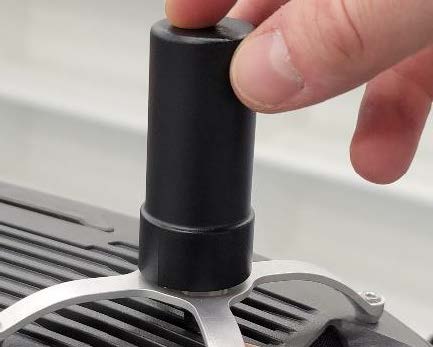
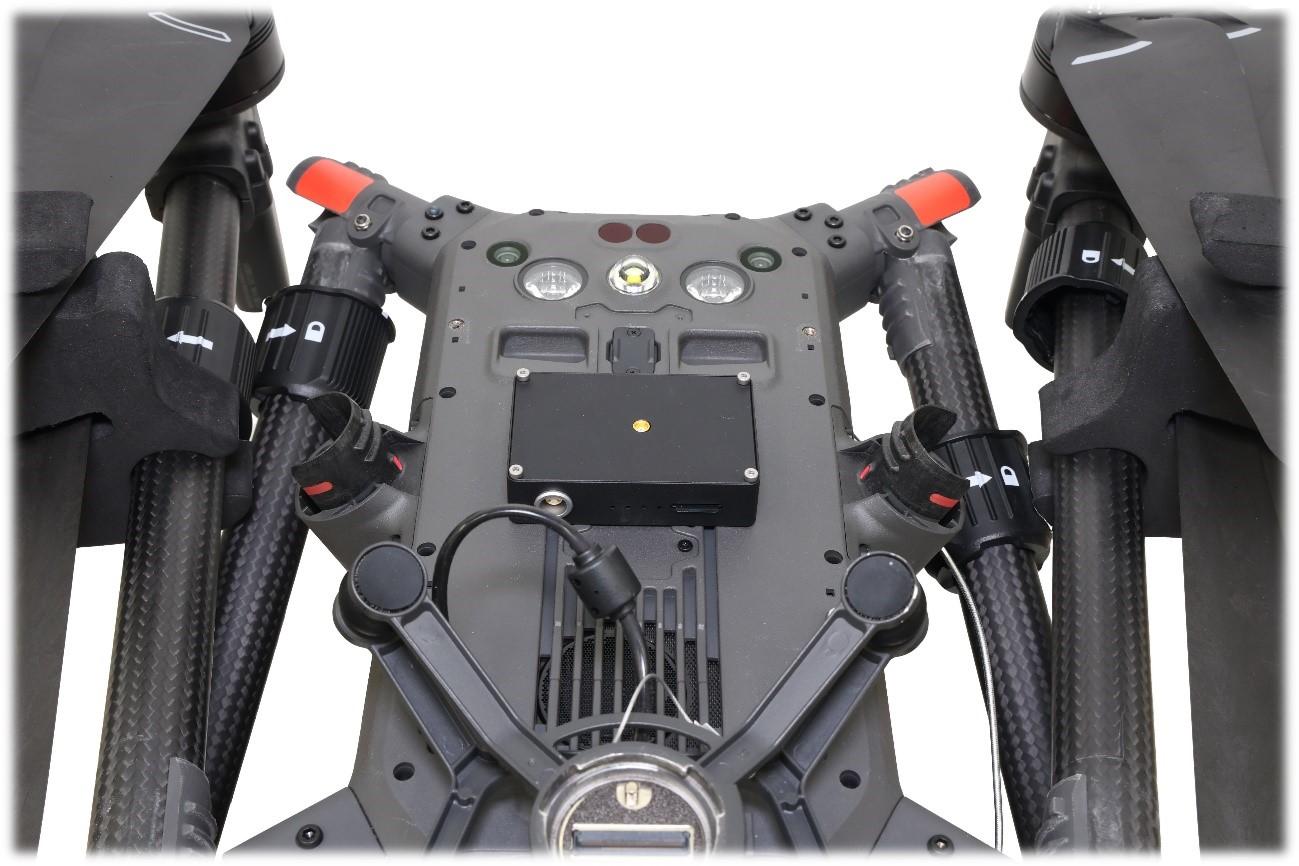
| Step 1. Flip the DJI M300 RTK drone over or place it in a case with folded beams. Find a flat area on the drone's body and degrease the surface with an alcohol wipe. | Step 2. Place the GNSS receiver on the prepared surface, fixing it with 3M tape. It is recommended to install it with the connectors on the right side of the drone (if viewed from behind). | Step 3. Place the antenna mount on the top of the drone body. Lay the antenna cable as shown in the photo. Screw in the supplied screws. | ||
 |
 |
 |
 |
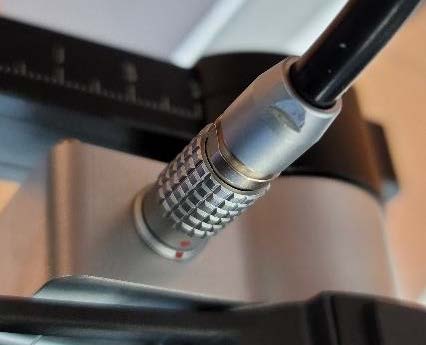 |
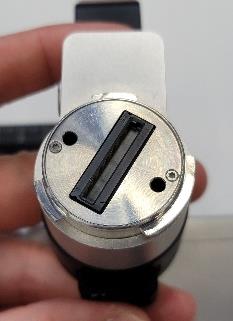
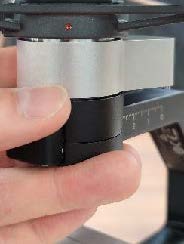
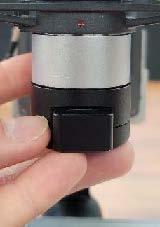
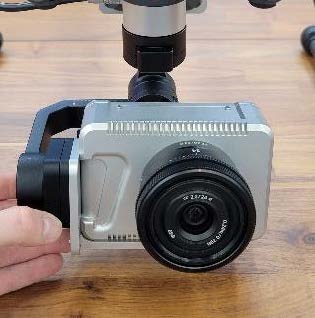
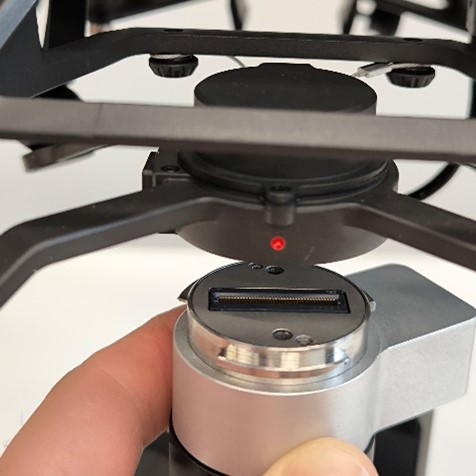
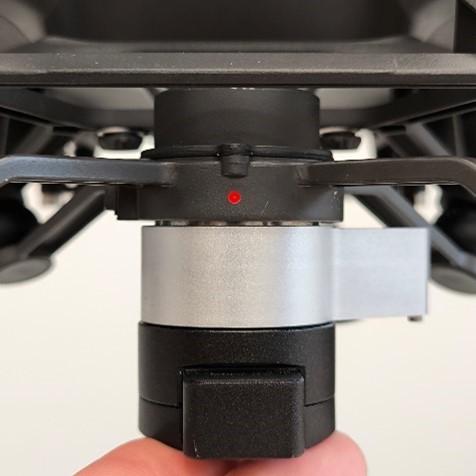
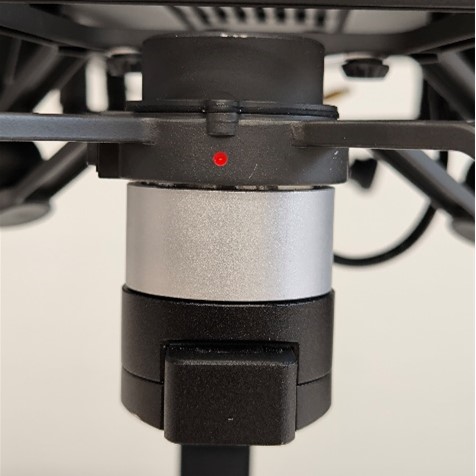
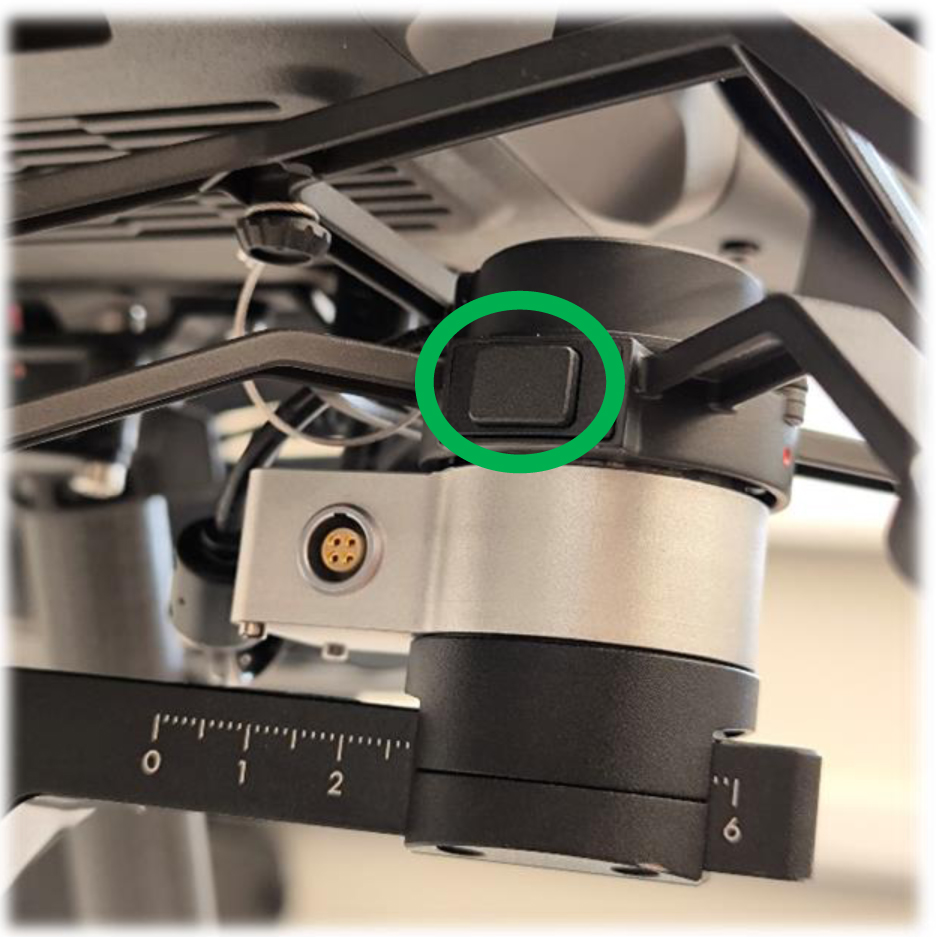
| Step 4. Remove the caps from the SkyPort connectors of the suspension and the drone, insert the suspension with the camera into the connector | Step 5. Turn the suspension by 30 degrees until it clicks lightly as in the photo. The suspension is fixed. | Step 6. Connect the LEMO 4 PIN cable to the camera mount. | ||
 |
 |
 |
||
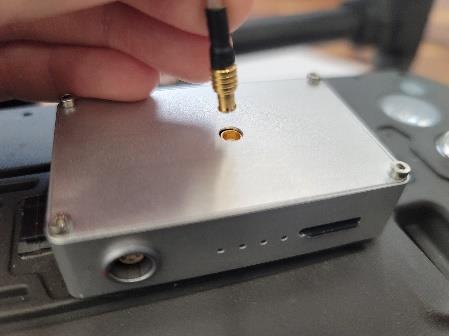
| Step. 7. Connect the antenna cable to the GNSS receiver | Step 8. Connect the LEMO 6 PIN cable to the GNSS receiver | Step 9. Install the external GNSS antenna | ||
Install TOPODRONE P61 with 3-axis suspension on
DJI Matrice 300/350 RTK
- Fold the DJI Matrice 300/350 RTK beams and place it in the transportation case. Find a flat surface on the drone body and degrease it. Install the TOPODRONE UAV PPK Upgrade Kit GNSS receiver on the prepared surface, securing it with double-sided 3M adhesive tape. It is recommended to place the receiver with LEDs in the direction of the drone movement.
- Place the antenna mount on the top of the drone body, securing it with the supplied bolts. Place the antenna cable at the shortest distance to the GNSS receiver.

Steps 1 and 2 must be completed once, without removing the mount and GNSS receiver until the equipment is used.
- Remove the cover from the X-Port connector of the stabilizer and Skyport of the drone, insert the stabilizer with the camera into the connector, turn the suspension by 30° until a light click. The stabilizer is locked in place.
- Connect the cable LEMO 4 PIN to the stabilizer with camera and LEMO 6 PIN to the GNSS receiver TOPODRONE.
- Install the GNSS antenna and connect the antenna cable to the TOPODRONE GNSS receiver.
- After turning on the drone and passing the camera initialization step in the DJI Pilot 2 app, go to the drone's main menu and select “Stabilizer Settings”.
- Perform Auto Stabilizer Calibration.
- Stabilizer autocalibration should be performed on a flat and stationary surface with no vibrations. It is performed once when the customer receives the camera.
- Set the stabilizer tilt, roll and pitch gains according to the figure below.

- Installation of TOPODRONE P61 on 3-axis suspension is complete.
Dismantle the equipment in reverse order. To remove the hanger from the drone, press the button on the Skyport connector holder and rotate the suspension by 30°.
Installation of TOPODRONE P61 together with laser scanner on DJI Matrice 300/350 RTK
- Install the L-shaped platform to TOPODRONE P61 and fix it with the three screws provided.
- Remove the LiDAR "dovetail mount", place the L-shaped platform with TOPODRONE P61 camera between the LiDAR body and the "dovetail mount" and secure it with the supplied extended screws.
- Place the antenna mount on the top of the drone body, securing it with the supplied bolts. Place the antenna cable along the shortest distance to the antenna connector of the laser scanner.
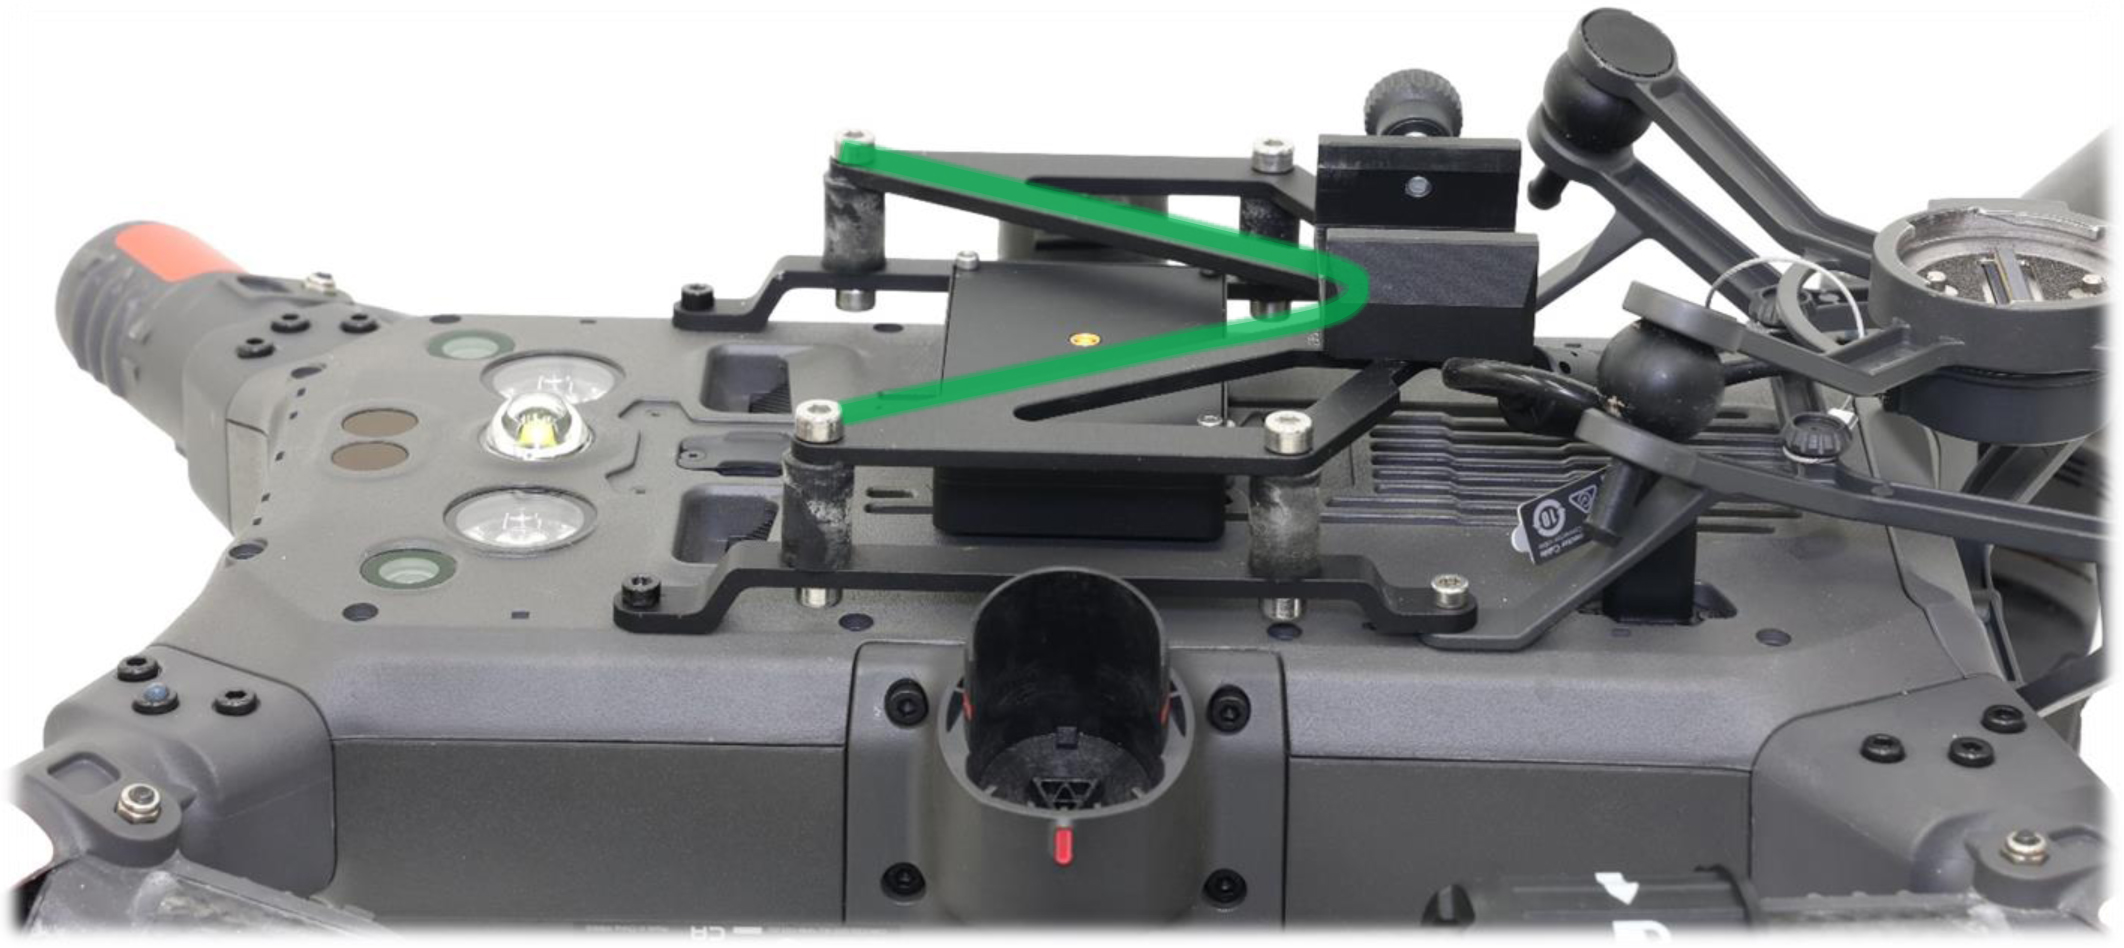
- The V-shaped laser scanner mount must be installed with the tip facing the drone. The mount fixing the "dovetail" should be on the right side in the direction of the drone's movement.

- Install the LiDAR in the standard mount so that the sensor looks back in the direction of the drone's movement.
- Remove the cover from the Skyport-SHLD adapter connector and Skyport of the drone, insert the Skyport connector, turn the metal part by 30° until a light click. The Skyport is locked into place. ВInsert the other part of the Skyport-SHLD adapter into the SHLD camera connector.
- Connect the camera to the TOPODRONE laser scanner with the LEMO 6 PIN cable.
- Install the GNSS antenna and connect the antenna cable to the TOPODRONE laser scanner.
- Installation of TOPODRONE P61 together with LiDAR is completed.
Steps 1-4 must be performed once without removing the L-shaped mount and antenna mount until you have finished using the equipment.
The dismantling of the equipment is carried out in reverse order.
No Comments