
Photogrammetric camera TOPODRONE P61 installation
Installing TOPODRONE P61 on DJI drone
TOPODRONE P61 can be installed on DJI Matrice 300/350 RTK drone. To install the TOPODRONE P61 on a drone, install the GNSS antenna and GNSS receiver on the drone body, connect the antenna cable to the receiver, connect the suspension to the camera and connect the modules using a cable.
 |
 |
 |
||
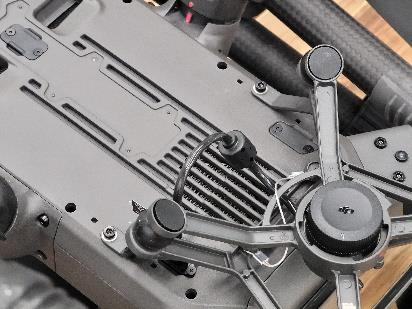
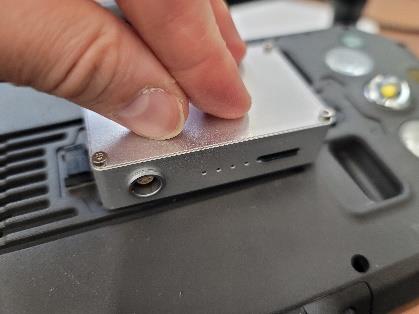
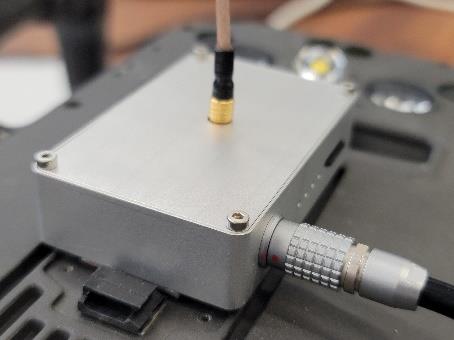
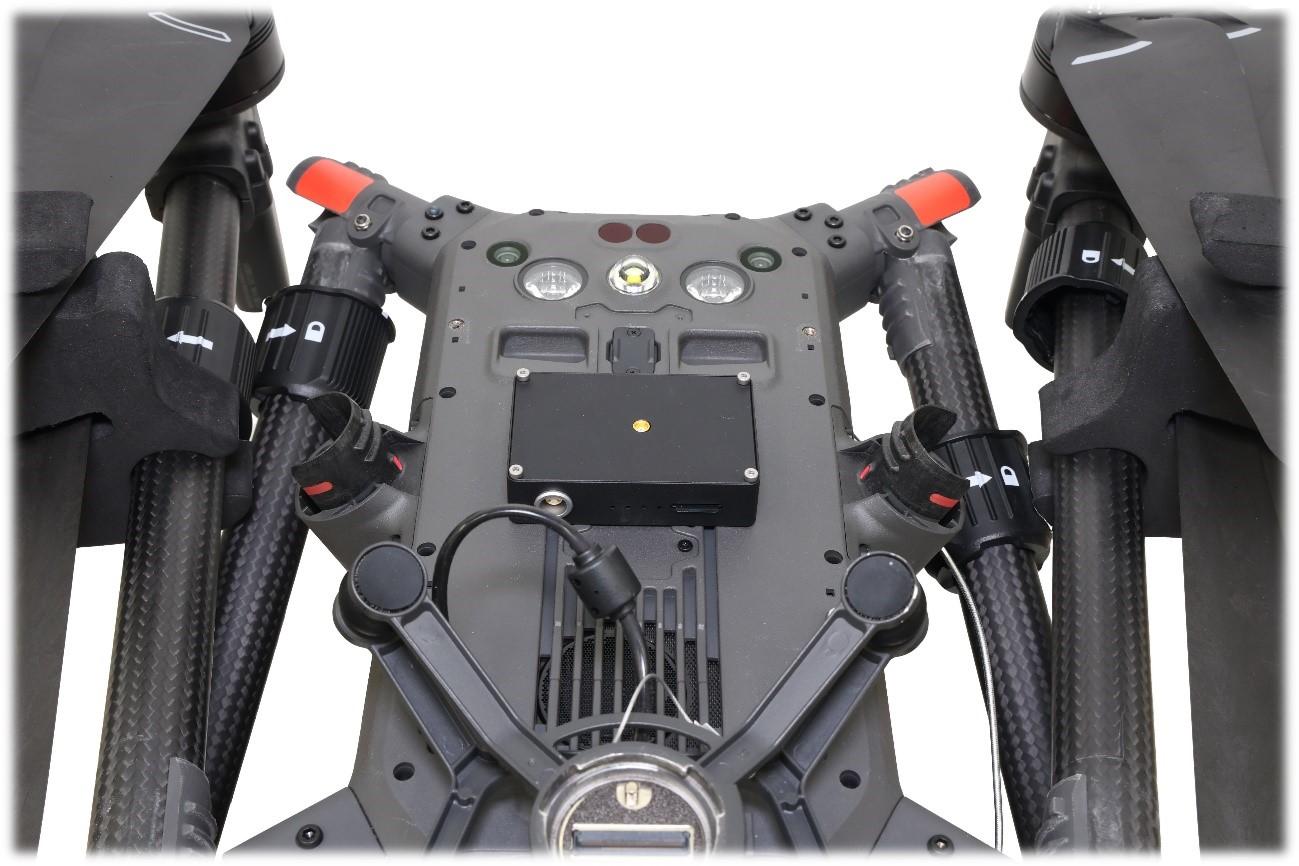
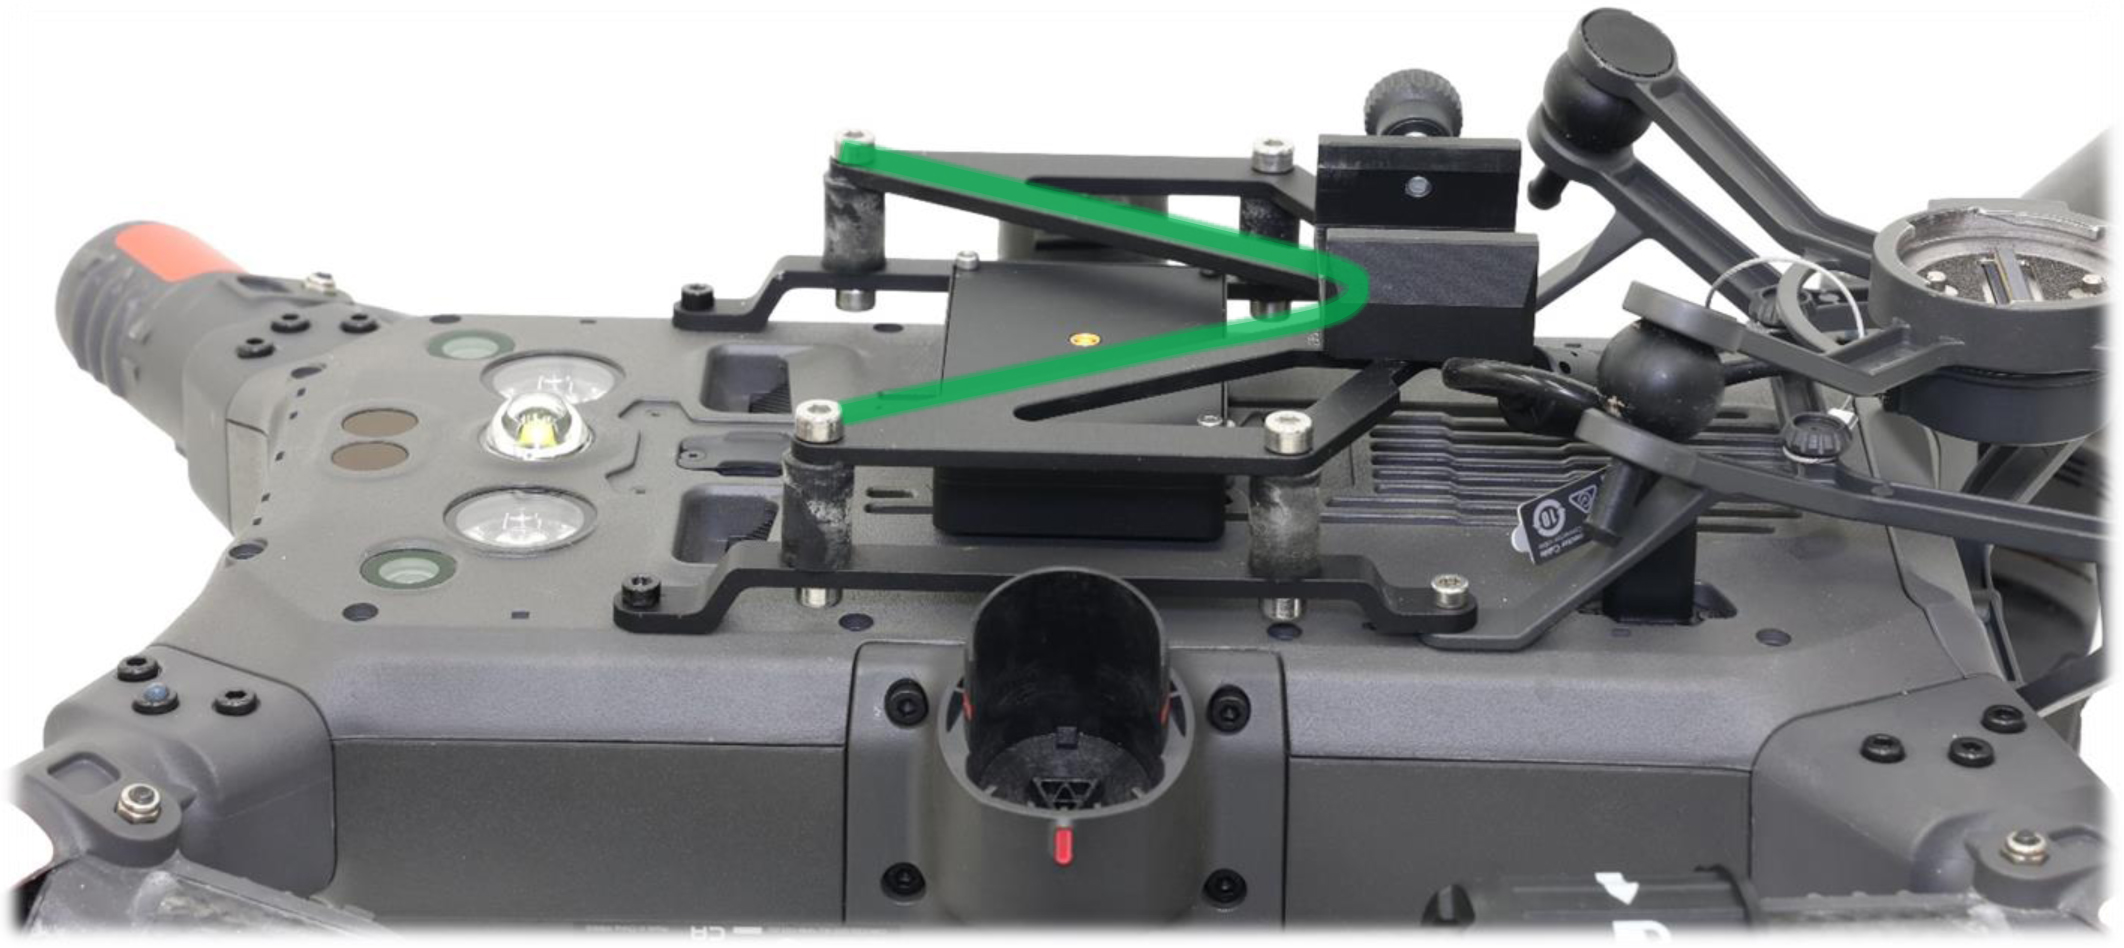
| Step 1. Flip the DJI M300 RTK drone over or place it in a case with folded beams. Find a flat area on the drone's body and degrease the surface with an alcohol wipe. | Step 2. Place the GNSS receiver on the prepared surface, fixing it with 3M tape. It is recommended to install it with the connectors on the right side of the drone (if viewed from behind). | Step 3. Place the antenna mount on the top of the drone body. Lay the antenna cable as shown in the photo. Screw in the supplied screws. | ||
 |
 |
 |
 |
 |
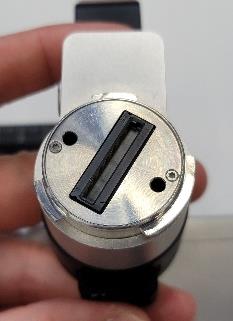
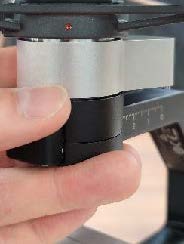
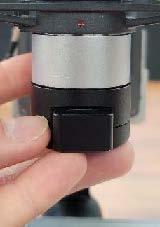
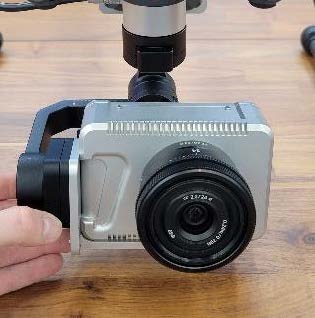
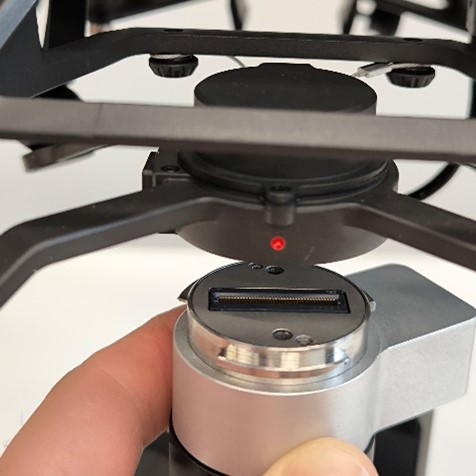
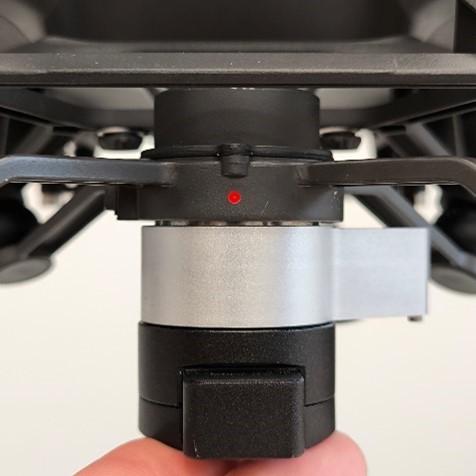
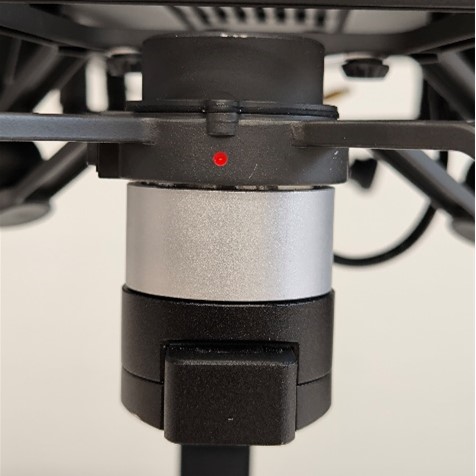
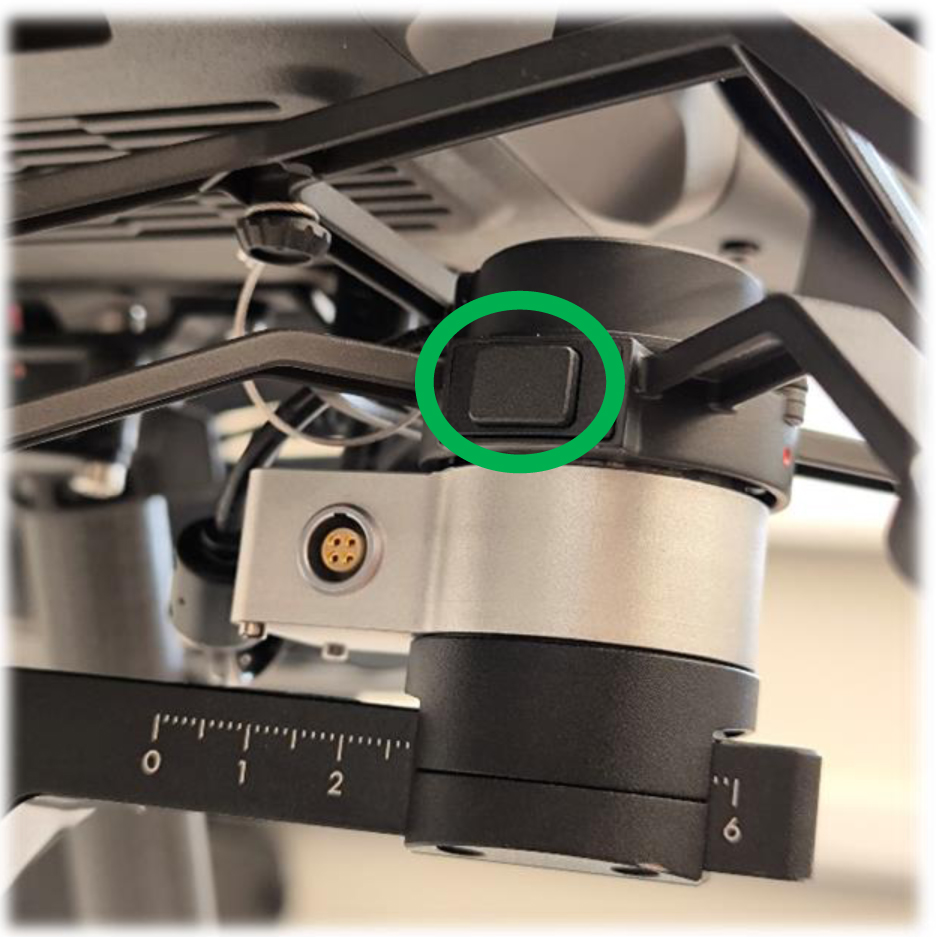
| Step 4. Remove the caps from the SkyPort connectors of the suspension and the drone, insert the suspension with the camera into the connector | Step 5. Turn the metal part of the suspension by 30 degrees until it clicks lightly as in the photo. The suspension is fixed. | Step 6. Connect the LEMO 4 PIN cable to the camera mount. | ||
 |
 |
 |
||
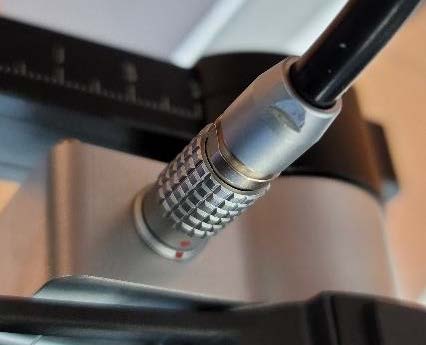
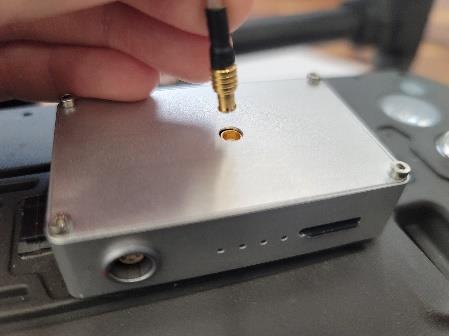
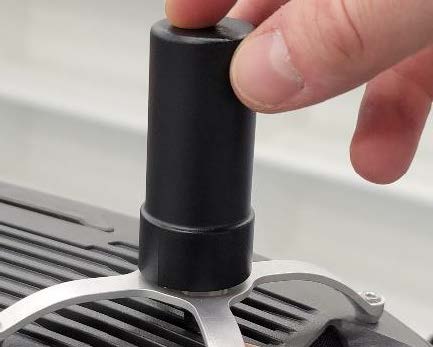
| Step. 7. Connect the antenna cable to the GNSS receiver | Step 8. Connect the LEMO 6 PIN cable to the GNSS receiver | Step 9. Install the external GNSS antenna | ||
Install TOPODRONE P61 with 3-axis suspension on
DJI Matrice 300/350 RTK
- Fold the DJI Matrice 300/350 RTK beams and place it in the transportation case. Find a flat surface on the drone body and degrease it. Install the TOPODRONE UAV PPK Upgrade Kit GNSS receiver on the prepared surface, securing it with double-sided 3M adhesive tape. It is recommended to place the receiver with LEDs in the direction of the drone movement.
- Place the antenna mount on the top of the drone body, securing it with the supplied bolts. Place the antenna cable at the shortest distance to the GNSS receiver.

Steps 1 and 2 must be completed once, without removing the mount and GNSS receiver until the equipment is used.
- Remove the cover from the X-Port connector of the stabilizer and Skyport of the drone, insert the stabilizer with the camera into the connector, turn the metal suspension part by 30° until a light click. The stabilizer is locked in place.
- Connect the cable LEMO 4 PIN to the stabilizer with camera and LEMO 6 PIN to the GNSS receiver TOPODRONE.
- Install the GNSS antenna and connect the antenna cable to the TOPODRONE GNSS receiver.
- After turning on the drone and passing the camera initialization step in the DJI Pilot 2 app, go to the drone's main menu and select “Stabilizer Settings”.
- Perform Auto Stabilizer Calibration.
- Stabilizer autocalibration should be performed on a flat and stationary surface with no vibrations. It is performed once when the customer receives the camera.
- Set the stabilizer tilt, roll and pitch gains according to the figure below.

- Installation of TOPODRONE P61 on 3-axis suspension is complete.
Dismantle the equipment in reverse order. To remove the hanger from the drone, press the button on the Skyport connector holder and rotate the metal part of the hanger by 30°.
Установка TOPODRONE P61 совместно с лазерным сканером на DJI Matrice 300/350 RTK
- Установить Г-образную площадку к TOPODRONE P61 и зафиксировать ее тремя винтами, идущими в комплекте.
- Демонтировать быстросъемное крепление «ласточкин хвост» от LiDAR, установить Г-образную площадку с камерой TOPODRONE P61 между корпусом LiDAR и креплением «ласточкин хвост» и закрепить удлинёнными винтами, идущими в комплекте.
- Разместить крепление антенны на верхней части корпуса дрона, антенный кабель разместить таким образом, чтобы он шел по кратчайшему расстоянию до антенного разъема лазерного сканера, закрепить крепление антенны болтами, которые идут в комплекте поставки.
- V-образная пластина для крепления лазерного сканера должна быть установлена остриём по ходу движения дрона, барашек, фиксирующий крепление «ласточкин хвост» должен находиться с правой стороны по ходу движения дрона.

- Установить LiDAR в штатное крепление таким образом, чтобы сенсор смотрел назад по ходу движения дрона.
- Снять крышку с разъема адаптера Skyport-SHLD и Skyport дрона, вставить Skyport разъем, повернуть металлическую деталь на 30° до легкого щелчка. Skyport зафиксирован. Вторую часть адаптера Skyport-SHLD вставить в разъем камеры SHLD.
- Подключить кабель LEMO 4 PIN к разъему для подключения к лазерному сканеру TOPODRONE, а LEMO 6 PIN к лазерному сканеру TOPODRONE.
- Плотно накрутить ГНСС антенну и подключить антенный кабель к лазерному сканеру TOPODRONE.
- Установка TOPODRONE P61 совместно с LiDAR завершена.
Пункты 1-4 необходимо выполнить один раз, не демонтируя Г-образное крепление и крепление антенны до завершения использования оборудования, если вы выполняете полеты в такой конфигурации оборудования.
Демонтаж оборудования выполняется в обратной последовательности.