
Compass calibration TOPODRONE DJI AIR 2S PPK
Every time the DJI Air 2S TOPODRONE PPK changes location, it needs to calibrate the compass.
Compass calibration allows the drone's flight controller to calibrate along local magnetic field lines according to current deviations and interference. The compass calibration mode is activated before takeoff on the ground using the remote control or flight software. During compass calibration, the accelerometer and compass must be rotated 380 degrees twice on two different axes. After that, the drone corrects the readings of both sensors. It is strongly recommended to calibrate the compass before each first flight in a new area, when moving to a new point, changing the location even for 1 km and after the drone is idle.
To calibrate the compass correctly, you need to follow these steps:
- Compass calibration is performed immediately before flying in an open area (It is pointless to calibrate indoors).
- Turn on the drone and remote controller, connect your mobile device.
- Make sure that there are no large metal structures and sources of magnetic fields (power lines, hangars, transformers, garages, bridges, etc.) within a radius of 50 m.
- Switch the drone to compass calibration mode. This can be done in two ways:
a) In the DJI Fly app, select the tab Safety/Sensors/Compass Working/Calibrate/Start.
b) In the middle of the remote, quickly move the switch to the C position, then the S position at least four times.

Quickly switching the flight mode lever 4 times or more puts the drone in compass calibration mode.
5. Make sure that the drone's rear LEDs are lit in a constant yellow, this means that the drone is in compass calibration mode!
6. To exit the compass calibration mode without performing it: (case 4a) - switch the flight mode toggle to N, in the case of method 4b - press "Cancel calibration" in DJI Fly software.
7. Take the remote control in one hand. Lift the drone with your other hand without tilting it. Hold the drone by the body from above in the area of the batteries.
8. Make a 380-degree turn to either side while holding the drone at arm's length (a little more than 1 full rotation). When the rear lights change color from solid yellow to solid green, stop.
9. Change the drone's orientation by turning it 90 degrees away from you.
10. Compass calibration is complete.
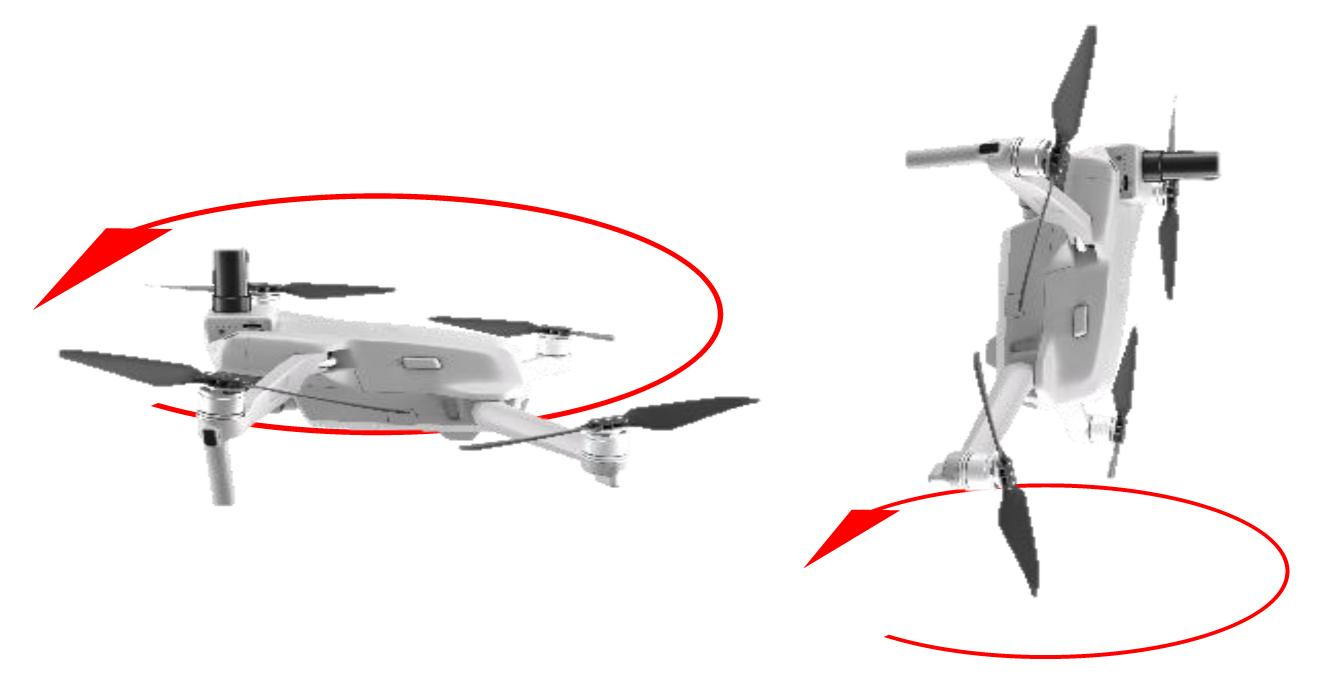
Turning the drone during compass calibration.
If the system gives an error after the compass calibration completing (the rear LEDs are flashing red), move 20-30 meters to the side and calibrate in another place nearby.
There shouldn't be any magnetic objects on the pilot's clothes, such as large jewelry, metal inserts, magnets on the iPad tablet, etc. Otherwise, even after successfully compass calibration, your drone will give a "Compass Error".
Compass calibration improves the drone's flight stability. However, the “Compass Error” may occur even after proper calibration. It is usually caused by other sources of interference, such as metal structures, large antennas, and power lines.
If the compass is successfully calibrated near powerful sources of electromagnetic interference, at a slight distance from them, the flight software may issue a compass error message caused by a change in magnetic field lines.
Despite the long distance of radio communication with the remote control (up to 4 km), it is not recommended to fly more than 1 km from the take-off point. This is due to the risks of switching between zones with different electromagnetic anomalies, which can cause a compass error even with all the actions performed correctly.
No Comments